So you’ve just stared blankly into your fridge, contemplating ordering takeout, but then remembered you wanted to *actually* make something delicious without breaking a sweat, right? Same. You’re in luck, my friend, because today we’re diving into the ridiculously easy, incredibly comforting, and utterly delightful world of Blueberry Crisp. And yes, it comes with a mandatory sidekick: vanilla ice cream. Don’t even think about skipping it.
Why This Recipe is Awesome
Let’s be real, life is complicated enough. Your desserts shouldn’t be. This blueberry crisp is basically the culinary equivalent of a warm, fuzzy blanket on a rainy day, but, you know, edible. It’s **idiot-proof** – and trust me, I’ve put that claim to the test more times than I care to admit. You don’t need fancy skills, a gazillion ingredients, or hours of your precious time.
What makes it so great?
- It smells heavenly while baking, instantly making your house feel like a cozy bakery.
- The sweet, tangy blueberries get all bubbly and jammy.
- That buttery, oat-y, crunchy topping? Pure bliss.
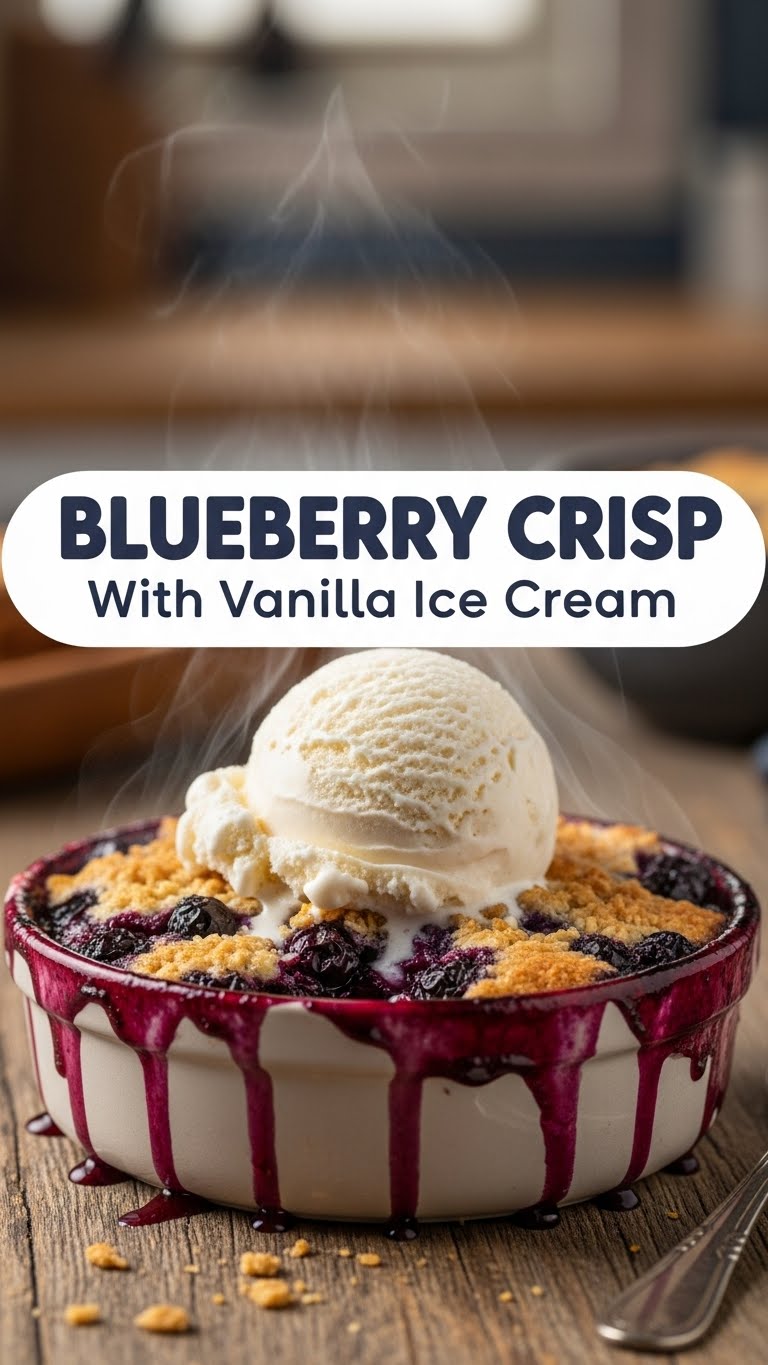
- And when it meets cold, melting vanilla ice cream? Forget about it. It’s a symphony of textures and temperatures.
- Plus, blueberries are technically a superfood, so it’s practically health food, right? (Don’t @ me.)
Ingredients You’ll Need
Gather your troops, folks! Most of these are probably chilling in your pantry already.
- For the Blueberry Filling:
- 4 cups fresh or frozen blueberries: Use whatever you’ve got. No judgment here. Just make sure they’re not, like, moldy.
- 1/2 cup granulated sugar: Because some things just need to be sweet.
- 1 tablespoon lemon juice (fresh is best!): A little zing to wake up those berries.
- 1 teaspoon vanilla extract: Liquid gold for all things sweet.
- 1 tablespoon cornstarch or all-purpose flour: Our secret weapon to thicken up that berry goodness.
- For the Crispy Topping:
- 1/2 cup all-purpose flour: The foundation of our crumble kingdom.
- 1/2 cup rolled oats (not instant!): For that perfect chew and texture. Instant oats just turn to mush, and nobody wants mush.
- 1/3 cup packed light brown sugar: Adds a lovely caramel note.
- 1/4 cup granulated sugar: More sweetness, because why not?
- 1/2 teaspoon ground cinnamon: For those warm, cozy vibes.
- 1/2 cup (1 stick) unsalted butter, cold and cut into cubes: The MVP of the topping. Cold butter is key for a crumbly texture!
- And, of course…
- Vanilla Ice Cream: Non-negotiable. Unless you secretly hate joy.
Step-by-Step Instructions
Alright, apron on, let’s get baking! This is going to be easier than deciding what to watch on Netflix.
- Preheat & Prep: Preheat your oven to **375°F (190°C)**. Grab an 8×8 or 9×9 inch baking dish. Give it a little spray with non-stick stuff or a quick butter rub.
- Berry Bliss: In a medium bowl, combine your blueberries, granulated sugar, lemon juice, vanilla extract, and cornstarch (or flour). Give it a good, gentle stir until the berries are coated. This is where the magic starts to happen!
- Into the Dish: Pour the berry mixture into your prepared baking dish. Spread it out evenly. Isn’t it already looking promising?
- Crumbly Creation: In another bowl, combine the flour, rolled oats, brown sugar, granulated sugar, and cinnamon for the topping. Give it a quick whisk to mix everything up.
- Butter Up! Add the cold, cubed butter to the dry topping ingredients. Now, get your hands in there! Use your fingertips to cut the butter into the dry mix until it resembles coarse crumbs, like wet sand, with some pea-sized pieces of butter still visible. **Don’t overwork it!**
- Top it Off: Sprinkle the glorious crumble topping evenly over the blueberries in the baking dish. Make sure every berry gets some love!
- Bake It ‘Til Golden: Pop the dish into your preheated oven. Bake for **35-45 minutes**, or until the topping is beautifully golden brown and the berry filling is bubbly around the edges. Oh, the aroma!
- Serve & Devour: Let it cool for about 10-15 minutes before serving (unless you like lava mouth, in which case, go for it!). Scoop a generous portion into a bowl, then add a big ol’ scoop of vanilla ice cream right on top. Watch it melt. Salivate. Enjoy!
Common Mistakes to Avoid
Even though this recipe is super forgiving, a few missteps can happen. Learn from my past errors!
- **Not preheating the oven:** Rookie mistake! Your crisp needs that initial blast of heat to cook evenly and get that beautiful golden topping.
- **Overmixing the crumble:** If you mix the topping too much, the butter will melt, and you’ll end up with a pasty topping instead of a light, crumbly one. **Work quickly and gently!**
- **Forgetting the cornstarch/flour in the filling:** Without it, you’ll have watery berries instead of a perfectly thickened, jammy goodness. It’s a small but mighty step!
- **Serving it without ice cream:** This is a cardinal sin. The hot crisp and cold ice cream combo is what dreams are made of. Don’t deny yourself!
- **Eating it straight out of the oven:** I know, I know, the smell is intoxicating. But please, give it 10-15 minutes to cool slightly. It thickens up a bit, and you won’t scorch your tongue. Patience, grasshopper.
Alternatives & Substitutions
Feeling a bit experimental, or just missing an ingredient? No stress, we can totally improvise!
- **Other Berries:** Out of blueberries? Try mixed berries, raspberries, blackberries, or even sliced peaches or apples for a delicious fruit crisp. Adjust sugar slightly depending on the fruit’s sweetness.
- **Sugar Swap:** You can use all brown sugar in the topping for a deeper, molasses-y flavor. Or, if you’re feeling fancy, a mix of white and brown in the filling works too.
- **Gluten-Free Fun:** For a GF version, use a 1:1 gluten-free all-purpose flour blend for both the filling and the topping. Make sure your oats are certified gluten-free!
- **Spice It Up:** A pinch of nutmeg or a tiny bit of cardamom would be lovely in the topping instead of, or in addition to, cinnamon.
- **Dairy-Free/Vegan:** Use a good quality plant-based butter (the stick kind, not the spread) and your favorite dairy-free vanilla ice cream. Most oats are naturally vegan.
FAQ (Frequently Asked Questions)
Got questions? I’ve got answers (and a little sass).
- Can I use frozen blueberries? Absolutely, yes! Don’t even bother thawing them. Just toss them in, they’ll thaw and cook perfectly in the oven. You might need to add an extra 5-10 minutes to the baking time, FYI.
- Do I *have* to add lemon juice? Well, technically no, but why would you skip it? That little bit of acid brightens the flavor of the berries and keeps it from being *too* sweet. It’s like a secret weapon for deliciousness.
- My crumble isn’t very crumbly, help! You might have overmixed it or your butter wasn’t cold enough. The key is cold butter and a gentle touch. If it’s too wet, add a tiny bit more flour. If it’s too dry, a tiny drizzle of melted butter can help.
- Can I make this ahead of time? You can definitely prep the blueberry filling and the crumble topping separately. Store the berries covered in the fridge and the crumble in a sealed container (or the fridge if it’s super warm). Assemble and bake just before you want to serve for the best results.
- What if I don’t have oats? You *could* skip them, but you’ll lose that amazing, chewy texture that makes a crisp a crisp. If you’re really desperate, you could add a bit more flour, or maybe some chopped nuts for crunch? But IMO, oats are essential here.
- Is it still good cold? It’s… okay. But it’s like comparing a warm, gooey brownie to a cold, hard one. The magic happens when it’s warm and the ice cream is melting into it. Don’t cheat yourself out of the full experience!
Final Thoughts
Seriously, go make this. You deserve a treat, and this Blueberry Crisp is the perfect reward for adulting, or just, you know, existing. It’s easy, it’s delicious, and it will make your house smell like happiness. Now go impress someone—or yourself—with your new culinary skills. You’ve earned it!


