Alright, my fellow dessert enthusiast, ever found yourself staring at a store-bought cake, thinking, ‘I could totally do better than that… if only I knew how?’ Or maybe you’ve got a birthday coming up (yours or someone else’s) and you want to truly wow them without spending a whole day in the kitchen. Well, buckle up, buttercup, because we’re about to make some chocolate cake magic that’s so good, people will actually think you *tried* really hard!
Why This Recipe is Awesome
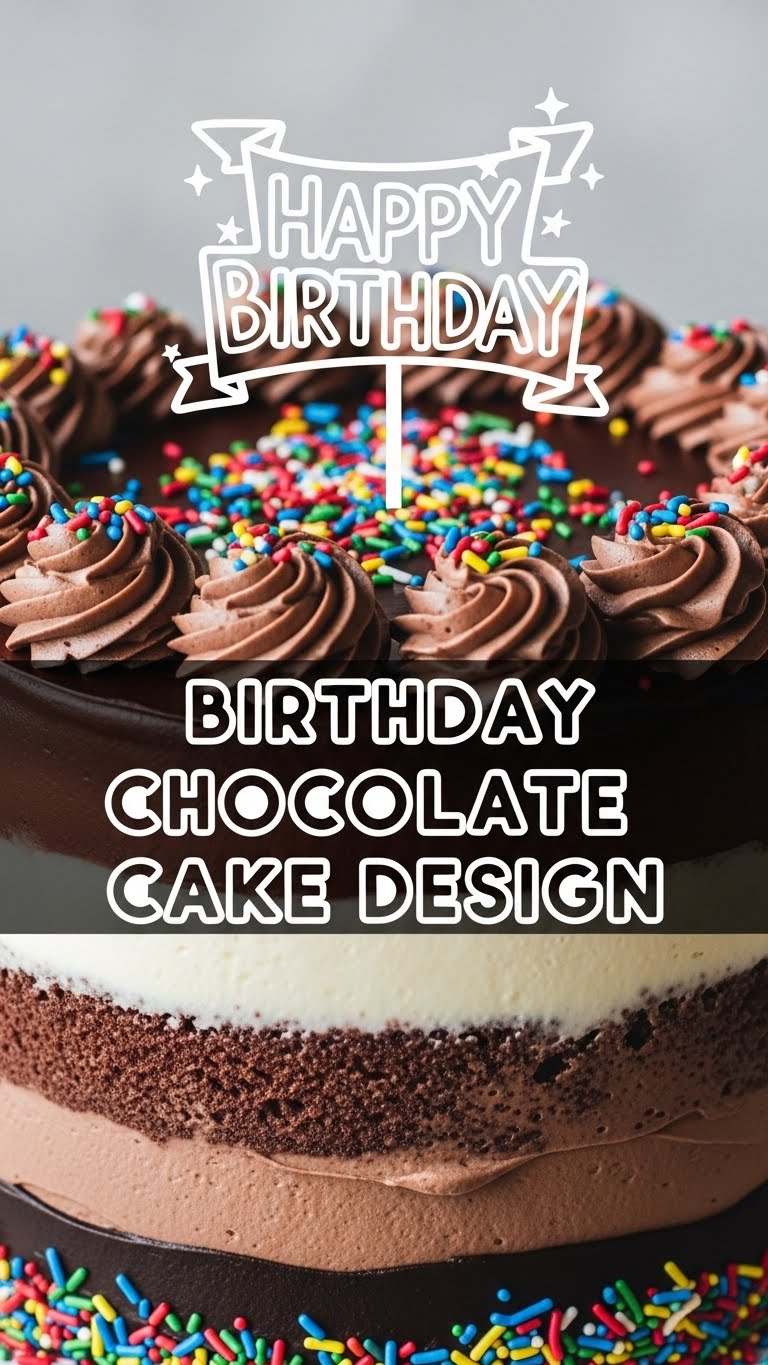
Look, we’re not aiming for Michelin stars here, but we *are* aiming for “OMG, you made this?!” This recipe is basically your cheat code to looking like a baking guru without actually *being* one. It’s **super forgiving**, ridiculously chocolatey, and honestly, if you can stir, you can make this. It’s moist, rich, and has that deep chocolate flavor that screams “special occasion” without all the stress. Plus, the design part is just plain fun – think edible canvas!
Ingredients You’ll Need
Gather your troops, folks! Here’s what you’ll need to assemble your chocolatey masterpiece:
- 1 ½ cups (190g) All-Purpose Flour: The basic building block of joy. All-purpose, obvi.
- 1 ½ cups (300g) Granulated Sugar: Because life’s better with a little sweetness, right?
- ¾ cup (65g) Unsweetened Cocoa Powder: Not the hot chocolate mix, please! Unsweetened baking cocoa for that deep, dark magic.
- 1 ½ tsp Baking Soda: Our trusty leavening agent. Don’t mix it up with baking powder, unless you like flat cake.
- ¾ tsp Baking Powder: Yep, both! They do different jobs to make your cake nice and fluffy.
- 1 tsp Salt: Just a pinch to make all that chocolate sing. **Don’t skip this!** It truly enhances the flavor.
- 2 Large Eggs: Room temp is best, they play nicer and emulsify better.
- ¾ cup (180ml) Whole Milk or Buttermilk: For ultimate moistness. Buttermilk adds a tangy kick that actually *enhances* the chocolate.
- ½ cup (120ml) Vegetable Oil (or melted unsalted butter): Oil makes it super moist; butter adds flavor. Your call, rockstar.
- 1 tsp Pure Vanilla Extract: Don’t skimp! It’s the secret sauce.
- ¾ cup (180ml) Hot Water or Hot Brewed Coffee: This is where the magic happens for ultimate chocolate flavor and moistness. Seriously, trust me on the coffee – it won’t taste like coffee, just more chocolatey!
For the Frosting/Decorating: Your favorite chocolate buttercream, ganache, or cream cheese frosting. Plus sprinkles, chocolate shavings, fresh berries, or whatever whimsical decorations your heart desires!
Step-by-Step Instructions
- Preheat & Prep Like a Pro: Get that oven screaming at **350°F (175°C)**. Grease and flour two 8 or 9-inch round cake pans. Or line with parchment. Whatever floats your boat for non-stick peace of mind.
- Whisk the Dry Crew: In a large bowl, whisk together the flour, sugar, cocoa powder, baking soda, baking powder, and salt. Make sure there are no lumps; we want a smooth ride!
- Combine the Wet Gang: In a separate medium bowl, whisk together the eggs, milk (or buttermilk), vegetable oil (or melted butter), and vanilla extract until well combined.
- Marry Them Up: Pour the wet ingredients into the dry ingredients. Mix with a whisk or spatula until *just* combined. **Don’t overmix!** A few small lumps are okay; overmixing develops gluten, leading to a tough cake. And nobody wants a tough cake.
- The Hot Liquid Magic: Slowly pour in the hot water (or coffee), stirring constantly until the batter is smooth. The batter will be quite thin, and that’s exactly what we’re going for! This is what makes it super moist.
- Divide & Conquer: Divide the batter evenly between your prepared cake pans. Give them a gentle tap on the counter to release any air bubbles.
- Bake It ‘Til It’s Great: Pop those beauties into the preheated oven for 30-35 minutes, or until a wooden skewer or toothpick inserted into the center comes out clean. **Resist the urge to open the oven door too soon!**
- Cool Your Jets: Let the cakes cool in their pans on a wire rack for 10-15 minutes. Then, carefully invert them onto the wire rack to cool completely. This is crucial for frosting! Patience, grasshopper.
- Decorate Your Masterpiece: Once the cakes are **completely cool** (I mean it!), it’s showtime. Stack ’em, frost ’em, and design ’em! Think sprinkles, chocolate curls, fresh fruit, or edible flowers. Let your inner artist shine!
Common Mistakes to Avoid
- **Opening the oven door constantly:** Seriously, it’s not going to grow faster if you peek every five minutes. You’re just letting out all the heat and risking a collapsed cake. Self-control, people!
- **Overmixing the batter:** You want a tender, fluffy cake, not a chewy rubber ball. Mix until just combined, a few lumps are fine.
- **Not cooling the cake completely:** Trying to frost a warm cake is like trying to ice skate uphill in mud. It’s a melted, crumbly mess. **Chill out!** Your frosting will thank you.
- **Using cold ingredients:** Especially eggs and milk. Room temperature ingredients emulsify better, leading to a smoother, more even batter and a better-textured cake. Plan ahead, even if it’s just for 30 minutes!
Alternatives & Substitutions
Life happens, and sometimes you don’t have exactly what the recipe calls for. No stress!
- Buttermilk Bonanza: No buttermilk? No problem! Add 1 tablespoon of white vinegar or lemon juice to regular milk and let it sit for 5 minutes. Boom, instant buttermilk!
- Oil vs. Butter Debate: Vegetable oil (like canola or sunflower) generally gives a super moist, tender crumb that lasts longer. Melted butter adds a richer, more pronounced flavor. Use what you prefer, or what’s hiding in your pantry.
- Coffee instead of hot water: For an even *deeper* chocolate flavor, use hot brewed coffee instead of hot water. I promise it won’t taste like coffee; it just intensifies the chocolate. **Highly recommended, IMO!**
- Gluten-Free Glory: Swap out the all-purpose flour for a good quality 1:1 gluten-free baking blend. Make sure it contains xanthan gum for structure!
FAQ (Frequently Asked Questions)
- “My cake sank in the middle! What gives?” Oh no! Usually, that means it wasn’t fully baked, you opened the oven door too early (see above!), or there was too much leavening. Don’t worry, next time you’ll be a pro!
- “Can I use chocolate chips instead of cocoa powder?” Uh, no. Not for the main cake batter. Cocoa powder provides the structure and intense flavor we need. Save those chips for melting into a ganache or mixing into the frosting!
- “How long does this cake last?” If kept covered at room temp, 2-3 days. In the fridge, 4-5 days. But honestly, will it even last that long? **Doubtful.**
- “Can I make this into cupcakes?” Absolutely! Just reduce the baking time to about 18-22 minutes. Keep a close eye on them, as oven temps vary!
- “What’s the best frosting for this?” A classic chocolate buttercream is always a winner. Or a cream cheese frosting if you’re feeling fancy. But for me, you can’t go wrong with a rich, dark chocolate ganache. Drool.
- “Do I *have* to use hot water/coffee?” Yes! That hot liquid is key to activating the cocoa powder and making the cake incredibly moist. Cold water just won’t cut it.
Final Thoughts
See? That wasn’t so scary, was it? You just whipped up a show-stopping birthday cake! You’re basically a kitchen wizard now. Go ahead, take a picture, boast a little on social media, and then **EAT THE CAKE!** You absolutely deserve every delicious bite. Happy baking, friend, and may your birthdays (and every day, really) be filled with chocolatey goodness!

