“`html
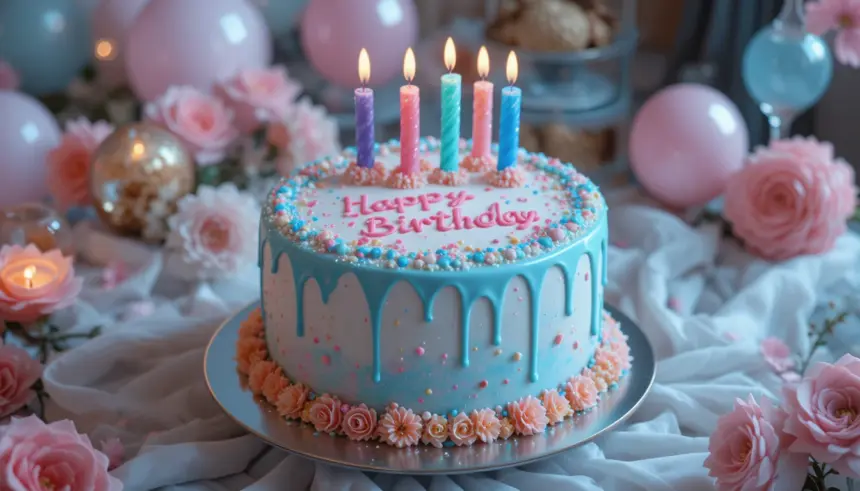
Okay, so you’ve been scrolling through Pinterest, and suddenly, BAM! You’re hit with the most epic, drool-worthy birthday cake aesthetic you’ve ever seen. You know, the ones that look like they were crafted by sugar-wielding fairies and photographed by angels? Yeah, *that* kind. And your brain immediately goes, “I NEEEEEED THAT.” But then reality slaps you: you have the baking skills of a confused squirrel and zero time. Sound familiar? Don’t worry, I gotchu.
Why This Recipe is Awesome (Even for Us)
Let’s be real, most “aesthetic” cakes involve intricate piping skills that make you feel like you’re defusing a bomb with a toothpick. Not this bad boy. This birthday cake aesthetic is all about achieving that jaw-dropping look without needing a degree in pastry arts. We’re talking gorgeous, layered, and totally Instagrammable, but with *minimal* fuss. It’s the kind of cake that screams “I’m sophisticated and talented” while secretly whispering, “I totally used a boxed mix and some store-bought frosting.” Shhh, your secret’s safe with me. Plus, it’s ridiculously adaptable, so you can basically make it your own personal masterpiece.
Ingredients You’ll Need (The Goods)
- Your favorite boxed cake mix (chocolate, vanilla, red velvet – you do you!)
- The ingredients called for on the cake mix box (usually eggs, oil, water – the usual suspects)
- Two containers of your go-to frosting (store-bought is totally acceptable, no judgment here!)
- Food coloring in your desired “aesthetic” shades. Think pastels, bold neons, or even a moody dark hue.
- Optional but highly recommended: Sprinkles, edible glitter, mini meringues, or whatever fancy toppings make your heart sing.
- A big ol’ dose of confidence. You’ll need it. (Okay, maybe not that much, but a little helps!)
Step-by-Step Instructions (Let’s Get This Party Started!)
- First things first, preheat your oven and grease and flour your cake pans. Seriously, don’t skip this part. Nobody likes a cake cemented to the pan. Trust me.
- Whip up your cake batter according to the box instructions. Keep it simple. The magic happens later.
- Pour the batter into your prepared pans. If you’re feeling fancy, you can divide the batter into multiple bowls and add different food colorings for a surprise inside. Ooh, exciting!
- Bake those cakes! Keep an eye on them and don’t overbake. A toothpick inserted into the center should come out with moist crumbs, not wet batter.
- Once baked, let the cakes cool in the pans for about 10-15 minutes, then invert them onto a wire rack to cool completely. Patience, grasshopper!
- While the cakes cool, let’s talk frosting. Divide your frosting into separate bowls (one for each color you want). Add a few drops of food coloring to each bowl and mix until you achieve your perfect aesthetic shade.
- Once the cakes are totally cool (this is CRUCIAL), level them off if they’re dome-shaped. A serrated knife works like a charm. We want flat surfaces for stacking, people!
- Now for the fun part: assembly! Place your first cake layer on your serving plate or cake stand. Spread a generous layer of one color of frosting on top. Then, add your second cake layer and frost it with another color. Repeat if you have more layers!
- Time for the “naked” or “semi-naked” cake look. Take a small amount of your lightest frosting and gently spread it around the sides of the cake. You want to leave some of the cake peeking through. It’s supposed to look effortlessly chic, not perfectly smooth. If you want a full frosting look, just go to town!
- Now, unleash your inner artist! Dollop, swirl, or drizzle different colored frostings onto the top and sides of your cake. Use an offset spatula or even a spoon to create beautiful, abstract designs. Think messy but intentional.
- Finally, shower your masterpiece with your chosen toppings. Go wild! This is where you really inject your personality.
Common Mistakes to Avoid (Don’t Be That Guy)
- Thinking you can frost a warm cake: It’s a recipe for a melty, slumpy disaster. Be patient!
- Over-mixing the batter: This leads to tough, dense cakes. Mix just until everything is combined.
- Skipping the leveling: Uneven cake layers = a lopsided cake. Nobody wants to cut a cake that’s already leaning.
- Using too much food coloring at once: You can always add more, but you can’t take it away. Start small!
- Forgetting to taste the frosting: This is a critical step. It’s your chance to ensure peak deliciousness. And maybe sneak a fingerful.
Alternatives & Substitutions (When Life Gives You Lemons…)
Feeling like a boxed cake mix is too… basic? Totally get it. You can absolutely use your favorite homemade cake recipe. Just make sure it bakes up relatively flat or is easy to level. For frosting, if you’re feeling ambitious, homemade buttercream is always a winner. And if you can’t find edible glitter? Use edible pearls, sugar crystals, or even tiny chocolate shavings. The goal is visual appeal, so get creative! Honestly, though, store-bought frosting is a lifesaver and tastes just fine.
FAQ (The Burning Questions You’re Probably Thinking)
- Can I make this cake ahead of time? Yes! You can bake and cool the cake layers a day in advance and store them wrapped tightly at room temperature. Frosting can also be made ahead. Just bring it to room temp and give it a quick whip before using.
- My frosting looks too stiff/runny. Help! For stiff frosting, add a tablespoon of milk or cream at a time until it loosens up. For runny frosting, try adding a bit more powdered sugar, a tablespoon at a time, until it thickens.
- What if I’m terrible at frosting and it looks… lumpy? Embrace the “rustic” look! A few intentional swirls and dips can make it look even cooler. Or, just dump a TON of sprinkles on it. Sprinkles are the ultimate concealer.
- Do I really need to use different colors? Can’t I just do one? Absolutely! A beautifully frosted single-color cake can be just as stunning, especially with some amazing toppings. It’s your cake, your rules!
- My cake layers are a bit small. Can I still stack them? Of course! Just make sure to use a good amount of frosting between the layers to help them stick. A slightly shorter, multi-layered cake is still super cute.
- What’s the “aesthetic” I should aim for? Think about what you love! Soft pastels for a dreamy vibe, bold jewel tones for a dramatic flair, or even a monochrome look with varying shades. It’s all about your personal style.
Final Thoughts
So there you have it! Your guide to achieving that drool-worthy birthday cake aesthetic without breaking a sweat (or your bank account). This recipe is all about fun, creativity, and deliciousness. Don’t be afraid to experiment, get a little messy, and most importantly, enjoy the process! Now go forth and bake something that’ll make everyone’s jaws drop. You’ve got this!
“`

