You know that feeling when the weather turns crisp and suddenly you’re possessed by the spirit of autumn? That’s when the apple crisp cravings hit me like a ton of cinnamon-scented bricks. This recipe is my go-to mood enhancer, comfort food, and excuse to eat dessert for breakfast all rolled into one glorious dish. Trust me, your kitchen is about to smell like a Martha Stewart magazine exploded in there—in the best possible way.
Why This Recipe is Awesome
Let’s be real: this apple crisp recipe is basically foolproof. I once made it while simultaneously watching Netflix AND texting my mom about her Facebook habits. Still turned out perfect. The oat topping gets all golden and crispy while the apples underneath transform into this heavenly, tender-but-not-mushy situation. It’s ridiculously versatile too—fancy enough for dinner guests but casual enough for a Tuesday night when you’re eating your feelings. Plus, it’s technically got fruit AND oats, so it’s practically a health food. (That’s my story and I’m sticking to it.)
Ingredients You’ll Need
For the apple filling:
- 6 medium apples (Granny Smith if you want to be proper, or whatever’s rolling around in your fruit drawer—I don’t judge)
- ¾ cup granulated sugar (or ⅔ if you’re “watching sugar intake” wink wink)
- 1 tablespoon flour (to thicken things up, like Spanx but for apple filling)
- 1 teaspoon cinnamon (minimum—I personally go rogue and double this)
- ¼ teaspoon nutmeg (the secret weapon)
- 2 tablespoons lemon juice (prevents browning and adds zing)
For the irresistible oat topping:
- 1 cup old-fashioned oats (not instant—don’t even think about it)
- 1 cup all-purpose flour (the backbone of all good decisions)
- 1 cup brown sugar, packed (with love and calories)
- ½ teaspoon salt (to make the sweet stuff pop)
- ½ teaspoon cinnamon (because why stop at the filling?)
- ½ cup cold butter, cubed (straight from the fridge, please and thank you)
Step-by-Step Instructions
- Prep your battlestation. Preheat your oven to 375°F (190°C) and grab a 9×13 baking dish. No need to grease it—we’re not monsters trying to make cleanup harder than it needs to be.
- Deal with the apples. Peel, core, and slice those apples into roughly ¼-inch pieces. Uniformity is nice but not worth having a breakdown over. Toss them in a large bowl with sugar, flour, cinnamon, nutmeg, and lemon juice until they’re well-coated. Pour this mixture into your baking dish and spread it evenly.
- Make the magnificent topping. In another bowl, combine oats, flour, brown sugar, salt, and cinnamon. Mix it up with a fork or your fingers (clean ones, obviously). Add the cold butter cubes and use a pastry cutter, two forks, or your fingers to work the butter into the dry ingredients until you get a crumbly texture. If it looks like wet sand with some chunky bits, you’re on the right track.
- Assemble this bad boy. Sprinkle the oat mixture evenly over the apples. Don’t press it down—we want that crumbly texture to stay intact for maximum crispiness.
- Bake to perfection. Pop it in the preheated oven for 35-40 minutes until the top is golden brown and you can see the apple filling bubbling around the edges like delicious lava.
- Exercise patience. Let it cool for at least 15 minutes before serving. I know it’s torture, but diving in too soon means burned taste buds and that’s just sad.
Common Mistakes to Avoid
Here’s where people typically go off the rails with this recipe:
- Skipping the lemon juice. “But I don’t have lemons!” I hear you cry. The lemon juice keeps the apples from turning brown and adds necessary acidity. In a pinch, a splash of orange juice or even apple cider vinegar will do.
- Using warm or softened butter. That’s a hard no. Cold butter creates those glorious pockets of buttery goodness in the topping. Warm butter just makes a homogeneous paste. Boooring.
- Overcrowding the dish. If your apple mountain is towering over the baking dish, you’ve gone too far. The apples will shrink as they bake, but starting with too many means soggy bottom syndrome.
- Underbaking. “Golden brown” doesn’t mean “vaguely tan.” Don’t be afraid of color—that’s where the flavor lives!
Alternatives & Substitutions
Because life is unpredictable and sometimes you just have to work with what you’ve got:
- Gluten-free? Swap regular flour for almond flour or a gluten-free blend. The oats can be replaced with certified gluten-free oats.
- Vegan needs? Use coconut oil or a plant-based butter substitute instead of butter. Works shockingly well, TBH.
- Apple varieties. Granny Smith are classic for their tartness, but Honeycrisp, Braeburn, or Pink Lady all bring their own charm to the party. Mix and match for complexity if you’re feeling fancy.
- Spice it up. Add a pinch of cardamom, ginger, or even a tiny bit of clove if you’re feeling adventurous. Or dump in pumpkin pie spice if you’re basic (no judgment).
- Make it extra. Throw in some chopped nuts (walnuts, pecans) or even a handful of dried cranberries to the filling for texture and flavor contrast.
FAQ (Frequently Asked Questions)
Can I make this ahead of time?
Absolutely! You can assemble the whole thing, cover it with plastic wrap, and refrigerate it for up to 24 hours before baking. Just add 5-10 minutes to the baking time since you’re starting cold.
Do I really need to peel the apples?
Technically, no. Nutritionally, the peels have fiber and stuff. Texture-wise, they can be a bit distracting in the final dish. It’s your call—I won’t send the dessert police to your house.
Can I freeze this masterpiece?
You sure can! Bake it, cool it completely, then cover tightly and freeze for up to 3 months. Thaw overnight in the fridge and reheat in a 350°F oven until warmed through (about 20-25 minutes).
What if I don’t have a 9×13 baking dish?
Any similar-sized baking vessel will work—an 8×8 square dish will make a thicker crisp (increase baking time by 5-10 minutes). You can even use individual ramekins for a fancy presentation (decrease baking time to about 25-30 minutes).
Is this recipe keto/paleo/Whole30 compliant?
LOL, no. It’s dessert. It’s supposed to bring joy, not compliance. But if you must, there are substitutions you can research, though I make no promises about the results.
What’s the best way to serve this?
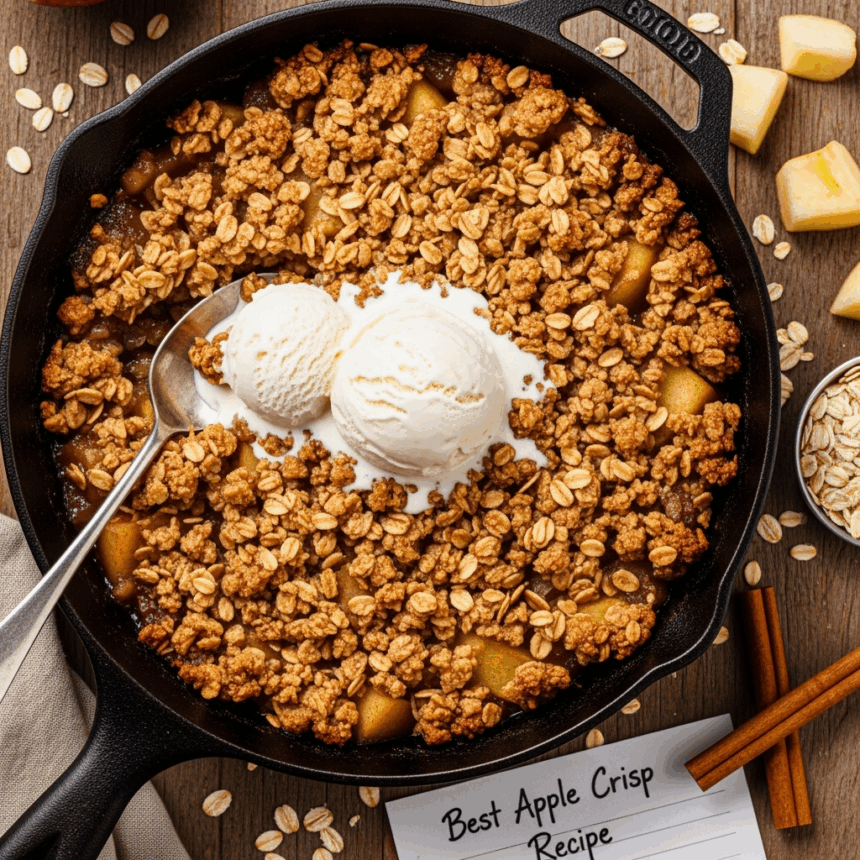
Warm with a scoop of vanilla ice cream is the classic move. But I’ve been known to eat it cold, straight from the fridge, at questionable hours of the morning. Follow your heart.
Final Thoughts
This apple crisp recipe has gotten me through breakups, job interviews, family gatherings, and Tuesday nights when nothing else would do. It’s simple enough to whip up whenever the mood strikes but impressive enough to make people think you’ve got your life together (even if your laundry has been sitting in the dryer for three days).
Remember, the beauty of a crisp is its forgiving nature—it doesn’t have to be picture-perfect to be delicious. If your topping isn’t perfectly even or your apple slices aren’t uniform, who cares? It’s going to taste amazing anyway.
Now go forth and bake! Your house is about to smell like autumn heaven, and you’re about to become the most popular person in your social circle. Or at least with yourself. Self-love is important too, especially when it involves warm apple crisp.
