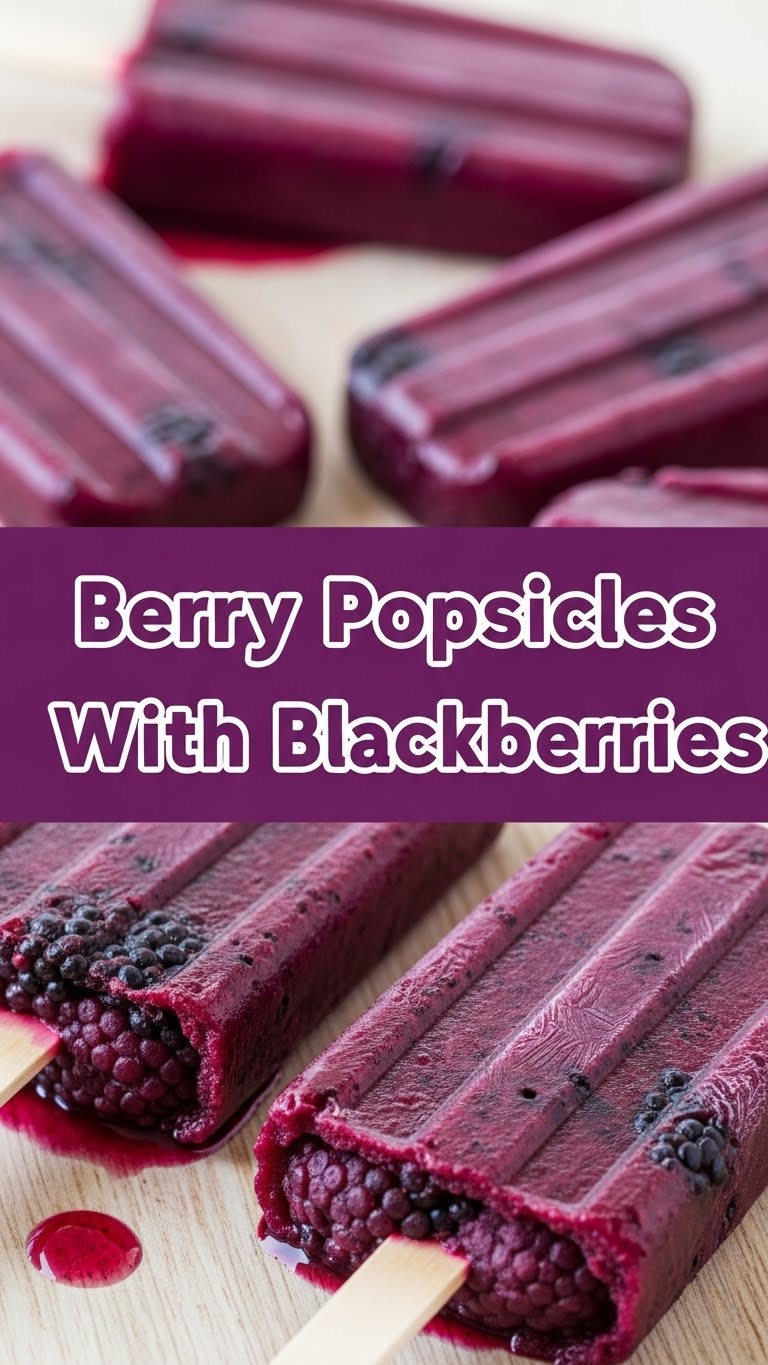
So you’re looking for something cool, refreshing, and ridiculously easy to make, but your brain is already melting from the heat? Been there, done that, got the popsicle stick. Good news: I’ve got a recipe so simple, it almost feels like cheating. Get ready for the best Berry Popsicles with Blackberries you’ve ever had!
Why This Recipe is Awesome
Okay, real talk. This recipe is less a ‘recipe’ and more a ‘suggestion.’ It’s so simple, even your cat could probably do it if it had opposable thumbs and a sweet tooth. You don’t need fancy equipment, a culinary degree, or even pants, probably. It’s basically summer in a stick, and it’s idiot-proof. Seriously, if I can make these without setting off the smoke detector, you’re golden. Plus, homemade means you control the sweetness, which is a win in my book!
Ingredients You’ll Need
- Blackberries (about 2 cups): The star of the show! Fresh is best for that vibrant flavor, but frozen works in a pinch – just make sure they’re thawed a bit so your blender doesn’t stage a protest.
- Plain Greek Yogurt (1 cup): The creamy dream maker. Full-fat for max deliciousness (because YOLO), but non-fat is cool too if you’re trying to be that person.
- Honey or Maple Syrup (2-4 tablespoons): Your sweet secret weapon. Adjust to your taste buds. Are you a sweet-as-sugar unicorn or a subtle sweetness sorcerer? Start with less, you can always add more!
- A splash of lemon juice (1 teaspoon): Optional, but highly recommended for a little zing! It really makes the berry flavor pop and keeps things from getting too one-note.
- Popsicle molds & sticks: Obvs. Don’t try to use your coffee mug; trust me, I speak from experience (it was a sticky situation).
Step-by-Step Instructions
- Prep the Berries: Toss your gorgeous blackberries into a blender or food processor.
- Blend ‘Em Up: Pulse until mostly smooth. A few little chunks are totally cool, actually desirable. They give your popsicles character!
- Mix in the Good Stuff: Add the Greek yogurt, your chosen sweetener (honey or maple syrup), and that optional lemon juice. Blend again until everything is happily combined and looking like a beautiful purple cloud.
- Taste Test (Crucial Step!): Grab a spoon. Does it need more sweetness? More tang? This is your moment to shine! Adjust to your heart’s content. This is *your* popsicle journey.
- Pour & Populate: Carefully pour the mixture into your popsicle molds. Don’t overfill! Leave a little room at the top for expansion, unless you enjoy a messy freezer.
- Insert Sticks: Pop the sticks into the molds. Try to make sure they’re straight! No one wants a crooked popsicle, that’s just bad vibes.
- Freeze Your Butt Off (The Popsicle’s, Not Yours): Stick ’em in the freezer for at least 4-6 hours, or until solid. Patience is a virtue here. Seriously, overnight is even better for maximum solidity.
- Enjoy! To release, run the mold under warm water for a few seconds. Then, gently peel and devour your masterpiece!
Common Mistakes to Avoid
- Not tasting the mixture before freezing: This isn’t rocket science, but it’s also not a guessing game. Taste it! You can’t fix bland once it’s frozen solid, unless you like sad, flavorless popsicles.
- Overfilling the molds: You’ll end up with an icy, sticky mess in your freezer. Trust me, been there, cleaned that, regretted it.
- Impatience: Trying to yank them out after only an hour. They’ll be slushy and fall apart like your dreams. Nobody wants a broken popsicle dream. Give them time to solidify properly.
- Forgetting the sticks: I mean, it happens, right? Then you just have berry yogurt blocks, which isn’t quite the same vibe as a convenient, stick-held treat.
Alternatives & Substitutions
- Other Berries? Absolutely! Raspberries, strawberries, mixed berries – go wild! Just make sure they’re ripe and flavorful for the best results.
- Different Yogurt? Sure, regular plain yogurt works, but Greek gives it that extra creamy thickness that we’re after. Non-dairy yogurts (almond, coconut) are also a go-go for a vegan twist.
- No Honey/Maple? Agave nectar, a date paste, or even just a little sugar dissolved in a tiny bit of warm water can work. Your choice, sweet tooth!
- Want more texture? Leave some berry chunks unblended, or even swirl in a little granola or chia seeds at the end before freezing. Get creative!
FAQ (Frequently Asked Questions)
- “Can I use store-bought berry jam instead of fresh berries?” Uh, technically yes, but… why hurt your soul like that? Fresh is best, my friend. Jam often has added sugar and weird stuff. If you *must*, reduce the added sweetener significantly.
- “My popsicles are too icy, what gives?” Probably not enough fat (use full-fat yogurt!) or too much water. A tiny bit of booze (like a teaspoon of vodka, seriously) can lower the freezing point and make them less icy, but that’s for the adventurous!
- “How long do they last in the freezer?” If they even make it past a week, you’ve got serious self-control! Usually good for 2-3 weeks in an airtight container, but IMO, fresher is always better.
- “Do I have to use popsicle molds?” Nope! Small paper cups with wooden sticks work in a pinch. Just peel away the cup when frozen. Not as fancy, but just as delicious.
- “Can I make them vegan?” Heck yes! Use a plant-based Greek-style yogurt (coconut or almond based are great) and maple syrup. Voila!
- “My stick came out, but the popsicle is still stuck!” You probably didn’t run the mold under warm water long enough. Or you pulled too hard. Be gentle, my friend. It’s a delicate operation.
Final Thoughts
See? Told you it was easy. Now you’ve got a batch of homemade berry popsicles that are way better than anything you’d buy at the store (and probably healthier, too, depending on how much honey you dumped in). Go on, impress your friends, your kids, your dog, or just yourself. You totally deserve this delicious, frosty treat. Now, if you’ll excuse me, I have a sudden craving…

