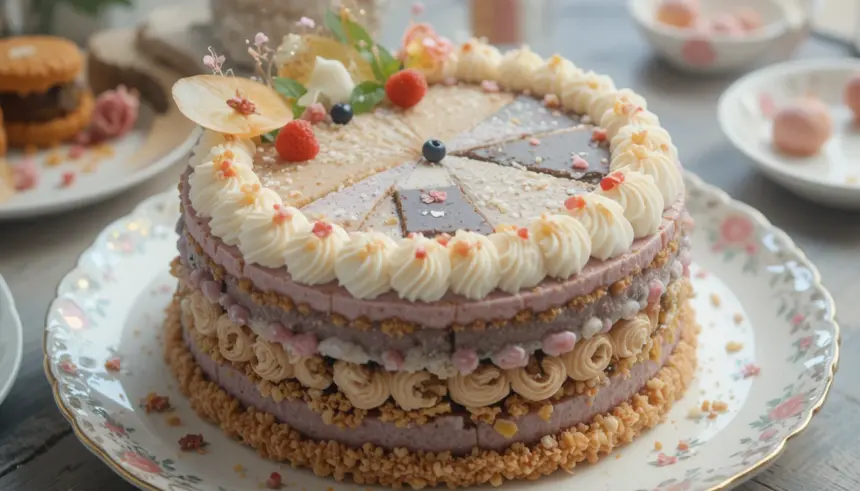
So, you’re eyeing those ridiculously adorable, perfectly proportioned little cakes on Instagram and thinking, “I could totally make that… if I had 3 days, an army of tiny sprinkles, and a pastry chef on speed dial,” right? Nah, friend, you’re about to dive into the magical world of bento cakes, where “minimalist” means maximum chill. These tiny titans of taste are all about big flavor in a super cute, small package. Perfect for when you crave cake but not *all* the cake, or when you want to surprise someone with a personalized treat without committing to a full-blown bakery project. Let’s get baking!
Why This Recipe is Awesome
Because who needs a gigantic, multi-tiered monstrosity when you can have a tiny, perfect cake that screams, “I’m chic, I’m sophisticated, and I don’t need a whole party to justify my existence”? These bento beauties are the ultimate “treat yourself” or “surprise a pal” move without breaking a sweat (or the bank). They’re **idiot-proof**, I swear. Even I didn’t mess it up! Plus, they’re practically portion control in disguise. And let’s be real, anything that fits in a cute little box and looks like it came straight from a Korean cafe is a total win-win.
Ingredients You’ll Need
For one or two glorious bento cakes (depending on your pan size), you’ll need the basics. We’re keeping it simple, folks!
- **All-purpose flour:** About 1 cup. The workhorse of our baking adventure. Don’t skimp.
- **Granulated sugar:** Around ½ cup. Sweetness, my darling!
- **Baking powder:** 1 teaspoon. Our little magic puff-upper.
- **Salt:** ¼ teaspoon. Just a pinch to make everything taste better. It’s science!
- **Unsalted butter:** ¼ cup (that’s half a stick), softened. Because we control the salt in this kitchen, baby!
- **Large egg:** 1. The binder of our dreams.
- **Milk:** ½ cup. Any kind works, but whole milk gives that extra richness.
- **Vanilla extract:** 1 teaspoon. Because everything is better with vanilla. Fight me.
- **For the Frosting:**
- **Unsalted butter:** ½ cup, softened. Yep, more butter. Don’t judge.
- **Powdered sugar:** 1 ½ – 2 cups. Sift it if you’re fancy, but I usually don’t. YOLO.
- **Vanilla extract:** ½ teaspoon. More vanilla, more problems (delicious problems).
- **Milk or cream:** 1-2 tablespoons. To get that perfect, spreadable consistency.
- **Optional food coloring:** A drop or two if you want to get creative. We’re going minimalist, but a pop of pastel is always cute!
Step-by-Step Instructions
- **Preheat & Prep:** Get that oven nice and toasty to 350°F (175°C). Line a small 4-6 inch cake pan or a couple of muffin tins (if you’re going super mini) with parchment paper. Give them a quick spray too. Nobody wants stuck cake.
- **Dry Mix:** In a medium bowl, whisk together your flour, sugar, baking powder, and salt. Easy peasy.
- **Wet Mix:** In a separate bowl (or the bowl of your stand mixer if you’re living the dream), cream the softened butter until it’s light and fluffy. Beat in the egg and vanilla extract until well combined.
- **Combine & Conquer:** Gradually add the dry ingredients to the wet ingredients, alternating with the milk. Start and end with the dry ingredients. **Mix until just combined** – don’t overmix, or your cake will be tough and nobody wants a tough cake.
- **Bake It Up:** Pour your glorious batter into your prepared pan(s). Bake for 20-30 minutes for a small cake, or 15-20 minutes for muffin-tin cakes. A toothpick inserted into the center should come out clean.
- **Cool Down:** Let your cakes cool in the pan for 10-15 minutes, then carefully transfer them to a wire rack to cool completely. Patience, young padawan.
- **Frosting Time:** While the cakes cool, whip up your frosting! Beat the softened butter until creamy, then gradually add the powdered sugar. Mix in the vanilla and milk/cream, one tablespoon at a time, until you reach a smooth, spreadable consistency. Add food coloring now if you’re using it.
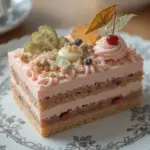
- **Stack & Frost:** Once the cake is completely cool (this is crucial!), level the top with a serrated knife if it’s domed. Slice your cake horizontally into two layers if you want a filling. Spread a thin layer of frosting between the layers, then cover the entire cake with a thin “crumb coat” of frosting. Chill for 10-15 minutes.
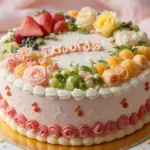
- **Decorate Minimally:** Now for the fun part! Apply your final coat of frosting. For minimalist vibes, keep it smooth and clean. You can add a simple piped border, a single cherry, or a tiny, simple message with a contrasting frosting color. Think elegant and understated!
Common Mistakes to Avoid
- **The Warm Cake Frosting Debacle:** Trying to frost a cake that’s still warm? Rookie mistake! It will melt your frosting into a sad, slippery mess. **Always let your cake cool completely.**
- **Overmixing the Batter:** You want a tender cake, not a rubbery hockey puck. Mix until just combined, a few lumps are totally fine.
- **Eyeballing Ingredients:** Unless you’re a seasoned witch doctor or a baking prodigy, stick to the measurements. Baking is science, people!
- **Not Greasing Your Pans Properly:** Nothing is more soul-crushing than a cake stuck to the bottom of the pan. Grease and flour, or grease and parchment paper – take your pick, but don’t skip it.
- **Under-Baking:** A wobbly cake means a raw center. Give it those extra few minutes until that toothpick comes out clean.
Alternatives & Substitutions
Feeling adventurous, or just missing an ingredient? No worries, we got you!
- **Cake Flavor:** Instead of vanilla, try almond extract, lemon zest, or a touch of cocoa powder for a chocolatey twist. Mocha bento cake? Yes, please!
- **Frosting Fun:** Swap out vanilla buttercream for cream cheese frosting, a simple whipped ganache, or even a store-bought frosting (no judgment here, sometimes a girl’s gotta do what a girl’s gotta do). Just make sure it’s thick enough to hold its shape.
- **Dairy-Free:** Use plant-based milk and butter substitutes. **FYI,** they often work beautifully in this recipe!
- **Gluten-Free:** Swap the all-purpose flour for a 1:1 gluten-free baking blend. You might need a tiny bit more liquid, so watch the consistency.
- **Fillings:** Add a thin layer of fruit jam, lemon curd, or even a spoonful of Nutella between the cake layers before frosting. A little surprise inside is always a good idea.
FAQ (Frequently Asked Questions)
- **Can I use margarine instead of butter?** Well, technically yes, but why hurt your soul like that? Butter just tastes better, IMO. But if you’re in a pinch, margarine can work.
- **Do I need special bento cake pans?** Nope! Small 4-6 inch round cake pans are ideal, but you can totally bake in muffin tins and then trim/stack the individual cupcakes to form a small cake. Get creative!
- **How long do bento cakes last?** Covered and refrigerated, they’re good for 3-4 days. But let’s be real, are they really going to last that long? Probably not.
- **Can I make the cake layers ahead of time?** Absolutely! Bake them, let them cool completely, wrap them tightly in plastic wrap, and freeze for up to a month. Thaw them in the fridge before frosting.
- **What’s a “crumb coat” and why do I need it?** It’s a thin layer of frosting that traps any loose crumbs, so your final, beautiful frosting layer is perfectly smooth and crumb-free. Don’t skip it unless you like a rustic, crumbly look!
- **What if my frosting is too thick/thin?** Too thick? Add milk/cream, a teaspoon at a time, until it’s perfect. Too thin? Add more powdered sugar, a tablespoon at a time. It’s an easy fix!
Final Thoughts
See? That wasn’t so scary, was it? You just whipped up a cute, delicious bento cake that’s ready to bring a smile to someone’s face (or your own, because you deserve it). These little guys are all about showing love without all the fuss. So go ahead, pat yourself on the back! Now go impress someone—or yourself—with your new culinary skills. You’ve earned it!
