So you’ve conquered the mighty bento cake, huh? Frosting game strong, tiny spatula high-fiving your skills? Awesome! You’ve baked, you’ve frosted, you’ve probably even taken 57 photos from different angles. But wait, how do you get that adorable creation from your kitchen counter to your friend’s doorstep without it looking like it wrestled a bear? Enter: the art of bento cake box packaging! Because let’s be real, a pretty cake deserves an equally pretty exit strategy.
Why This “Recipe” (Packaging Guide) is Awesome
Because nobody wants a naked cake showing up to the party, that’s why! This isn’t just about putting a lid on it; it’s about elevating your bento cake from “homemade treat” to “OMG, you made this?!” It’s like giving your cake a tiny, fancy tuxedo before its big debut. Seriously, good packaging not only protects your precious, perfectly piped masterpiece from bumps and smudges, but it also adds a whole new level of “I thought of everything” charm. Plus, it screams professional, even if your kitchen currently looks like a flour bomb went off. No more “oops, my cake fell over” horror stories, promise!
Ingredients You’ll Need
Alright, ditch the flour and eggs for a minute. These are your packaging power-ups:
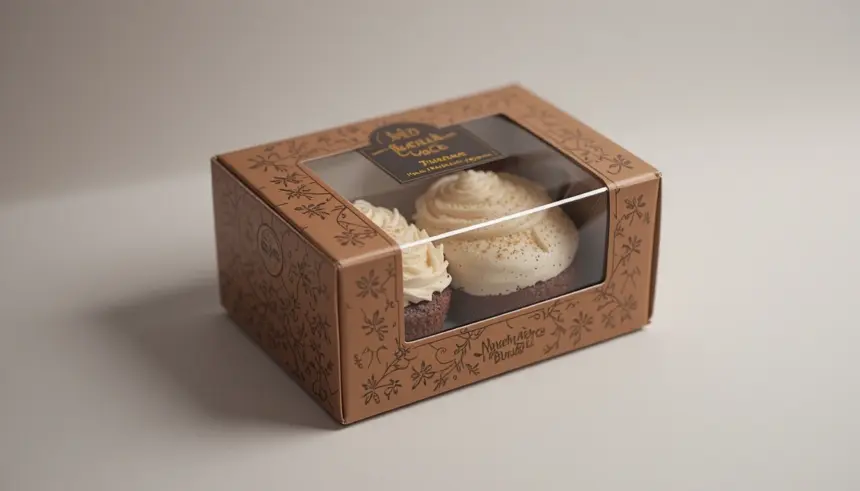
- Bento Cake Box: The star of the show! Typically 4×4 or 6×6 inches. Make sure it’s food-safe, obvi.
- Cake Board/Base: A sturdy little round or square to give your cake some footing. It’s like a tiny magic carpet for your cake.
- Parchment Paper or Wax Paper: For lining the box. Think of it as a protective little blanket.
- Ribbon or Twine: To tie things up prettily. Bonus points for matching your frosting colors!
- Stickers or Labels: A custom touch, maybe with your logo (if you’re fancy) or a sweet “Enjoy!”
- Optional: Cute Mini Spoon/Fork: Because who doesn’t love a ready-to-eat cake moment?
- Optional: Edible Glitter/Sprinkles: A tiny sprinkle inside the box (not on the cake!) can add a fun surprise.
- Optional: A Little Note/Tag: Personalized messages are always a win.
Step-by-Step Instructions
- Chill Your Cake: First things first, make sure your bento cake is super chilled. A firm cake is a happy, un-smudged cake. Nobody wants a melty mess, right?
- Place on Board: Gently transfer your chilled bento cake onto its cake board. This is its sturdy foundation, so treat it well.
- Prep the Box: Open your bento cake box. Line the bottom with a square of parchment or wax paper. This prevents sticking and adds a hygienic barrier.
- Careful Placement: Carefully lift your cake (on its board!) and center it inside the prepared box. Take your time here—it’s the most delicate part.
- Add the Extras: If you’re including a mini spoon, fork, or a small bag of sprinkles, tuck them neatly beside the cake or under the lid. Make it look intentional, not like they just fell in.
- Close and Secure: Fold down the sides and secure the lid of the box. Make sure it clicks into place firmly. You don’t want any accidental pop-offs.
- Decorate the Exterior: Now for the fun part! Wrap your ribbon or twine around the box, tying a neat bow. Stick on your label or a cute sticker. Add a handwritten tag for that extra personal touch.
Common Mistakes to Avoid
We’ve all been there, trust me. Learn from my packaging faux pas!
- Not Chilling the Cake Enough: Rookie mistake! A warm or soft cake will get squished and smudged faster than you can say “buttercream disaster.” Chill it, chill it good.
- Using the Wrong Size Box: A box that’s too big lets the cake slide around (bad!). A box that’s too small squishes the frosting (even worse!). Snug but not squished is the golden rule.
- Forgetting the Cake Board: Trying to lift a cake without a board is like trying to lift a cloud—it just falls apart. The board is non-negotiable, IMO.
- Over-Decorating: Less is often more, especially with bento cakes. Let the cake be the star, and the packaging its elegant supporting cast.
- Rushing It: Packaging takes a little patience. Don’t shove the cake in haphazardly. Treat it like a fragile, delicious treasure.
Alternatives & Substitutions
No special box? No problem (mostly)!
- Box Alternatives: If you’re in a pinch, a clean, sturdy take-out container (the clear plastic kind) can work, but it lacks the charm. For a truly rustic vibe, a small, clean kraft paper box without a window can be dressed up beautifully with stamps and twine.
- Lining Alternatives: Got no parchment? Clean, unprinted wax paper or even a paper doily (placed under the cake board) works for aesthetics, though parchment offers better non-stick properties.
- Ribbon Replacements: Twine, jute string, even a strip of pretty fabric or washi tape can replace traditional ribbon. Get creative!
- Personalized Touches: Instead of stickers, draw a tiny design on the box with a food-safe marker, or get some custom stamps made.
FAQ (Frequently Asked Questions)
- What size box should I use? Is bigger always better?
Nope, definitely not! You want a box that’s just a little bit wider than your cake board. Typically, for a mini bento cake, a 4×4 inch box is perfect. A 6×6 inch box might be better for slightly larger or taller designs. A snug fit prevents the cake from sliding around during transport.
- Can I just use a regular food container? Won’t that work?
Technically, yes, it will hold the cake. But does it have the same “ooh-la-la” factor? Probably not. The bento box is part of the aesthetic, FYI. It’s like wrapping a diamond in newspaper—it works, but it’s not ideal.
- How do I prevent the cake from sliding around inside the box?
A properly sized cake board that fits snugly in the box is key. You can also put a tiny dot of frosting under the cake board to “glue” it to the box’s parchment lining. Some people even use a small non-slip mat under the box in the car.
- Should I add a tiny fork or spoon inside the box? Is that extra?
It’s absolutely adorable and definitely not extra! It’s a thoughtful touch that says, “Eat me now!” It enhances the whole experience. Go for it!
- How far in advance can I package my bento cake?
Ideally, package it as close to delivery or gifting time as possible, especially if it’s hot out. However, if your cake is well-chilled and stable (and the frosting can hold up), you can package it a few hours in advance and keep it refrigerated until ready to go.
- Any tips for transporting it in the car?
Always place the box on a flat, stable surface. The floor of the passenger seat or the trunk is usually better than a wobbly seat. If you have a cooler bag, even better for longer trips to keep it chilled!
Final Thoughts
So there you have it, your crash course in making your bento cake look as good on the outside as it tastes on the inside. Packaging isn’t just a formality; it’s the final flourish, the mic drop, the “Ta-da!” moment for your edible art. Now go impress someone—or yourself—with your new culinary *and* packaging skills. You’ve earned it!


