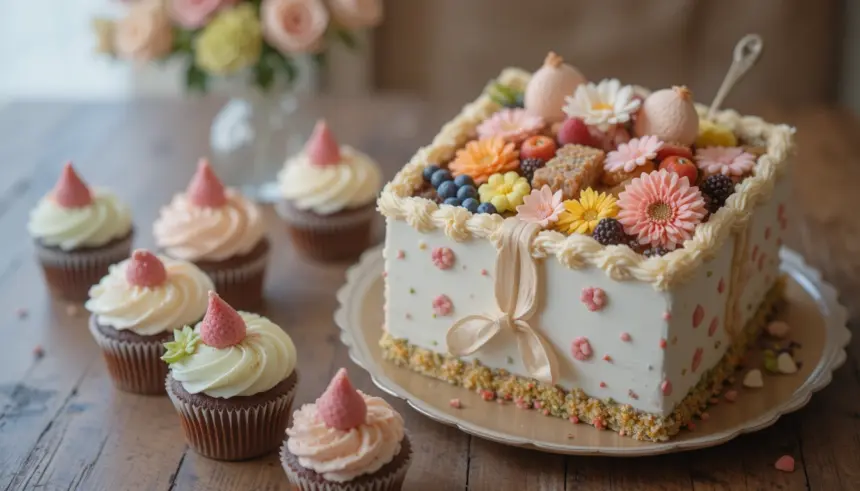
So, you’ve scrolled through endless feeds of impossibly cute mini cakes and thought, “I could totally make that… if I only had the time/skill/patience.” Guess what? You absolutely can! We’re diving headfirst into the world of Bento Box Cakes and Cupcakes, and trust me, it’s less ‘MasterChef’ and more ‘I-just-want-something-sweet-and-adorable-without-the-drama’.
Why This Recipe is Awesome
Because who needs a massive, intimidating layer cake when you can have your own personal, perfectly portioned bundle of joy? This recipe is seriously **idiot-proof**. Even if your baking skills usually stop at “adding water to ramen,” you’re going to crush this. It’s perfect for gifting (hello, instant best friend status!), surprising a loved one, or just treating yourself because, frankly, you deserve it. Plus, mini means less guilt, right? (Don’t answer that.)
Ingredients You’ll Need
Get ready for a super straightforward shopping list. No obscure, ancient herbs required here, just pure, unadulterated deliciousness.
- All-Purpose Flour: The backbone of all deliciousness. About 1 ½ cups.
- Granulated Sugar: For that sweet, sweet magic. 1 cup should do it.
- Baking Powder: The secret to light and fluffy. 1 ½ teaspoons.
- Salt: Don’t skip it! It balances everything out. ½ teaspoon.
- Unsalted Butter: Softened, please. About ½ cup (1 stick). Because you control the salt, not the butter company, duh.
- Large Eggs: Two of ’em. Room temperature is best, FYI.
- Milk: Any kind works, but whole milk makes it extra lush. ½ cup.
- Vanilla Extract: Go for the good stuff! 1 teaspoon. It makes a difference, IMO.
- For the Frosting:
- Powdered Sugar: About 3-4 cups, sifted.
- Unsalted Butter: Another ½ cup, softened.
- Milk or Heavy Cream: 2-3 tablespoons, for creaminess.
- Vanilla Extract: Another teaspoon.
- Food Coloring (Optional): For those Instagram-worthy pastel vibes.
Step-by-Step Instructions
Time to get your bake on! Don’t overthink it; we’re just making yummy tiny cakes here.
- Preheat & Prep: First things first, preheat your oven to 350°F (175°C). Line a cupcake tin with liners or grease and flour a mini cake pan. For a bento box cake, a small 4-inch round cake pan is perfect.
- Mix Dry Ingredients: In a medium bowl, whisk together the flour, sugar, baking powder, and salt. Give it a good whisk until everything is happily combined.
- Cream Butter & Sugar: In a separate, larger bowl (or your stand mixer), cream the softened butter and sugar together until it’s light and fluffy. This usually takes about 2-3 minutes.
- Add Eggs & Vanilla: Beat in the eggs one at a time, mixing well after each addition. Then stir in the vanilla extract. Scrape down the sides of the bowl to ensure everything gets mixed in.
- Combine Wet & Dry: Gradually add the dry ingredient mix to the wet mix, alternating with the milk. Start and end with the dry ingredients. Mix until just combined – **do not overmix!** Overmixing makes tough cakes, and we want tender, fluffy ones.
- Bake Time: Divide the batter evenly into your cupcake liners or mini cake pan. Fill cupcake liners about two-thirds full. For a 4-inch cake, you might have enough for two small layers.
- Bake ‘Em Up: Bake cupcakes for 18-22 minutes, or the mini cake for 25-30 minutes, or until a toothpick inserted into the center comes out clean.
- Cool Down: Let them cool in the pans for about 5-10 minutes before transferring them to a wire rack to cool completely. Patience, young padawan!
- Make Frosting: While your cakes cool, beat the softened butter until creamy. Gradually add the sifted powdered sugar, alternating with milk/cream and vanilla extract, until you have a smooth, spreadable frosting. Add food coloring now if you want those vibrant colors.
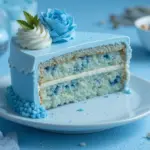
- Decorate! Once your cakes are totally cool (this is crucial!), frost and decorate them to your heart’s content. Get creative with sprinkles, edible glitter, or cute little piped designs.
Common Mistakes to Avoid
Let’s save you some heartache (and wasted ingredients). Here are a few pitfalls to dodge like a pro:
- Overmixing the Batter: This is a classic rookie error! It develops the gluten too much, leading to dense, chewy cakes. Mix until just combined, then stop. Seriously.
- Using Cold Ingredients: Room temperature butter and eggs cream together much better, creating a smoother emulsion and a lighter cake. Don’t skip this step!
- Frosting Warm Cakes: Unless you enjoy a soupy, sliding mess, wait until your cakes are **completely cool**. We’re talking zero warmth.
- Forgetting to Level Your Cakes/Cupcakes: If your cake has a dome, level it with a serrated knife before frosting for a neat finish. Or embrace the dome if you’re feeling wild!
Alternatives & Substitutions
Feeling adventurous? Or just missing an ingredient? No worries, we’ve got options:
- Gluten-Free Flour: Swap out the all-purpose flour for a 1:1 gluten-free baking blend. Results may vary slightly, but it usually works pretty well!
- Dairy-Free: Use your favorite plant-based milk (almond, soy, oat) and dairy-free butter sticks. For frosting, also use dairy-free butter and milk.
- Flavor Variations: Instead of vanilla, try almond extract or a hint of lemon zest in the batter. For frosting, add cocoa powder for chocolate frosting, or a touch of coffee for mocha!
- Different Sugars: You can experiment with brown sugar for a richer, more moist cake, especially in the frosting for a caramel-like note.
FAQ (Frequently Asked Questions)
Got questions? I probably do too, but here are some common ones you might actually have!
- Can I use margarine instead of butter? Well, technically yes, but why hurt your soul like that? Butter tastes infinitely better and gives a superior texture. For real.
- How long do these mini cakes last? They’re best enjoyed within 2-3 days at room temperature, or up to 5 days if stored in an airtight container in the fridge.
- Can I make them ahead of time? Absolutely! Bake the cakes a day in advance, let them cool, and store them unfrosted in an airtight container. Frost on the day you plan to serve.
- What if my frosting is too thin/thick? If it’s too thin, add more powdered sugar, a tablespoon at a time. Too thick? Add a tiny splash of milk or cream. Adjust until it’s perfect!
- Do I need special equipment for the bento box? Not really! Any small, shallow container or even a regular takeout container works. The charm is in the mini cake itself, not the box!
Final Thoughts
See? That wasn’t so scary, was it? You just whipped up some adorable, delicious bento box cakes and cupcakes like the baking wizard you secretly are. Now go impress someone (or just yourself, because that’s important too!) with your newfound culinary skills. You’ve earned those bragging rights – and a tasty treat. Happy baking, my friend!

