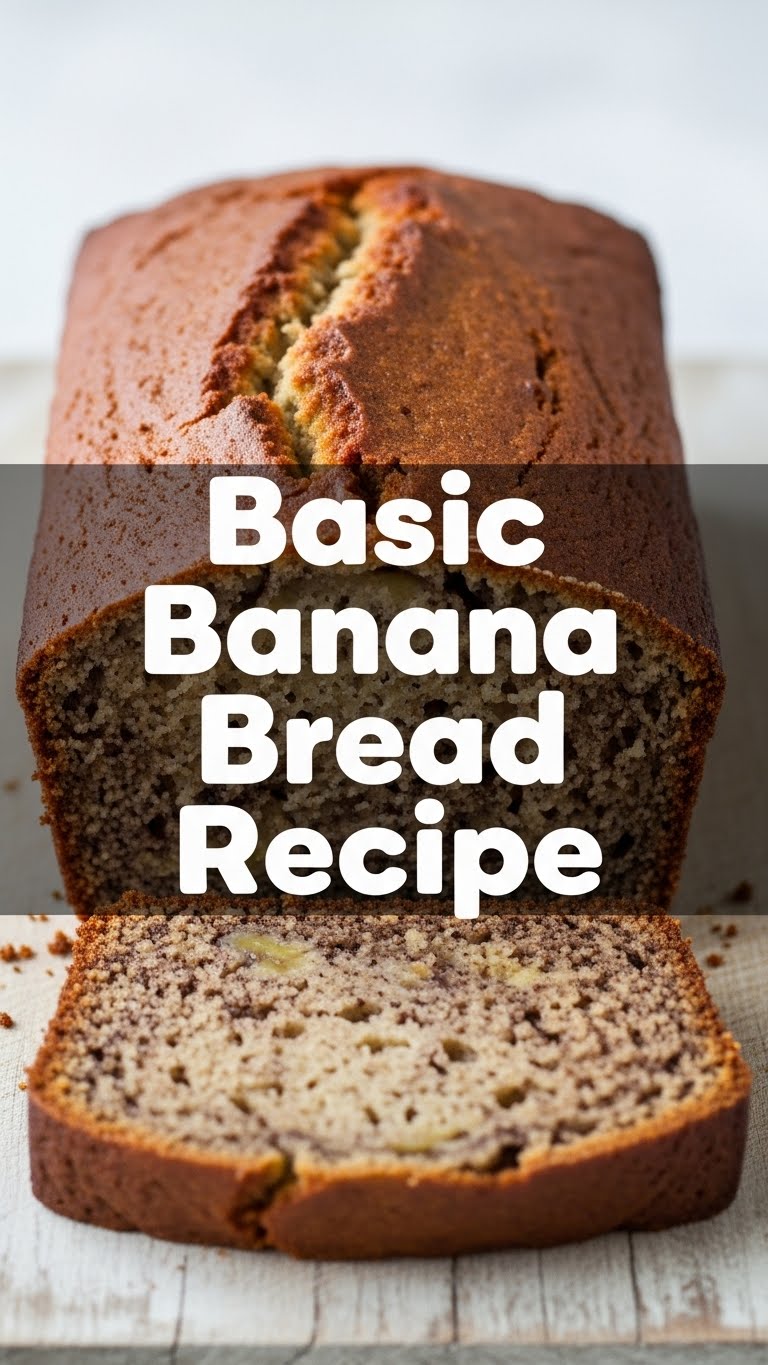
So you’re craving something warm, comforting, and packed with that sweet, banana-y goodness, but the thought of a complicated recipe makes you want to curl up with a bag of chips instead? Same, friend. You’ve landed in the right spot because we’re about to make some banana bread that’s so easy, you’ll wonder why you ever bought it from a bakery.
Why This Recipe is Awesome
Okay, let’s be real. This isn’t just *any* banana bread recipe. This is THE banana bread recipe for when you have a few sad-looking, spotty bananas on your counter judging you, and you suddenly feel a burst of culinary inspiration (or, let’s be honest, you’re just bored). It’s basically **idiot-proof**. Seriously, if I can pull this off without accidentally setting off the smoke detector, you definitely can. Plus, it uses super common ingredients you probably already have lurking in your pantry, meaning fewer trips to the grocery store. Win-win!
Ingredients You’ll Need
Gather your troops! No fancy equipment or exotic spices required. Just the good stuff.
- **3 ripe bananas:** The browner, the better! Think “almost questionable” bananas. Those are the superstars.
- **1/3 cup melted butter:** Unsalted, please. Or salted if that’s all you have and you live life on the edge.
- **1 teaspoon baking soda:** Our leavening MVP. Don’t skip it unless you want a banana brick.
- **Pinch of salt:** Balances everything out. Trust the process.
- **3/4 cup granulated sugar:** Or a little less if your bananas are basically candy.
- **1 large egg:** Room temperature if you’re feeling fancy, but straight from the fridge works too, IMO.
- **1 teaspoon vanilla extract:** Makes everything smell and taste like a dream.
- **1 1/2 cups all-purpose flour:** The backbone of our bread.
Step-by-Step Instructions
Alright, apron on, good vibes only. Let’s get baking!
- **Preheat Your Oven:** Set that baby to 350°F (175°C). Then, lightly grease and flour a 9×5 inch loaf pan. Nobody likes a stuck loaf, right?
- **Mash Those Bananas:** In a medium bowl, take your ripe bananas and mash ’em up with a fork. You want some lumps for texture, so don’t go full purée unless that’s your jam.
- **Mix in the Wet Stuff:** Add the melted butter, baking soda, and salt to the mashed bananas. Stir until they’re just combined.
- **Sweeten It Up:** Now, add the sugar, egg, and vanilla extract. Mix well until everything looks beautifully blended and smells amazing.
- **Fold in the Flour:** Gently add the flour to your wet ingredients. Mix just until combined. **Overmixing is the enemy here**, so stop as soon as you don’t see any dry streaks. Lumpy batter is happy batter!
- **Pour and Bake:** Pour your glorious batter into the prepared loaf pan. Pop it into your preheated oven and bake for 50-60 minutes.
- **Check for Doneness:** You’ll know it’s ready when a toothpick inserted into the center comes out clean or with just a few moist crumbs.
- **Cool it Down:** Let the banana bread cool in the pan for about 10 minutes before turning it out onto a wire rack to cool completely. Or, you know, eat it warm because who has that kind of patience?
Common Mistakes to Avoid
Let’s save you some heartache (and potentially burnt bread). Learn from my past kitchen mishaps!
- **Using under-ripe bananas:** Rookie mistake! Green bananas taste good on their own, but they won’t give your bread that sweet, deep banana flavor and moist texture. Embrace the brown spots!
- **Overmixing the batter:** This is a biggie. Mixing too much develops the gluten, leading to tough, dense bread. Mix until *just* combined, then back away from the spatula.
- **Not preheating your oven:** Seriously, don’t just shove it in there and hope for the best. A properly preheated oven ensures even baking from the get-go.
- **Cutting into it too soon:** I know, I know, the smell is intoxicating. But letting it cool a bit helps it set and prevents it from crumbling into a sad mess.
Alternatives & Substitutions
Feeling adventurous? Or just missing an ingredient? No stress, we got options!
- **Chocolate Chip Heaven:** Add 1/2 to 1 cup of chocolate chips (milk, dark, white – your call!) with the flour. Because chocolate makes everything better.
- **Nutty Professor:** Stir in 1/2 cup of chopped walnuts or pecans for a delightful crunch. Toast them beforehand for extra flavor!
- **Spice it Up:** A dash of cinnamon or nutmeg (about 1/2 teaspoon each) can add a lovely warm depth.
- **Butter Swap:** If you’re out of butter, vegetable oil or coconut oil can work in a pinch. The flavor will be slightly different, but it’ll still be delicious.
- **Sugar Choices:** Brown sugar can replace white sugar for a deeper, more molasses-like flavor. Yum!
FAQ (Frequently Asked Questions)
Got questions? I’ve got (mostly sarcastic) answers!
- **Can I use frozen bananas?** Absolutely! Just thaw them first, and don’t drain the liquid; that’s where all the good banana-y flavor lives.
- **My bananas aren’t ripe enough! Help!** Quick trick: bake them on a baking sheet at 300°F (150°C) for 15-30 minutes until they’re black and soft. Magic!
- **How do I store banana bread?** Keep it tightly wrapped at room temperature for up to 3 days, or in the fridge for up to a week. It also freezes beautifully for longer storage!
- **Can I make muffins instead?** You bet! Divide the batter into a greased muffin tin and bake for about 20-25 minutes. Hello, banana bread muffins!
- **Why is my banana bread dry?** Chances are you either overmixed the batter, used too much flour, or overbaked it. Remember, **less is more** when it comes to mixing and baking time!
- **Can I use margarine instead of butter?** Well, technically yes, but why hurt your soul (and your banana bread’s flavor) like that? Butter just tastes better, period.
Final Thoughts
See? That wasn’t so scary, was it? You just whipped up some amazing banana bread, and now your kitchen smells like a dream. Go on, slice yourself a thick piece, maybe slather it with some butter (or cream cheese, if you’re feeling fancy), and pat yourself on the back. You’ve earned it! Now go impress someone—or just yourself—with your new culinary skills. Happy baking, friend!

