
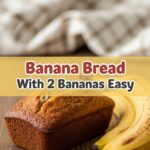
So you’re craving something tasty but too lazy to spend forever in the kitchen, huh? Or maybe you’ve got a pile of ridiculously brown bananas judging you from the counter, and you’re tired of making the same old quick bread. Hey, I get it. We’ve all been there. You want comfort, you want deliciousness, and you definitely want bragging rights without, you know, *actual* effort. Enter: Banana Yeast Bread. It’s like your favorite banana bread went to culinary school, got a little bougie, but still keeps it real.
Why This Recipe is Awesome
Okay, let’s be real. This isn’t just *another* banana bread recipe. This is the glow-up your sad, forgotten bananas deserve. Why is it awesome, you ask? Because it takes that classic, comforting banana flavor and elevates it with the soft, chewy texture only yeast can provide. It’s less cakey, more bready, and just ridiculously satisfying. It’s also pretty darn idiot-proof. I managed not to mess it up, and my track record in the kitchen can sometimes resemble a demolition derby. Plus, your house will smell like a warm hug, and honestly, isn’t that what we all need right now?
Ingredients You’ll Need
Gather ’round, my fellow kitchen adventurers! Here’s your treasure map to deliciousness. Nothing too crazy, promise!
- 2 ¼ teaspoons active dry yeast (One packet usually, unless you buy it in bulk like a total pro. Make sure it’s not expired, unless you like bread that doubles as a doorstop.)
- ¼ cup warm water (Around 105-115°F/40-46°C. Think baby bathwater, not lava.)
- ½ cup warm milk (Same temperature as the water. Any milk works, even the fancy oat stuff if you’re feeling plant-based.)
- ¼ cup unsalted butter, melted (Because butter makes everything better. Don’t fight me on this.)
- 1 large egg (Room temp if you’re feeling fancy, but straight from the fridge is usually fine.)
- 1 cup very ripe mashed bananas (We’re talking brown, spotty, almost black. The uglier, the better. This is where all the flavor lives, people!)
- ¼ cup granulated sugar (Just enough sweetness to make it happy, not overly sugary.)
- 1 teaspoon salt (Don’t skip it! It balances everything out and makes the banana flavor pop.)
- ½ teaspoon ground cinnamon (Optional, but highly recommended for that extra cozy vibe.)
- 3 to 3 ½ cups all-purpose flour (Start with 3, add more if needed. We’re going for a soft dough, not concrete.)
Step-by-Step Instructions
Alright, let’s get our hands dirty (in the best way possible)!
- Get your yeast party started: In a large bowl, sprinkle the yeast over the warm water. Give it a gentle stir and let it hang out for about 5-10 minutes. It should get nice and foamy, like a tiny yeast cappuccino. If it doesn’t, your yeast might be dead. RIP. Start over with fresh yeast!
- Combine the wet wonders: Into that same bowl with your frothy yeast, whisk in the warm milk, melted butter, egg, mashed bananas, sugar, salt, and cinnamon (if using). Give it a good swirl until everything is mostly combined.
- Introduce the flour: Gradually add 3 cups of the flour to the wet mixture, stirring with a wooden spoon or a sturdy spatula until a shaggy dough forms. If it’s still super sticky, add the remaining ½ cup of flour, a little at a time, until the dough comes together and is just slightly sticky.
- Knead it, baby: Turn the dough out onto a lightly floured surface. Knead for 5-7 minutes until it’s smooth and elastic. Don’t over-knead! We’re not trying to build biceps here, just develop some gluten. It should be soft and give a little bounce back when you poke it.
- First rise to glory: Lightly grease a clean bowl with a bit of oil. Pop your dough in, turn it once to coat, then cover the bowl with plastic wrap or a clean kitchen towel. Let it rise in a warm spot for 1 to 1 ½ hours, or until it’s doubled in size. This is where the magic happens, FYI.
- Shape it up: Gently punch down the dough to release the air. Turn it out onto a lightly floured surface and shape it into a loaf. The easiest way is usually to flatten it into a rectangle, then roll it up tightly from one of the long sides, pinching the seam closed.
- Second rise to fame: Place your beautifully shaped loaf into a lightly greased 9×5-inch loaf pan. Cover it again and let it rise for another 30-45 minutes, or until it’s puffed up nicely over the edge of the pan.
- Bake it ’til it’s golden: While your loaf is doing its second rise, preheat your oven to 375°F (190°C). Bake for 30-40 minutes, or until the top is golden brown and a thermometer inserted into the center reads 200-205°F (93-96°C). If it’s browning too fast, loosely tent it with foil.
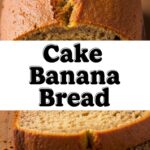
- Cool and devour: Let the bread cool in the pan for 10 minutes before turning it out onto a wire rack to cool completely. This part is crucial! Don’t cut into it while it’s hot, no matter how tempting. It needs to set.
Common Mistakes to Avoid
Listen up, buttercup! A few rookie blunders can turn your dream bread into a sad brick. Let’s not do that.
- Using under-ripe bananas: This is like showing up to a party early and awkwardly standing in a corner. The flavor just isn’t there yet. Seriously, wait for those black spots!
- Water too hot/cold for yeast: Too hot and you’ll kill the yeast (RIP). Too cold and it won’t activate. Aim for that perfect baby bathwater temp.
- Not letting it rise enough: Patience is a virtue, especially with yeast bread. If it doesn’t double, your bread will be dense and sad.
- Over-flouring: Adding too much flour makes for dry, tough bread. Start with the lower amount and add sparingly.
- Cutting it while hot: I know, I know. The smell is intoxicating. But trust me, you’ll regret it. The structure needs to set, or it’ll be gummy.
Alternatives & Substitutions
Feeling adventurous? Or just realized you’re missing an ingredient? No stress, we got options!
- Add-ins: Swirl in some chocolate chips (because, duh), chopped walnuts or pecans, or even a sprinkle of shredded coconut when you’re shaping the loaf.
- Flour Power: You can substitute up to half of the all-purpose flour with whole wheat flour for a nuttier, heartier loaf. Just know it might be a bit denser.
- Dairy-Free: Use your favorite non-dairy milk (almond, soy, oat) and a plant-based butter alternative. The texture might vary slightly, but it’ll still be delicious.
- Spice it up: Add a pinch of nutmeg or allspice along with the cinnamon for an even more complex flavor profile.
- Sweetener Swap: Brown sugar can be used instead of granulated sugar for a slightly deeper, more molasses-like flavor. IMO, it’s a great choice here!
FAQ (Frequently Asked Questions)
Got questions? I’ve got (mostly sarcastic) answers!
- Can I use yellow bananas instead of brown ones? Well, technically yes, but why would you want to hurt my feelings like that? The browner, the sweeter, the more flavorful. Trust the process!
- How do I know if my yeast is active? It’ll get bubbly and foamy on top of the warm water. If it just sits there looking bored, it’s likely dead. Time for a new packet!
- Do I *have* to knead the dough? Yes, unless you prefer a flat, crumbly mess. Kneading develops the gluten which gives the bread its structure and chewiness. It’s like a tiny dough massage!
- Why is my bread dense? Probably a few reasons: old/inactive yeast, not enough rise time, or you added too much flour. Don’t worry, even dense bread can be toasted and still be tasty.
- Can I make this gluten-free? It’s a bit tricky for yeast breads, as gluten is key for structure. You *can* try a 1:1 gluten-free flour blend, but results may vary wildly. Maybe master the regular version first, then get experimental!
- How long does this bread last? Stored in an airtight container at room temp, it’s good for 3-4 days. It also freezes beautifully for up to 3 months. Slice it before freezing for easy toast access!
- My bread browned too quickly on top. What gives? Your oven might run hot, or it was just a bit enthusiastic! Next time, loosely tent it with aluminum foil partway through baking.
Final Thoughts
And there you have it, folks! Your very own, incredibly delicious, conversation-starting Banana Yeast Bread. It’s proof that sometimes, the best things come from letting nature take its course (i.e., letting bananas go brown) and adding a little yeast-powered magic. So go ahead, tear into a slice, slather it with some butter, and congratulate yourself. You just made something truly spectacular. Now go impress someone—or yourself—with your new culinary skills. You’ve earned it!
