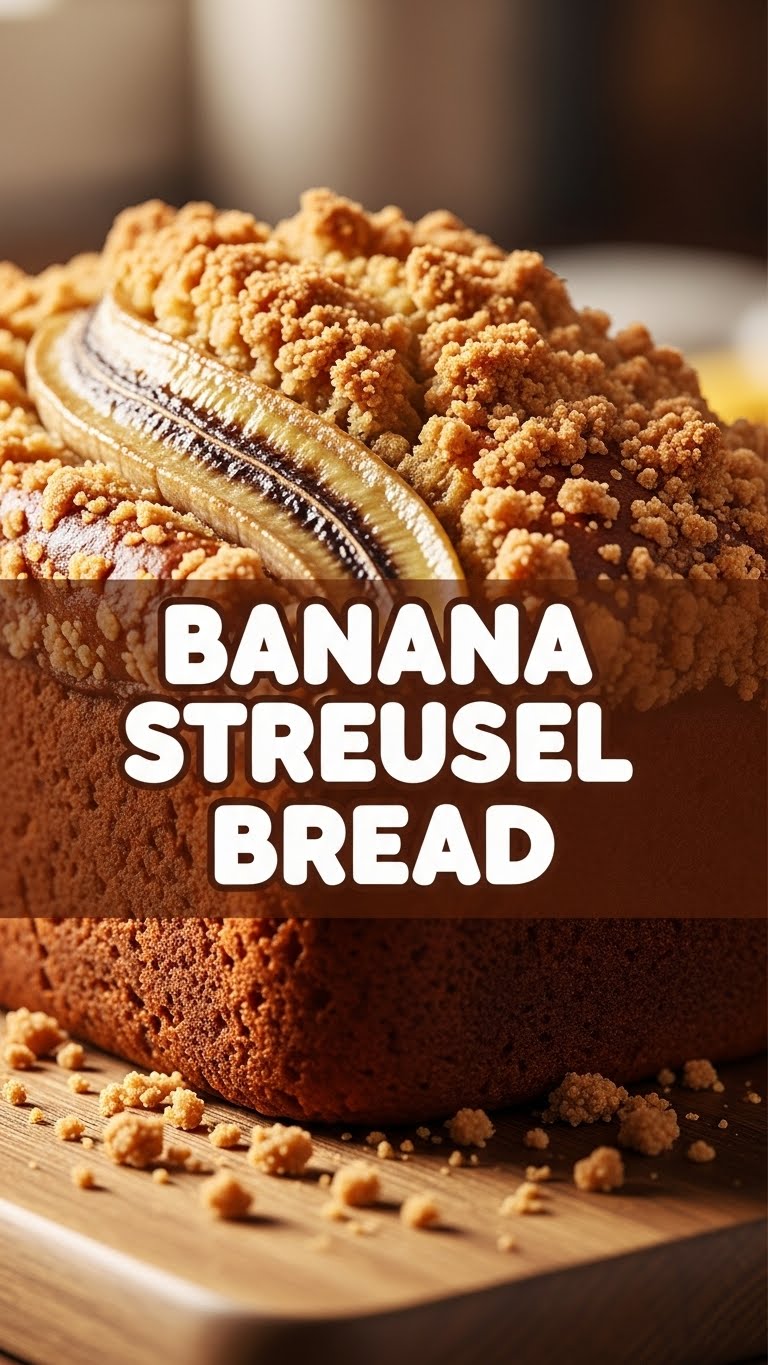
So you’re craving something tasty but too lazy to spend forever in the kitchen, huh? Same. And by “same,” I mean I’ve basically perfected the art of maximum flavor with minimum effort. Today, we’re diving headfirst into the glorious world of **Banana Streusel Bread**. Forget your basic banana bread; we’re giving it a glow-up with a crunchy, buttery streusel topping. Prepare your taste buds!
Why This Recipe is Awesome
Okay, let’s be real. There are a million banana bread recipes out there. But this one? This one is different. First, it’s got streusel, which is basically a fancy word for “butter and sugar crumbs that make everything better.” Second, it’s genuinely **idiot-proof**. And I say that with love, because if *I* can make it without setting off the smoke alarm (mostly), you can too. It’s moist, it’s flavorful, and it makes your house smell like a bakery decided to have a party. Plus, it’s a brilliant way to use up those sad, forgotten bananas on your counter before they stage a revolt.
Ingredients You’ll Need
Gather ’round, my fellow food adventurers! Here’s what you’ll need to conjure this magic. No fancy equipment, just basic pantry stuff.
For the Banana Bread Base:
- 1 ½ cups all-purpose flour: The backbone of our deliciousness.
- 1 teaspoon baking soda: Our fluffy-maker. Don’t skip it!
- ½ teaspoon salt: Balances everything out like a culinary tightrope walker.
- ½ cup (1 stick) unsalted butter: Melted and slightly cooled. The good stuff, not that weird spread.
- ¾ cup granulated sugar: Sweetness central.
- 1 large egg: Room temperature, if you’re feeling fancy (but don’t stress if you’re not).
- 1 teaspoon vanilla extract: Because everything is better with vanilla.
- 3-4 very ripe bananas: Mashed. And by “very ripe,” I mean practically black and squishy. The uglier, the better – seriously, don’t use pretty yellow ones! They’re for eating, not baking.
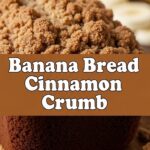
For the Streusel Topping:
- ¼ cup all-purpose flour: For crumbly goodness.
- ¼ cup packed light brown sugar: Adds a lovely caramel note.
- ½ teaspoon ground cinnamon: The perfect warm hug for bananas.
- 2 tablespoons cold unsalted butter: Cut into small cubes. This is key for those perfectly crumbly bits.
Step-by-Step Instructions
Alright, let’s get baking! Follow these simple steps, and you’ll be a banana bread streusel superstar in no time.
Preheat & Prep: First things first, preheat your oven to 350°F (175°C). Seriously, do it now. Lightly grease and flour a 9×5-inch loaf pan, or line it with parchment paper for easy removal. Trust me on the parchment; it’s a lifesaver.
Dry Mix Magic: In a medium bowl, whisk together the 1 ½ cups flour, baking soda, and salt. Give it a good whisk to make sure everything’s evenly distributed. Set this aside for a hot minute.
Wet Mix Wonders: In a larger bowl, mash those gloriously ugly ripe bananas with a fork until they’re mostly smooth, with a few small lumps if you like texture. Stir in the melted butter, granulated sugar, egg, and vanilla extract. Mix it until it’s just combined; don’t go crazy here.
Combine Forces: Pour the dry ingredients into the wet ingredients. Mix with a spatula or wooden spoon *just until combined*. And I mean *just*. A few streaks of flour are totally fine. Overmixing is the enemy of moist banana bread, FYI!
Streusel Time! In a small bowl, combine the ¼ cup flour, brown sugar, and cinnamon for the streusel. Add the cold butter cubes. Now, with your fingertips, a pastry blender, or even two forks, work the butter into the dry ingredients until you have coarse crumbs. It should look like sandy bits.
Assemble & Bake: Pour your banana bread batter into the prepared loaf pan. Sprinkle the streusel topping evenly over the batter. Pop it into your preheated oven.
Bake to Perfection: Bake for 50-65 minutes, or until a wooden skewer or toothpick inserted into the center comes out clean (or with just a few moist crumbs). If the streusel starts getting too dark, loosely tent the loaf with aluminum foil for the last 15-20 minutes of baking.
Cool Down (The Hardest Part): Let the bread cool in the pan on a wire rack for about 10-15 minutes. Then, carefully remove it from the pan and let it cool completely on the wire rack. Yes, completely. Resist the urge to slice into it immediately! It needs to set up. But hey, I won’t tell anyone if you snag a warm crumb or two.
Common Mistakes to Avoid
Even the pros make mistakes, but with a little heads-up, you can avoid these common banana bread blunders:
Using Under-Ripe Bananas: This is a cardinal sin. Green or yellow bananas won’t give you the sweetness or the texture you need. Your bread will taste like… well, less-sweet, less-banana-y sadness. **Embrace the brown spots!**
Overmixing the Batter: Remember when I said “just until combined”? I meant it. Overmixing develops the gluten in the flour, leading to a tough, dense, rubbery bread. Nobody wants rubber bread. So stop mixing when you see a few flour streaks!
Not Preheating the Oven: Rookie mistake. A cold oven messes with the baking time and the bread’s rise. Always preheat!
Cutting Too Soon: I know, it smells heavenly, and patience is a virtue you sometimes lack. But slicing hot bread can make it crumbly and hard to handle. Let it cool; it’s worth the wait.
Alternatives & Substitutions
Feeling creative? This recipe is super flexible! Here are a few ideas to shake things up:
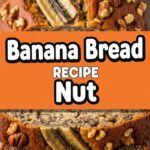
Nuts for Guts: Want some crunch in the bread itself? Fold in ½ cup of chopped walnuts or pecans with the dry ingredients. Or, add them to your streusel for an extra nutty topping.
Chocolate Lovers Unite: Everything’s better with chocolate, right? Stir in ½ cup of chocolate chips (milk, dark, or even white!) with the dry ingredients. You won’t regret it.
Spice It Up: A pinch of nutmeg or allspice in the batter can add another layer of warm flavor. Go wild!
Gluten-Free Swap: You can absolutely use a 1:1 gluten-free flour blend. The texture might be slightly different, but it’ll still be delicious. Always check the blend you’re using for specific recommendations.
Dairy-Free Option: Swap the butter for a good quality plant-based butter alternative. While butter is king IMO, a dairy-free version can work well!
FAQ (Frequently Asked Questions)
Got questions? I’ve got answers! (Mostly.)
Can I use frozen bananas? Absolutely! Just thaw them completely and drain any excess liquid. They’ll be super soft and perfect for mashing.
How ripe should my bananas really be? As ripe as you can stand! We’re talking brown spots galore, almost fully black. The riper they are, the sweeter and more flavorful your bread will be.
My streusel didn’t get crispy, what happened? It might have been too warm. Ensure your butter is cold when you cut it into the streusel mix. Also, check your oven temperature; sometimes ovens run a bit cool.
How do I store this deliciousness? Store leftover banana bread in an airtight container at room temperature for up to 3-4 days. You can also pop it in the fridge for up to a week, or freeze slices for longer-term enjoyment (up to 3 months!).
Can I make muffins instead of a loaf? Totally! Just divide the batter among 12-18 muffin cups (lined with paper liners). Reduce the baking time to about 20-25 minutes, or until a toothpick comes out clean.
Is this healthy? Honey, it’s got fruit! It’s practically a health food. (Disclaimer: I am not a nutritionist. But it’s delicious, and sometimes that’s all that matters.)
Final Thoughts
So there you have it! Your new go-to recipe for the most delightful, streusel-topped banana bread you’ve ever tasted. It’s easy, it’s forgiving, and it’s guaranteed to make you feel like a kitchen wizard. Now go impress someone—or yourself—with your new culinary skills. You’ve earned it! Seriously, go make some. Your future self (and stomach) will thank you. Happy baking!
