So you’re craving something tasty, legitimately healthy-ish, but too lazy to spend forever in the kitchen, huh? And maybe you have a few *ahem* ‘well-loved’ bananas sitting on your counter giving you the side-eye? Same, friend, same. Get ready to turn those spotted fellas into pure, unadulterated, guilt-free bliss: Banana Ice Cream with Fruit! It’s basically magic, but without the complicated spells.
Why This Recipe is Awesome
Let me count the ways this recipe will become your new best friend. First off, it’s about as **idiot-proof** as a recipe can get. Seriously, I’ve made this on days when my brain felt like a deflated balloon, and it still turned out amazing. You need, like, two main ingredients. *Two!* It’s also incredibly fast. We’re talking “satisfy your craving before you scroll through half your social media feed” fast. Plus, it’s naturally sweet, dairy-free (unless you decide otherwise, you rebel), and packed with fruit. So you can totally justify having it for breakfast, lunch, dinner, or, let’s be real, all of the above. It’s the kind of healthy treat that doesn’t *feel* healthy, and **IMO**, that’s the holy grail of desserts.
Ingredients You’ll Need
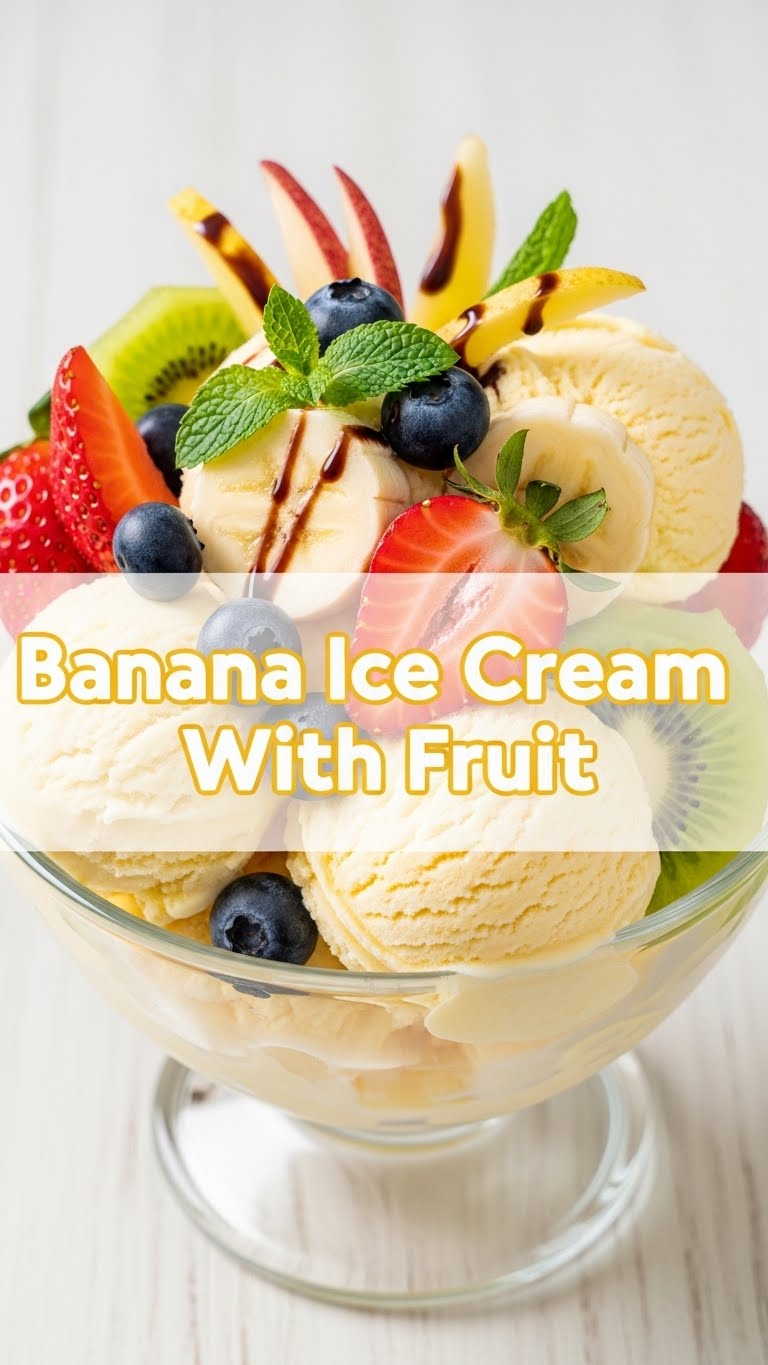
- **3-4 Ripe Bananas:** The uglier, the better! We’re talking serious brown spots. Those are the sweetest ones, trust me. Peel them, then chop them into coin-sized pieces.
- **1 cup (about 150g) Frozen Fruit:** Whatever your heart desires! Mixed berries, sliced mango, cherries, pineapple chunks – pick your fighter. This adds flavor, color, and extra chill.
- **Optional Splash of Liquid (1-2 tablespoons max):** Milk (dairy or non-dairy like almond, oat, soy), water, or a tiny bit of fruit juice. Just in case your blender needs a little nudge.
- **Optional Add-ins (for extra flair):**
- A tiny dash of vanilla extract
- A tablespoon of cocoa powder (hello, chocolate banana heaven!)
- A spoonful of nut butter (peanut, almond, cashew – take your pick!)
- A sprinkle of mini chocolate chips or shredded coconut for serving (because why not?)
Step-by-Step Instructions
- **Freeze Those Bananas Solid:** This is crucial. After you’ve peeled and chopped your ripe bananas, spread them out on a baking sheet lined with parchment paper or a silicone mat. Pop them in the freezer for at least **2-3 hours**, or until they’re rock solid. You can even do this overnight!
- **Blend the Bananas:** Transfer the frozen banana chunks to a sturdy food processor or a high-powered blender. Start blending! It might look crumbly and like nothing is happening at first. Don’t panic; this is normal. Keep scraping down the sides.
- **Scrape and Scrape Again:** The mixture will go from crumbly to a thick, soft-serve consistency. It will look like lumpy soft-serve, then eventually smooth out. If it’s really struggling, add that tiny splash (and I mean *tiny*, like 1 tablespoon at a time) of your chosen liquid to help it along. You’re looking for creamy perfection here!
- **Add Your Fruit & Blend (Lightly!):** Now, toss in your cup of frozen fruit. Blend again, but this time, just until the fruit is incorporated and swirled throughout. You want swirls, not a fully homogenous smoothie. This adds amazing texture and bursts of flavor.
- **Serve Immediately or Store:** Spoon your glorious banana ice cream into bowls and dig in! This is when it’s at its absolute best. If you have any leftovers (unlikely, but hey), you can transfer it to an airtight container and freeze it for later. Just know it might harden quite a bit, so you’ll want to let it thaw for 10-15 minutes before scooping.
Common Mistakes to Avoid
- **Not Freezing Bananas Enough:** This isn’t a suggestion, it’s a command! If your bananas aren’t frozen solid, you’ll end up with a banana smoothie, not ice cream. Rookie mistake.
- **Adding Too Much Liquid:** You’re not making a milkshake! A small splash is fine if your blender is protesting, but more than 2 tablespoons will turn your ice cream into soup. **Be stingy with the liquid.**
- **Trying to Blend *All* the Fruit Together Initially:** While you can blend some fruit in from the start, adding most of your frozen fruit later helps maintain that gorgeous swirled look and stops the whole mixture from becoming a single-colored, dense block.
- **Using Unripe Bananas:** Green-ish bananas just won’t cut it. They lack the natural sweetness and creamy texture that ripe, spotty bananas bring to the party. Save those for banana bread if you must.
Alternatives & Substitutions
This recipe is super flexible, like a really chill yoga instructor. Don’t have bananas? Well, then it’s not *banana* ice cream, but you can still make a similar “nice cream” with other frozen fruits like mango or a mix of berries. Just know the texture will be a bit different. As for the additional fruit, literally anything frozen works! Blackberries, raspberries, peaches – **FYI**, they all bring their own delicious vibe. Want a richer flavor? Swap that optional milk for a spoonful of full-fat coconut cream (the thick stuff from a can, refrigerated). Or, for a protein boost, add a scoop of your favorite protein powder along with your bananas. The world is your oyster… or, in this case, your fruit bowl!
FAQ (Frequently Asked Questions)
Can I use fresh bananas instead of frozen?
Well, technically yes, but why hurt your soul like that? You’ll just get a very thick smoothie, not ice cream. The freezing is what gives it that glorious, creamy texture!
Do I need a fancy high-speed blender?
A good food processor works like a dream for this! If you have a regular blender, you might need to stop, scrape, and pulse a bit more often, and definitely use that tiny splash of liquid. It’ll get there, just with a little more effort.
How long does it last in the freezer?
It’s truly best eaten fresh, right after blending, for that perfect soft-serve consistency. If you refreeze it, it’ll become quite hard, like traditional ice cream. It’ll keep for a couple of weeks, but you’ll need to let it sit out for 10-15 minutes to soften before scooping.
Can I add extra sweetener?
Ripe bananas are super sweet on their own! But if you have an extra sweet tooth, a drizzle of maple syrup or honey (a teaspoon or two) while blending wouldn’t hurt. Taste it first, though!
Is this *really* ice cream?
Look, it walks like ice cream, it talks like ice cream, and it definitely tastes like a lighter, fruitier, healthier version of ice cream. So yes, for all intents and purposes, it’s ice cream. No need to get technicalities involved when deliciousness is on the line!
What if my mixture is too thick to blend?
Patience, young grasshopper! And a tiny, tiny splash of liquid. Literally a tablespoon at a time. Scrape down the sides constantly. It will eventually catch.
What if my mixture is too thin/soupy?
Uh oh! You probably added too much liquid or your bananas weren’t frozen solid enough. Pop the soupy mixture back in the freezer for 30 minutes to an hour, then try blending again. Lesson learned!
Final Thoughts
There you have it! A ridiculously easy, unbelievably tasty, and surprisingly healthy dessert that will make you feel like a culinary genius (even if your only other achievement today was remembering to put on pants). Now go impress someone – or, more importantly, yourself – with your new banana nice cream skills. You’ve earned this deliciously simple treat! Enjoy every guilt-free spoonful!


