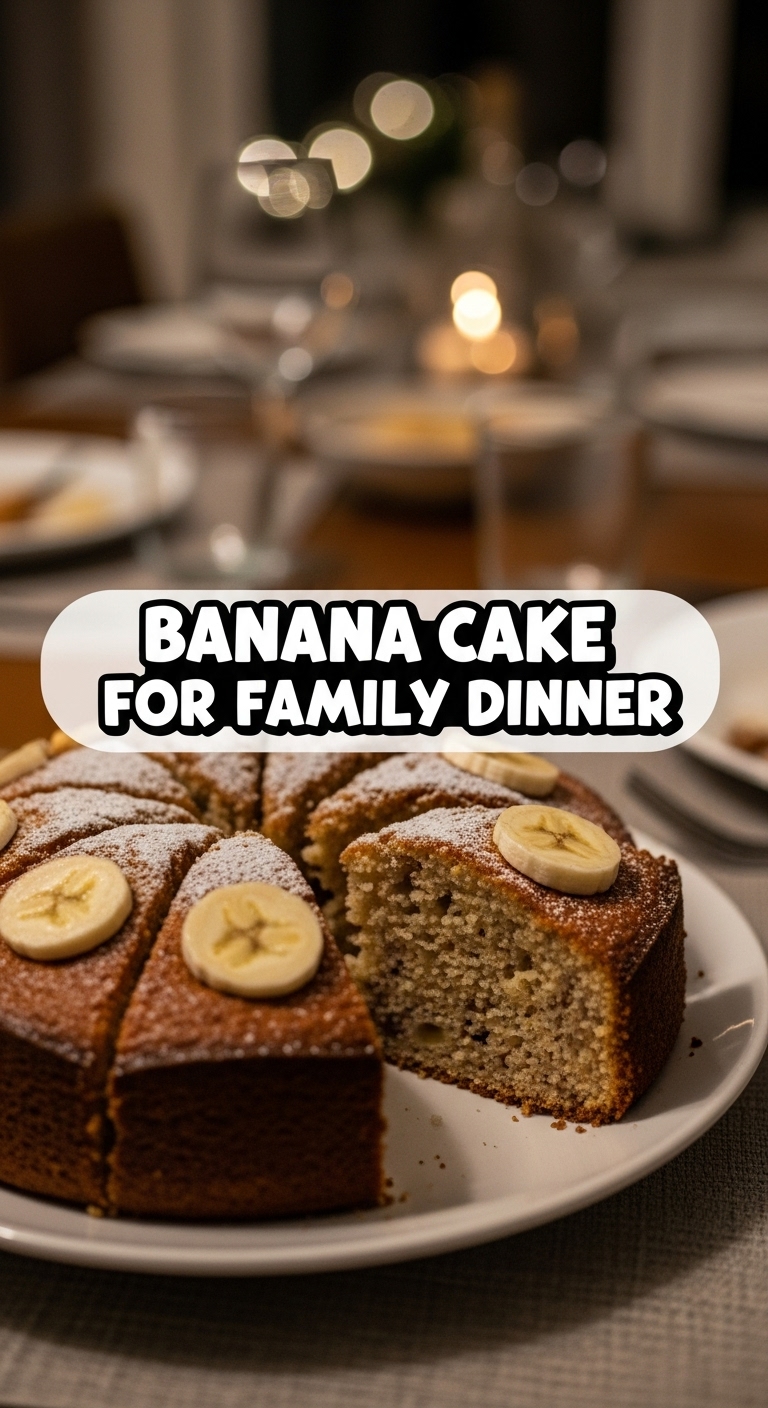
Got some sad, spotty bananas lounging on your counter, giving you the side-eye? Don’t even THINK about tossing them! They’re not past their prime; they’re just… *experienced*. And experienced bananas are exactly what we need for today’s mission: whipping up a banana cake so good, your family will think you secretly enrolled in pastry school. Or, you know, just got really good at following instructions. 😉
Why This Recipe is Awesome
Okay, let’s be real. We all want to be domestic goddesses/gods without actually, well, *trying* too hard. This banana cake recipe? It’s your secret weapon. It’s **idiot-proof**. And I say that with love, because even I, a person whose kitchen sometimes resembles a post-apocalyptic food fight, have nailed this. It’s moist, it’s flavourful, and it magically transforms those neglected brown bananas into pure, unadulterated joy. Plus, it makes your house smell like a warm hug, which is a definite bonus, IMO.
Ingredients You’ll Need
Gather ’round, my fellow lazy gourmands! Here’s what you’ll need for this culinary masterpiece. Don’t worry, nothing too fancy here.
- 3-4 medium overripe bananas: The browner, the better! We’re talking “almost-compost” brown. This is where all the flavour lives.
- 1 ½ cups all-purpose flour: The backbone of our operation.
- 1 teaspoon baking soda: Our magical leavening agent. Gives it that fluffy lift!
- ¼ teaspoon salt: Just a pinch to balance the sweetness and make everything *pop*.
- ½ cup (1 stick) unsalted butter, softened: Because everything’s better with butter, duh. Softened is key here!
- ¾ cup granulated sugar: Sweetness, glorious sweetness.
- 1 large egg: Our trusty binder.
- 1 teaspoon vanilla extract: The unsung hero, adding that warm, comforting note.
- 2 tablespoons milk (optional): Just a splash if your batter feels a bit too thick, but usually not needed.
Step-by-Step Instructions
- Preheat & Prep: First things first, crank that oven to 350°F (175°C). Then, grab an 8×8 or 9×5 inch loaf pan, grease it like you’re prepping for a slippery otter race, and dust with flour. Or line with parchment paper if you’re feeling fancy.
- Mash ‘Em Up: In a medium bowl, mash those gloriously ugly bananas with a fork until they’re mostly smooth but still have a few small lumps. We like texture! Set ’em aside.
- Dry Mix Magic: In a separate bowl, whisk together your flour, baking soda, and salt. This ensures everything is evenly distributed, so no weird pockets of salt or baking soda, capiche?
- Creamy Dreamy: In a larger bowl (or your stand mixer if you’re feeling energetic), cream the softened butter and sugar together until it’s light and fluffy. This takes about 2-3 minutes. Don’t rush it!
- Egg & Vanilla Party: Beat in the egg until just combined, then stir in the vanilla extract. Scrape down the sides of the bowl to make sure everything’s incorporated.
- Combine & Conquer: Gradually add your dry ingredient mixture to the wet mixture, mixing until just combined. **Do not overmix!** A few flour streaks are totally fine; overmixing leads to tough cake, and nobody wants that.
- Banana Time! Gently fold in your mashed bananas. If your batter seems a little too thick, add a tablespoon or two of milk.
- Bake It Up: Pour the batter into your prepared pan and smooth the top. Pop it into the preheated oven for 45-55 minutes. A toothpick inserted into the center should come out clean (or with a few moist crumbs, but no wet batter).
- Cool Down: Let the cake cool in the pan for about 10 minutes before carefully inverting it onto a wire rack to cool completely. Patience is a virtue here, my friend.
Common Mistakes to Avoid
Listen, we’ve all been there. Here’s a quick list of rookie errors to sidestep:
- Not preheating the oven: Seriously, this isn’t a suggestion, it’s a command! An un-preheated oven leads to sad, unevenly baked cake.
- Using underripe bananas: If your bananas are still yellow, put them back on the counter and wait. You need those glorious brown spots for max sweetness and flavour.
- Overmixing the batter: This is a biggie! Once the flour goes in, mix until *just* combined. Too much mixing develops the gluten, making your cake tough and chewy instead of tender and moist.
- Opening the oven door too soon: Resist the urge to peek! Especially in the first 30 minutes, this can cause your cake to deflate.
- Not letting it cool: I know, I know, the smell is intoxicating. But cutting into a hot cake means it might fall apart and won’t have the best texture. Give it time, you deserve a perfectly cooled slice!
Alternatives & Substitutions
Feeling adventurous? Or just missing an ingredient? No stress, I got you!
- Add-ins: **Chocolate chips** are always a good idea (dark or milk, your call!). Walnuts or pecans add a nice crunch. A sprinkle of cinnamon or nutmeg can enhance the banana flavour too. Just fold in about ½ to 1 cup with the bananas.
- Sugar Swap: You can swap half or all of the granulated sugar for brown sugar for a deeper, more caramel-like flavour. Delicious!
- Butter Alternative: In a pinch, you can use vegetable oil or melted coconut oil instead of butter. The texture might be slightly different (a bit denser), but it’ll still be tasty. (Though, IMO, butter wins every time!)
- Dairy-Free: Use a plant-based butter alternative and plant-based milk (if using). Easy peasy.
FAQ (Frequently Asked Questions)
Because you’ve got questions, and I’ve got (casual) answers!
- “Can I use yellow bananas if I’m impatient?” Well, technically you *could*, but why hurt your soul like that? Yellow bananas aren’t sweet enough and won’t give you that deep, rich banana flavour. Wait for the spots, trust me!
- “My cake looks really brown on top, but the middle isn’t done. Help!” No worries! Loosely tent some aluminum foil over the top of the cake for the remainder of the baking time. It’ll prevent burning while the inside catches up.
- “Can I make this into muffins instead?” Absolutely! Divide the batter into a greased muffin tin. Bake for about 20-25 minutes, or until a toothpick comes out clean. Hello, breakfast!
- “How do I store leftover banana cake?” If there *are* leftovers (a big if!), store it tightly wrapped at room temperature for up to 3 days, or in the fridge for up to a week. It also freezes beautifully for up to 3 months!
- “What about frosting? Should I?” If you want to elevate this from “awesome” to “holy moly,” a simple cream cheese frosting is always a winner. But honestly, this cake is perfect on its own.
Final Thoughts
And there you have it, folks! Your very own, incredibly delicious banana cake, made with minimal fuss and maximum flavour. You just took those neglected bananas and turned them into a family dinner showstopper. Now go impress someone—or just yourself—with your new culinary skills. You’ve earned it! Grab a slice, maybe a cuppa, and bask in the glory of your baking prowess. You’re basically a professional, FYI. 😉


