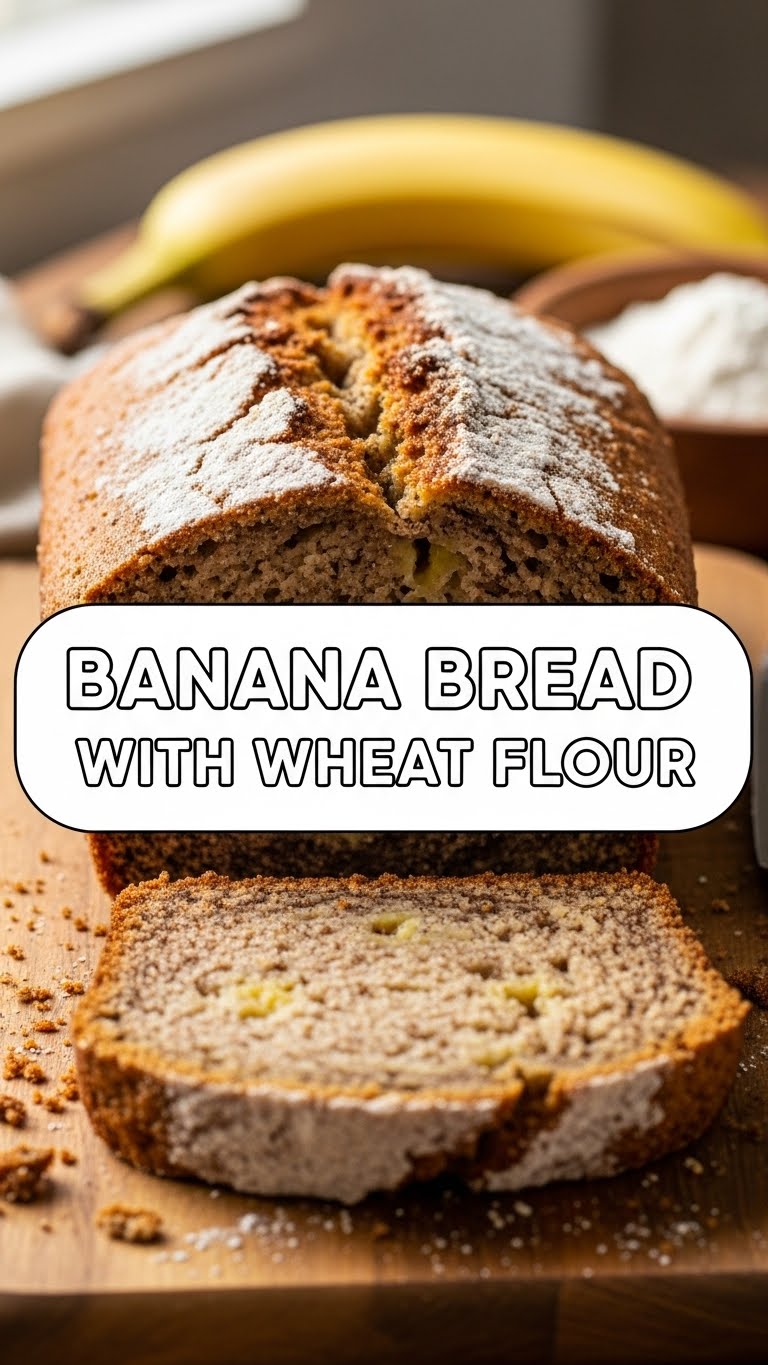
So your bananas have gone rogue on your counter, looking less like fruit and more like a science experiment? Perfect! We’re making banana bread, baby, and it’s gonna be epic. Forget those fancy patisserie vibes; this is about delicious, soul-hugging goodness that’s surprisingly easy. You’re in for a treat!
Why This Recipe is Awesome
Okay, let’s be real. You want delicious banana bread, but you also want to prove you’re an adult who can bake without setting off the smoke detector. This recipe? It’s your secret weapon. It’s so **fool-proof**, even your pet goldfish could probably guide you through it. Plus, we’re sneaking in some whole wheat flour, so you can totally tell yourself it’s practically a health food. Win-win!
It’s quick, uses up those sad-looking bananas, and fills your home with the kind of smell that makes people think you’ve got your life together. Spoiler alert: you probably still don’t, but the banana bread will be a delicious distraction.
Ingredients You’ll Need
Gather ’round, buttercups! Here’s your shopping list for impending deliciousness:
- The Bananas: 3-4 ripe bananas (the ones that look like they’ve seen better days, aka perfect for baking. Don’t even *think* about using yellow ones!)
- The Flour Power: 1 ½ cups whole wheat flour (for that wholesome vibe, and so you can justify eating three slices. FYI, it adds a lovely nutty flavor!)
- Sweet Dreams: ¾ cup granulated sugar (or less if your sweet tooth is on vacation, or a bit more if it’s throwing a party. Your call!)
- The Good Stuff: ½ cup unsalted butter, melted (because everything’s better with butter, *amirite*?).
- The Binder: 1 large egg (the glue that holds our dreams together).
- Flavor Boosters: 1 teaspoon vanilla extract (don’t skip this, it’s the Beyoncé of flavors).
- Magic Poof-Maker: 1 teaspoon baking soda (our little secret to a fluffy loaf).
- The Balancer: ½ teaspoon salt (to make all those sweet flavors sing).
- Optional Mix-ins: ½ cup chocolate chips or chopped nuts (because why not live a little? Walnuts or pecans are classic!).
Step-by-Step Instructions
- **Prep Time:** First things first, preheat that oven to 350°F (175°C). Seriously, don’t skip this. While it’s getting cozy, grease and flour a 9×5 inch loaf pan. Or line it with parchment paper if you’re feeling fancy.
- **Mash ‘Em Up:** In a medium bowl, go full Hulk on your ripe bananas. Mash them until they’re mostly smooth but a few lumps are totally okay. Adds character, right?
- **Wet Ingredients Party:** Add the melted butter, sugar, beaten egg, and vanilla extract to your mashed bananas. Stir ’em all up until they’re just combined. Don’t overmix, we’re not making cement.
- **Dry Ingredients Join In:** In a separate bowl, whisk together your whole wheat flour, baking soda, and salt. Make sure there are no lumpy surprises.
- **Combine Forces:** Gently fold the dry ingredients into the wet ingredients. Mix until *just* combined. A few streaks of flour are fine. This is a **no-overmixing zone**, folks, unless you want tough banana bread.
- **Optional Goodies:** If you’re adding chocolate chips or nuts, now’s the time! Fold them in with a light hand.
- **Into the Pan:** Pour the batter into your prepared loaf pan. Give it a gentle tap on the counter to settle any air bubbles.
- **Bake It Up:** Bake for 50-60 minutes, or until a toothpick inserted into the center comes out clean. **Keep an eye on it** after 45 minutes; ovens have personalities.
- **Cool Down:** Let it cool in the pan for about 10 minutes (patience, young padawan!). Then, carefully transfer it to a wire rack to cool completely. Or, you know, eat a warm slice right away. I won’t tell.
Common Mistakes to Avoid
Nobody’s perfect, but we can avoid some classic banana bread blunders, shall we?
- **Underripe Bananas:** Using yellow bananas with green tips. Seriously? Those aren’t ripe enough! You want those spotted, almost black beauties for maximum banana-y goodness. Rookie mistake, trust me.
- **Overmixing the Batter:** Stirring the batter like you’re churning butter for hours. Stop! Overmixing develops gluten, which leads to tough, chewy bread instead of that moist, tender crumb we’re aiming for. Mix *just* until combined, capiche?
- **Not Greasing the Pan Properly:** Thinking your non-stick pan is magic and doesn’t need a little love. It does. Or you’ll be wrestling your banana bread out in pieces. **Don’t skimp on the grease**!
- **Opening the Oven Door Too Early:** Peeking every five minutes. The oven gods are watching. Keep that door closed, especially in the first 30-40 minutes, or your bread might sink. Trust the process!
Alternatives & Substitutions
Feeling adventurous or just out of an ingredient? No stress, we got you covered!
- **Flour Power:** Feeling even healthier? You can totally swap some of the whole wheat flour for oat flour or even a gluten-free blend, but the texture might be a little different. IMO, whole wheat gives it a lovely nutty depth.
- **Sweet Swaps:** Instead of granulated sugar, try brown sugar for a deeper, molasses-y flavor. Or reduce the sugar and add a splash of maple syrup or honey, if you’re feeling adventurous (and don’t mind a slightly wetter batter).
- **Butter Alternatives:** Melted coconut oil or a neutral oil like canola or vegetable oil work just fine if you’re out of butter. The flavor will be subtly different, but still delicious.
- **Mix-in Madness:** No chocolate chips? No problem! Walnuts, pecans, shredded coconut, dried cranberries, or even a sprinkle of cinnamon and nutmeg are all fair game. Get creative!
FAQ (Frequently Asked Questions)
- My bananas aren’t ripe enough! What do I do? Impatience is a virtue, sometimes! You can bake them (unpeeled) on a baking sheet at 300°F (150°C) for 15-20 minutes until they’re black and soft. Or just wait. Good things come to those who wait, *and* those who bake their bananas.
- Can I use all-purpose flour instead of whole wheat? Absolutely! The texture will be a bit lighter, and it’ll still be delish. But hey, we’re trying to be *slightly* wholesome here, right? Just use the same amount.
- How do I know if it’s cooked all the way through? The toothpick test, my friend! Stick a toothpick into the very center of the loaf. If it comes out clean (no wet batter), you’re golden. If it’s gooey, give it another 5-10 minutes.
- How long does this banana bread last? In my house? About an hour. Kidding! It’ll stay fresh at room temperature, tightly wrapped, for 2-3 days. In the fridge, it’ll last up to a week. And it freezes beautifully for up to 3 months. Future you will thank present you.
- Can I add spices? Heck yes! A teaspoon of cinnamon, half a teaspoon of nutmeg, or a pinch of cloves would make this even cozier. Spice it up!
- My banana bread sank in the middle! What went wrong? Oh no, the dreaded banana bread collapse! Usually, this means it was underbaked, or you opened the oven door too many times during baking, causing it to deflate. Also, too much leavening can sometimes be the culprit. Next time, **bake a little longer** and resist the urge to peek!
Final Thoughts
See? I told you this was easy peasy banana squeezy! You’ve just whipped up a loaf of wholesome, delicious banana bread that smells like pure happiness. Go ahead, cut yourself a fat slice (or two!), brew some coffee, and pat yourself on the back. You’re basically a master baker now. Now go impress someone—or yourself—with your new culinary skills. You’ve earned it!

