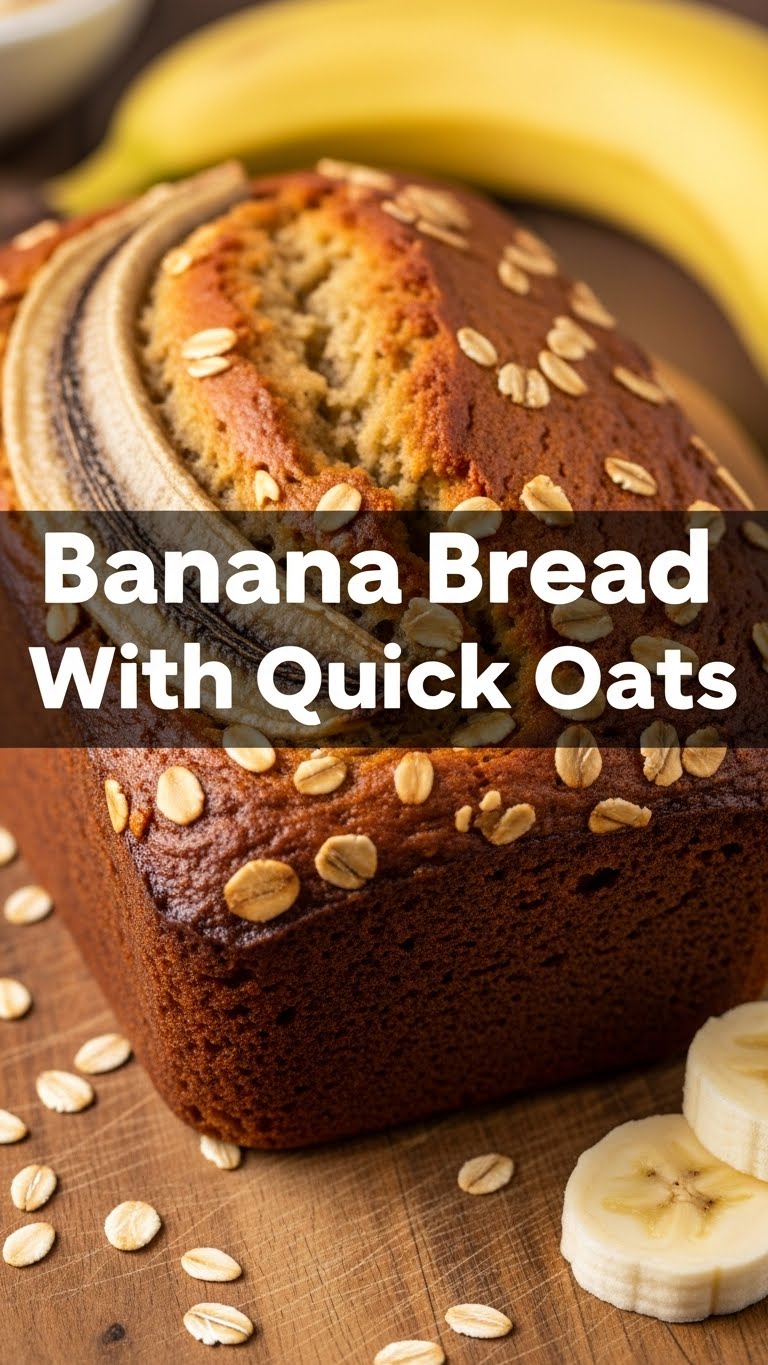
Banana Bread With Quick Oats: Because Adulting is Hard, But Baking Doesn’t Have to Be.
So you’re craving something tasty but too lazy to spend forever in the kitchen, huh? Same. Life’s too short for complicated recipes when you’ve got perfectly ripe bananas staring you down, silently judging your procrastination. Enter this banana bread. It’s the culinary equivalent of a cozy blanket and a good Netflix binge – comforting, easy, and guaranteed to make you feel like a domestic goddess, even if your yoga pants have seen better days. Let’s get this bread (pun intended).
Why This Recipe is Awesome
Honestly, this recipe is pretty darn awesome. For starters, it uses quick oats, which means less fuss and a slightly chewier, more robust texture than your average banana bread. It’s also practically foolproof. I’m talking “I-forgot-to-read-the-whole-recipe-before-I-started” foolproof. Plus, it’s a fantastic way to use up those browning bananas that are threatening to become compost. Think of it as edible recycling. You’re basically saving the planet, one delicious loaf at a time. And who doesn’t love that?
Ingredients You’ll Need
Here’s the lowdown on what you’ll need to whip up this magic:
- 3 ripe bananas, the mushier the better. Seriously, if they’re still yellow, you’re doing it wrong.
- 1/3 cup melted butter (or, you know, whatever butter you have lurking in the fridge. No judgment here).
- 1/2 cup granulated sugar (for that touch of sweetness that screams “I’m an adult who can bake”).
- 1 large egg, preferably not from a dinosaur.
- 1 teaspoon vanilla extract, the magical potion of baked goods.
- 1 cup all-purpose flour, your trusty baking sidekick.
- 1/2 cup quick oats, the secret weapon for texture.
- 1 teaspoon baking soda, because we don’t want a sad, flat bread.
- 1/2 teaspoon salt, to make all those flavors pop!
- Optional: 1/2 cup chopped nuts or chocolate chips. Because life is too short to say no to chocolate.
Step-by-Step Instructions
Alright, apron on (or don’t, who am I to judge?). Let’s make some bread:
- Preheat your oven to 350°F (175°C). Grease and flour a 9×5 inch loaf pan. This is crucial, unless you enjoy the taste of burnt bread glued to your pan.
- In a large bowl, mash those sad, overripe bananas until they’re practically soup. Get those lumps out, unless you *like* banana surprises.
- Stir in the melted butter, sugar, egg, and vanilla extract. Whisk it all together until it looks like a happy, sweet concoction.
- In a separate bowl, whisk together the flour, quick oats, baking soda, and salt. This is where the dry magic happens.
- Add the dry ingredients to the wet ingredients. **Mix until just combined.** Overmixing is the enemy of tender banana bread. Seriously, don’t go all Hulk on it.
- If you’re feeling fancy, **fold in those nuts or chocolate chips.** Or both. I won’t tell.
- Pour the batter into your prepared loaf pan. Spread it evenly so you don’t have weird banana mountain peaks.
- Bake for 50-60 minutes, or until a toothpick inserted into the center comes out clean. If it comes out gooey, give it a few more minutes. Patience, grasshopper.
- Let the bread cool in the pan for 10 minutes before turning it out onto a wire rack to cool completely. This is the hardest part, I know.
Common Mistakes to Avoid
Let’s be real, we’ve all been there. But let’s try to steer clear of these common pitfalls:
- Using underripe bananas: This is like trying to build a house with wet sand. It just won’t work.
- Overmixing the batter: Seriously, guys, **”just combined” means just combined.** Don’t be a hero.
- Not preheating the oven: This is a cardinal sin. Your bread will be pale, sad, and possibly raw.
- Opening the oven door too much: Let the bread do its thing! Every peek causes temperature fluctuations, and nobody wants a deflated bread situation.
- Cutting it too soon: It’s torture, I know, but letting it cool makes it sliceable and less likely to crumble into banana-y dust.
Alternatives & Substitutions
Feeling a bit rebellious? Go for it!
- Butter: Coconut oil or vegetable oil works too. Just remember, it’s not quite the same cozy richness.
- Sugar: Brown sugar will give it a more caramelly flavor. Honey or maple syrup? Sure, but you might need to adjust the liquid a bit.
- Nuts/Choco Chips: Dried cranberries, blueberries, or even a sprinkle of cinnamon on top are all delicious. Get creative!
- No quick oats? Rolled oats are fine, but they might make the bread a little denser. If you’re feeling ambitious, pulse them in a food processor a few times to break them down a bit.
FAQ (Frequently Asked Questions)
Q: My bananas are practically liquid. Is that okay?
A: Oh, honey, that’s PERFECT. The mushier, the better for banana bread. It means more flavor and more moisture!
Q: Can I add more sugar? I have a sweet tooth the size of Texas.
A: Technically, yes. But you risk making it overly sweet and potentially affecting the texture. Proceed with caution, my friend.
Q: My bread is browning too quickly on top. What gives?
A: Ah, the dreaded premature browning! Loosely tent the loaf with aluminum foil for the last 15-20 minutes of baking. It’s like a little bread blanket to protect it.
Q: I don’t have a loaf pan. Can I use a muffin tin?
A: Absolutely! Just reduce the baking time to about 20-25 minutes. Keep an eye on them; they bake up fast!
Q: How long does this banana bread last?
A: It’s best eaten within 2-3 days at room temperature, nicely wrapped. But let’s be honest, it probably won’t last that long.
Q: Can I freeze it?
A: YES! Once completely cooled, wrap it tightly in plastic wrap, then foil. It’ll last for about 2-3 months. Thaw at room temp or gently warm in the oven.
Final Thoughts
And there you have it! A ridiculously easy and delicious banana bread that’ll make you feel like a baking pro. Don’t stress, have fun with it, and most importantly, enjoy every single bite. Now go impress someone—or yourself—with your new culinary skills. You’ve earned it! Happy baking!
