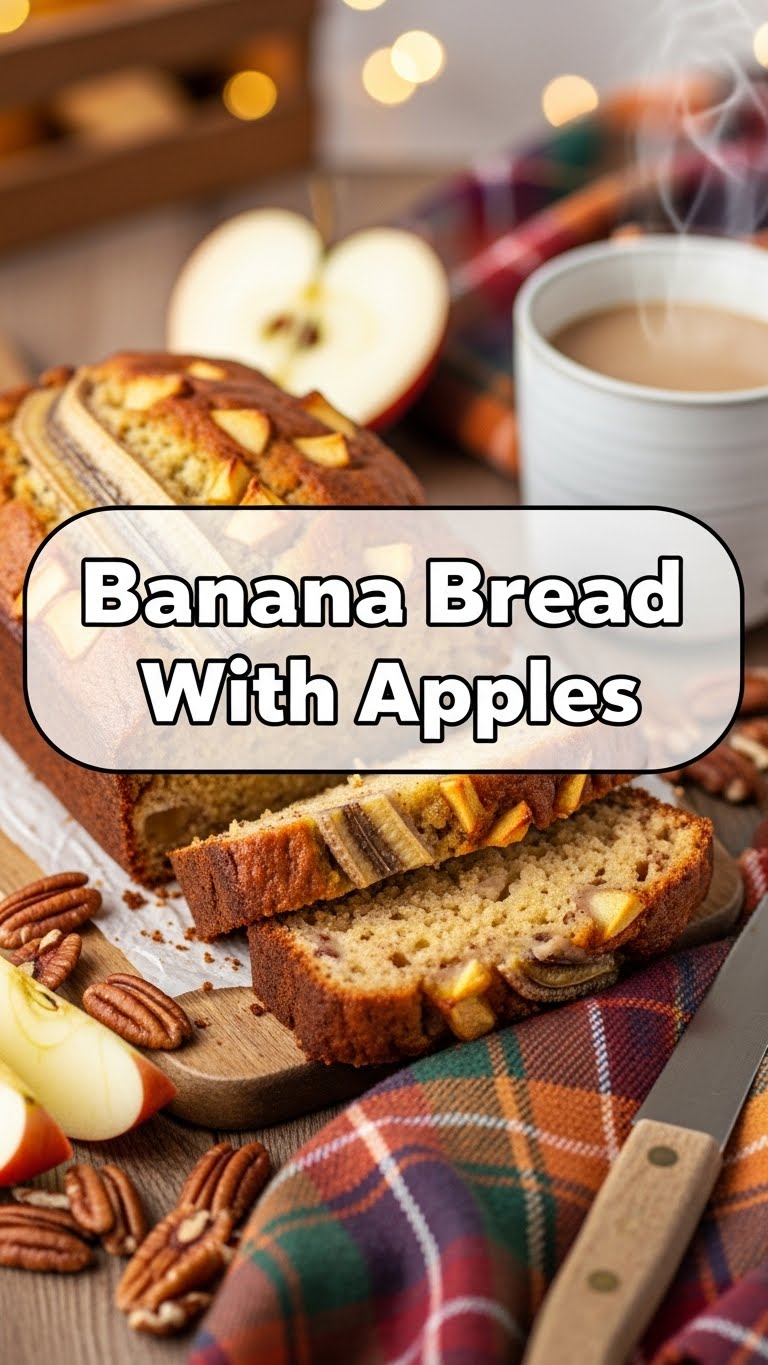
Hey there, fellow food adventurer! Got a bunch of sad, spotty bananas glaring at you from the counter? And maybe an apple or two chilling in the fruit bowl, feeling a bit left out? Perfect! Because today, we’re saving them from the compost bin and turning them into something glorious. We’re making banana bread with apples, and it’s basically a hug in loaf form.
Why This Recipe is Awesome
Okay, so why this particular recipe? Because it’s literally **impossible to screw up**. Seriously. Even if your culinary skills peak at toast (no judgment, we’ve all been there), you can nail this. It’s moist, it’s flavorful, it makes your house smell like a bakery exploded (in a good way), and it uses up those slightly-past-their-prime fruits. Plus, it’s a killer breakfast, a delightful dessert, and an afternoon pick-me-up. **Multi-talented bread**, much?
Ingredients You’ll Need
- Ripe bananas (3-4 medium): The spottier, the better! Think of them as flavor bombs waiting to detonate.
- Apple (1 medium): Any firm apple works – Granny Smith for a bit of tart, Fuji for sweet. Don’t overthink it.
- All-purpose flour (1 ½ cups): The trusty foundation. Nothing fancy required.
- Granulated sugar (¾ cup): For that sweet, sweet goodness. Adjust if your bananas are basically liquid sugar.
- Brown sugar (¼ cup, packed): Adds depth and chewiness. Trust me on this one.
- Baking soda (1 teaspoon): Our little leavening hero. Don’t skip it unless you want a flat banana pancake.
- Salt (½ teaspoon): Just a pinch to balance things out. It’s like the quiet friend who makes everyone else shine.
- Ground cinnamon (1 teaspoon): Because apples and cinnamon are soulmates.
- Nutmeg (¼ teaspoon): Cinnamon’s slightly spicier, mysterious cousin. Optional, but highly recommended.
- Unsalted butter (½ cup or 1 stick), melted: Because butter makes everything better. End of discussion.
- Large egg (1): The binder that holds our dreams together.
- Vanilla extract (1 teaspoon): For that extra “oomph” of deliciousness. Don’t skimp on the good stuff.
- Optional add-ins: Chopped walnuts/pecans (½ cup) if you’re feeling nutty, or chocolate chips (½ cup) if you’re feeling wild.
Step-by-Step Instructions
- Prep the Oven & Pan: Preheat your oven to 350°F (175°C). Grease and flour a 9×5-inch loaf pan. Don’t forget this step, unless you like your bread permanently stuck to the pan.
- Mash Those Bananas: In a large bowl, mash the ripe bananas with a fork until mostly smooth. A few lumps are totally fine; it adds character.
- Mix Wet Ingredients: Add the melted butter, egg, and vanilla extract to the mashed bananas. Stir until just combined. Don’t overmix! We’re not making rubber.
- Whisk Dry Ingredients: In a separate medium bowl, whisk together the flour, granulated sugar, brown sugar, baking soda, salt, cinnamon, and nutmeg (if using).
- Combine & Conquer: Gently fold the dry ingredients into the wet ingredients. Mix until *just* combined. A few streaks of flour are okay. Overmixing develops gluten, and we want tender, not tough, bread.
- Fold in Apples (and extras!): Gently fold in your diced apples (and any optional nuts or chocolate chips).
- Bake It Up: Pour the batter into your prepared loaf pan. Pop it into the preheated oven and bake for 50-60 minutes.
- Check for Doneness: To check if it’s done, insert a wooden skewer or toothpick into the center. If it comes out clean (or with a few moist crumbs), you’re golden!
- Cool Down: Let the bread cool in the pan for about 10-15 minutes before carefully transferring it to a wire rack to cool completely. Patience, young Padawan.
Common Mistakes to Avoid
- Using under-ripe bananas: Rookie mistake! Green bananas are great for smoothies, terrible for banana bread. **You need those dark spots** for maximum sweetness and moisture.
- Overmixing the batter: Resist the urge! Once you add the wet to the dry, mix *just* until combined. Overmixing makes your bread tough, dry, and sad.
- Not preheating the oven: Just because you’re impatient doesn’t mean your oven will magically hit the right temp. Give it time, or your bread won’t rise properly.
- Cutting into it too soon: I know, I know. The smell is intoxicating. But let it cool! Cutting hot bread can make it gummy and fall apart. **Patience is a virtue here.**
Alternatives & Substitutions
Flour power: All-purpose is great, but you could try a 50/50 mix with whole wheat flour for a slightly nuttier, healthier vibe. Gluten-free? Use your favorite GF blend, but maybe add an extra tablespoon of liquid if it looks too dry.
Sweetener swap: Not a fan of refined sugar? You can experiment with maple syrup or honey, but the texture might change slightly. Start with about ¾ of the amount and adjust to taste. **FYI**, brown sugar is key for that chewy texture, so think twice before ditching it completely.
Fat switch: Instead of butter, you can use an equal amount of oil (canola, vegetable, or melted coconut oil). It’ll still be delicious, just a slightly different flavor profile.
Apple variations: Any apple works, really. Pears would also be delightful! Or skip the apples and just go pure banana bread. Your kitchen, your rules.
FAQ (Frequently Asked Questions)
- “My bananas aren’t ripe enough! What do I do?”
Chill! You can speed up ripening by baking them in their skins on a baking sheet at 300°F (150°C) for 15-30 minutes until they’re black and shiny. Or just go buy some ripe ones, you procrastinator.
- “Can I add nuts AND chocolate chips?”
Absolutely! Go wild. It’s your bread. **IMO**, chocolate chips make everything better.
- “How do I store banana bread?”
In an airtight container at room temperature for up to 3 days, or in the fridge for up to a week. It also freezes beautifully for up to 3 months – just wrap it tightly!
- “Can I make this into muffins?”
Heck yeah! Fill muffin cups about two-thirds full and bake for 20-25 minutes, or until a toothpick comes out clean. Adjust baking time accordingly.
- “What if I don’t have a loaf pan?”
No worries! Use a square 8×8-inch pan, but reduce baking time. Or even a cast iron skillet if you’re feeling rustic! Just keep an eye on it.
- “Is this healthy?”
“Healthy” is relative, my friend. It’s got fruit! And some other delicious stuff. It’s definitely **soul-healthy**. Don’t question it, just enjoy.
Final Thoughts
See? That wasn’t so scary, was it? You just whipped up a glorious loaf of banana bread with a delightful apple twist. Now go forth and conquer that craving! Share it (if you must), savor it, and bask in the glory of your baking prowess. You deserve a pat on the back, and maybe a second slice. Happy baking, you culinary superstar!

