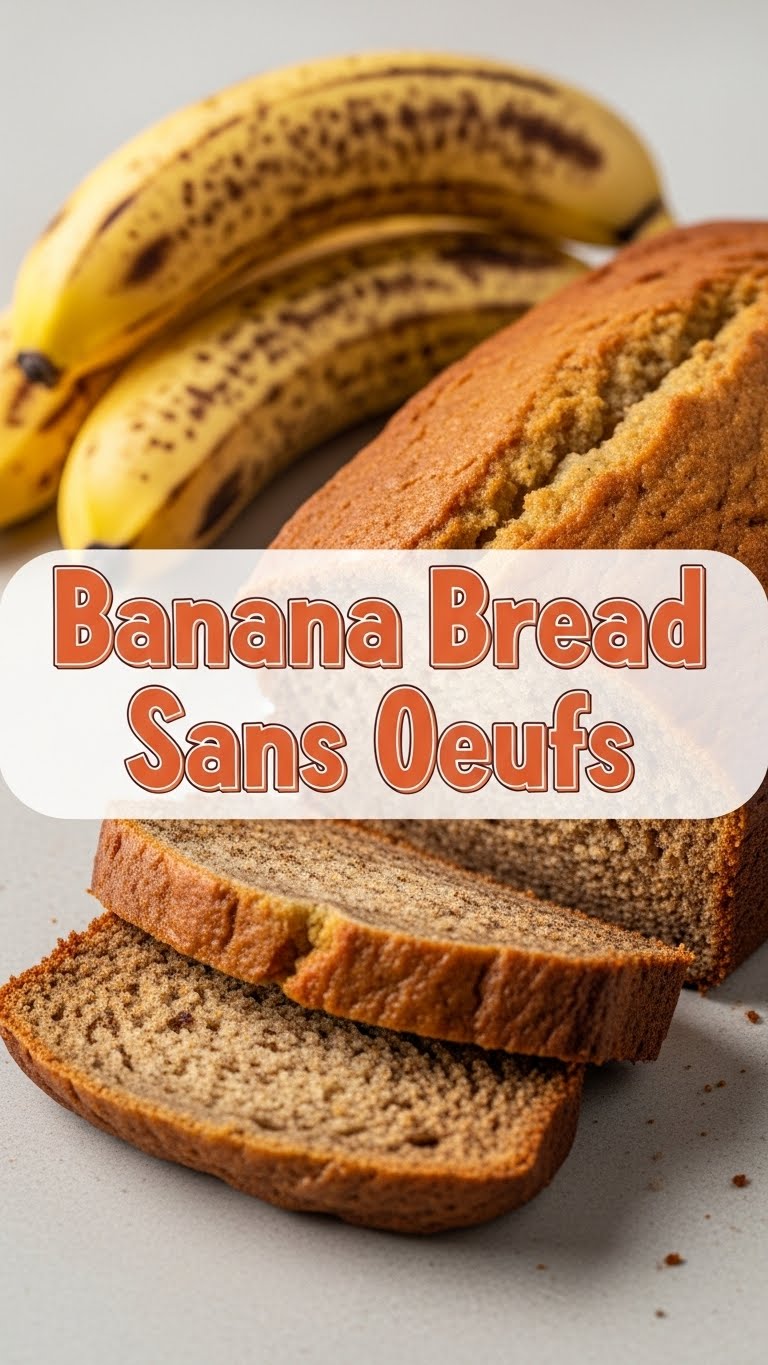
Alright, my friend, so you’ve got those sad, spotty bananas glaring at you from the fruit bowl, right? And you’re thinking, ‘Hmm, banana bread!’ But then you open the fridge and… *gasp*… no eggs? Or maybe you just prefer your baked goods au naturel, sans les poulets’ contributions. Whatever your reason, I’ve got your back. This isn’t just *any* banana bread; it’s the kind that makes you wonder if eggs were ever even necessary. Prepare for some magic!
Why This Recipe is Awesome
Okay, first off, it’s ridiculously easy. Seriously, if you can mash a banana, you can make this. It’s practically idiot-proof. (And yes, that’s a compliment from me, knowing my own kitchen shenanigans.) Secondly, it’s super moist and flavorful, even without the eggy bit. No weird textures here, promise! Plus, it’s a fantastic way to use up those overripe bananas before they stage a full-blown rebellion on your counter. Think of it as culinary waste management, but delicious. You’re basically a hero.
Ingredients You’ll Need
- Ripe Bananas: Like, *really* ripe. The ones that look like they’ve seen some things. The spottier, the better – they’re sweeter! (3 medium-sized)
- All-Purpose Flour: The trusty backbone of most baked goods. No fancy stuff needed, unless you’re feeling extra. (1 ½ cups)
- Granulated Sugar: Sweetness, baby! Adjust to your banana’s natural sugar levels. (½ to ¾ cup, depending on your sweet tooth and banana ripeness)
- Baking Soda: Our leavening MVP, especially important without eggs. It’s what makes it fluffy, not flat. (1 teaspoon)
- Salt: Just a pinch, to make all the other flavors sing. Don’t skip it! (½ teaspoon)
- Melted Butter (or Oil): For that rich, tender crumb. Butter is divine, but oil works too if you’re feeling virtuous. (⅓ cup)
- Milk (any kind!): Helps bring it all together. Dairy, almond, oat, whatever floats your boat. (¼ cup)
- Vanilla Extract: Because everything is better with vanilla. It’s the little black dress of baking ingredients. (1 teaspoon)
- Optional Mix-ins: Chocolate chips, walnuts, pecans, cinnamon. Go wild! (½ cup)
Step-by-Step Instructions
- Preheat & Prep: Get that oven heated to 350°F (175°C). Seriously, don’t skip this. Grease and flour a 9×5 inch loaf pan. Or line it with parchment paper if you’re fancy.
- Mash ‘Em Up: In a large bowl, mash those ripe bananas until they’re mostly smooth with a few yummy lumps.
- Wet Ingredients Party: Add the melted butter (or oil), milk, and vanilla extract to the mashed bananas. Stir it all together until just combined. Don’t overmix!
- Dry Ingredients Unite: In a separate medium bowl, whisk together the flour, sugar, baking soda, and salt. Make sure it’s well combined, no weird pockets of baking soda, please.
- Combine the Squad: Pour the dry ingredients into the wet ingredients. Mix with a spoon or spatula until *just* combined. A few lumps of flour are totally fine; overmixing is the enemy of tender banana bread.
- Optional Goodies: Fold in any chocolate chips, nuts, or other fun stuff you’re adding.
- Loaf Pan Time: Pour the batter into your prepared loaf pan.
- Bake Away! Pop it in the preheated oven for 50-65 minutes. It’s done when a toothpick inserted into the center comes out clean (or with a few moist crumbs).
- Cool Down: Let it cool in the pan for about 10-15 minutes before transferring it to a wire rack to cool completely. Patience is a virtue, especially when warm bread is involved.
Common Mistakes to Avoid
- Not using ripe bananas: Seriously, green bananas will give you a sad, flavorless bread. Wait for the spots! It’s worth it, promise.
- Overmixing the batter: This is a biggie. You want tender bread, not rubbery bread. Mix until *just* combined. Lumps are okay!
- Opening the oven door too soon: Resist the urge to peek during the first 30 minutes. Let it do its thing.
- Forgetting to grease the pan: Unless you like your banana bread stuck forever to the bottom, give that pan some love.
- Not letting it cool: I know, I know, it smells amazing. But cutting into hot banana bread can make it crumble. Let it set up a bit!
Alternatives & Substitutions
- Flour Power: Want to go whole grain? Swap out half the all-purpose flour for whole wheat flour. Just be aware it might be a *tad* denser. Gluten-free flour blend? Go for it!
- Sweetener Swaps: Brown sugar can replace granulated sugar for a deeper, more caramel-y flavor. Maple syrup or honey could work, but reduce the milk slightly since they add more liquid.
- Fat Swaps: Melted coconut oil is a great vegan alternative to butter. Any neutral oil (vegetable, canola) works perfectly fine too.
- Milk Alternatives: Any plant-based milk (almond, soy, oat) works wonderfully. No need to buy cow’s milk just for this!
- Spice It Up: A pinch of cinnamon or nutmeg can elevate the flavor profile. IMO, cinnamon and banana are a match made in heaven.
FAQ (Frequently Asked Questions)
- “Can I use frozen bananas?” Absolutely! Just thaw them completely first and drain any excess liquid. They’ll be super mushy, which is perfect for mashing!
- “My banana bread is dense! What happened?” Most likely, you overmixed the batter, or your baking soda wasn’t fresh. Fresh baking soda is key, FYI.
- “Can I make this into muffins?” Heck yes! Just reduce the baking time to about 20-25 minutes for standard muffins. Keep an eye on them!
- “What if I don’t have enough ripe bananas?” You can ripen them faster by baking them unpeeled on a baking sheet at 300°F (150°C) for 15-30 minutes until they’re black and soft. Magic!
- “How do I store it?” Keep it wrapped tightly in plastic wrap or in an airtight container at room temperature for up to 3 days, or in the fridge for up to a week. It also freezes beautifully!
Final Thoughts
See? That wasn’t so scary, was it? You just whipped up a glorious loaf of banana bread without even needing an egg. Who’s the culinary genius now? You are! This recipe is basically your new secret weapon for turning neglected fruit into pure joy. So go ahead, slice yourself a thick piece, maybe slather it with a little butter (because why not?), and bask in the glory of your creation. You totally earned it. Now go impress someone—or yourself—with your new culinary skills. Happy baking!
