So, you’re staring at those sad, spotty bananas on your counter, aren’t you? And a sudden, overwhelming urge for something warm, sweet, and comforting just hit you like a rogue wave. But, *gasp*, no butter in the fridge? Or maybe you just can’t be bothered with it today? Don’t sweat it, friend. I got you. We’re about to make the most ridiculously easy, perfectly moist banana bread, and guess what? Butter isn’t even invited to this party. You’re welcome.
Why This Recipe is Awesome
Let’s be real, who needs extra fuss when you’re just trying to satisfy a banana bread craving? This recipe is the ultimate chill baker’s dream. First off, no butter means it’s (arguably) a smidge healthier, right? We’re just going to pretend that the delicious sugar and optional chocolate chips totally balance out the health factor. Secondly, it’s pretty much **idiot-proof**. Seriously, if I didn’t mess it up, you won’t. The hardest part is honestly waiting for it to cool down enough to slice. Plus, it uses up those bananas that are practically screaming, “Bake me! I’m perfect!” You’re saving them from the bin and turning them into pure magic. Win-win-win!
Ingredients You’ll Need
Gather ’round, my friend, for this minimal cast of characters:
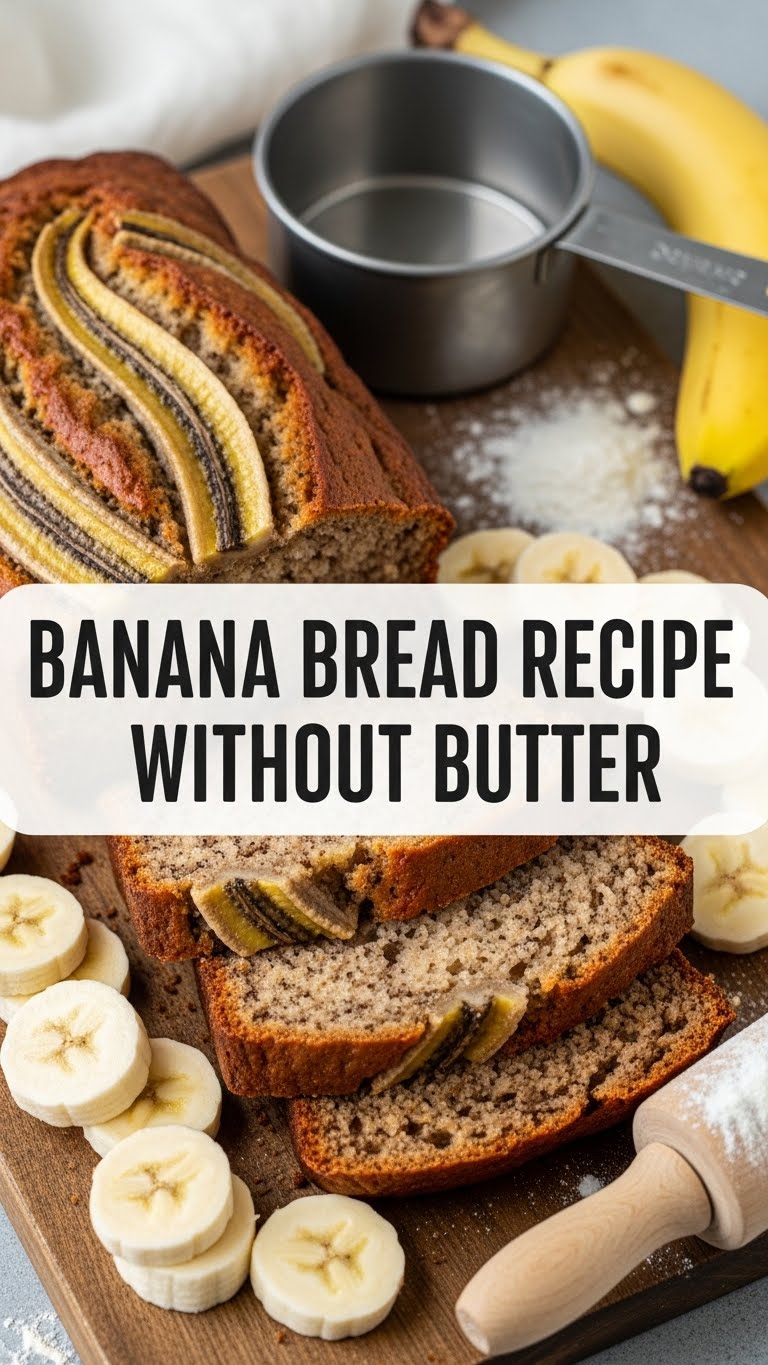
- 3 Overripe Bananas: The darker, the better. We’re talking brown spots, maybe even a little black. These are practically liquid gold at this stage – super sweet and mashable.
- 1/3 cup Neutral Oil: Think vegetable oil, canola oil, or even melted coconut oil. This is our butter stand-in, giving us that glorious moistness.
- 1 Large Egg: Your binding buddy, helping everything stick together beautifully.
- 1/2 cup Granulated Sugar: The sweet stuff. If you’re feeling fancy, brown sugar works too for a deeper, more caramel-y flavor.
- 1 tsp Vanilla Extract: The secret sauce that makes everything taste like a hug.
- 1 1/2 cups All-Purpose Flour: The classic, no fancy stuff needed here.
- 1 tsp Baking Soda: Our lift-off specialist, essential for that perfect rise.
- 1/2 tsp Salt: Just a pinch to make all those sweet flavors truly pop. Don’t skip it!
- Optional Add-ins (because why not?):
- 1/2 cup Chocolate Chips: Because chocolate makes everything better, duh.
- 1/2 cup Chopped Walnuts/Pecans: For a little crunch, if that’s your jam.
- 1 tsp Cinnamon: For a warm, spicy kick.
Step-by-Step Instructions
- **Preheat Your Oven & Prep Your Pan:** Set your oven to a cozy **350°F (175°C)**. Grab a 9×5 inch loaf pan and either grease it or line it with parchment paper. We want a non-stick situation, capiche?
- **Mash Those Bananas:** In a medium bowl, take your gloriously overripe bananas and mash them up with a fork. Don’t be shy; you want a lumpy but mostly smooth consistency. A few small chunks are totally fine – adds character!
- **Whisk the Wet Wonders:** To your mashed bananas, add the oil, egg, sugar, and vanilla extract. Whisk ’em all together until they’re nicely combined and look like a creamy, golden dream.
- **Combine the Dry Delights:** In a separate, larger bowl, whisk together your flour, baking soda, and salt. Give it a good whisk to make sure everything is evenly distributed.
- **Marry Wet & Dry (Gently!):** Pour your wet banana mixture into the bowl with the dry ingredients. Now, this is crucial: **Gently fold them together with a spatula until *just* combined.** A few streaks of flour are okay! **Don’t overmix**, or you’ll end up with tough banana bread, and nobody wants that. If you’re adding chocolate chips, nuts, or cinnamon, fold them in now.
- **Bake to Perfection:** Pour your beautiful batter into your prepared loaf pan. Pop it into the preheated oven and bake for about **50-65 minutes**. You’ll know it’s ready when a wooden skewer or toothpick inserted into the center comes out clean (or with just a few moist crumbs).
- **Cool Down, Buttercup:** Once baked, let your banana bread cool in the pan for about 10-15 minutes before transferring it to a wire rack to cool completely. I know, I know, the smell is intoxicating, but **slicing hot banana bread is a crumbly mistake**!
Common Mistakes to Avoid
We’ve all been there, trust me. Learn from my (many) culinary misadventures:
- **Underripe Bananas:** If your bananas are still mostly yellow, put them back on the counter and wait! Green or slightly yellow bananas won’t give you the sweetness or moisture you need for a truly epic banana bread. Patience, young Padawan.
- **Overmixing the Batter:** This is a biggie! Mixing too much develops the gluten in the flour, leading to a tough, dense loaf instead of that tender, soft crumb we’re aiming for. Mix until *just* combined, then stop.
- **Opening the Oven Door Constantly:** Resist the urge! Every time you open the oven, the temperature drops, affecting your bread’s rise and texture. Let it bake in peace until close to the end of the baking time.
- **Not Letting it Cool:** I know the aroma is like a siren song, but slicing hot banana bread is a recipe for a messy, crumbly disaster. It needs time to set up and become sliceable. **Seriously, resist.**
Alternatives & Substitutions
Feel free to get a little creative once you master the basic recipe!
- **Oil Alternatives:** Any neutral oil (canola, grapeseed, sunflower) will work. Melted coconut oil adds a lovely subtle tropical flavor, IMO! Applesauce *can* be used for part of the oil for an even lighter loaf, but it might change the texture slightly, making it a bit gummier.
- **Sugar Swaps:** Brown sugar instead of white sugar will give you a deeper, chewier bread with molasses notes. You can even do a 50/50 split! Maple syrup or honey *could* work as a sweetener, but they are liquids, so you might need to slightly reduce the oil to maintain the right moisture balance.
- **Flour Power:** Want to make it a smidge healthier? You can swap up to half of the all-purpose flour for whole wheat pastry flour. I wouldn’t go full whole wheat unless you’re prepared for a much denser loaf. Gluten-free 1:1 baking blend can also work, but results may vary.
- **Amp Up the Flavor:** Aside from chocolate chips and nuts, try adding dried cranberries, raisins, a dash of nutmeg, or even a tablespoon of instant espresso powder to enhance the chocolate (if you’re using it).
FAQ (Frequently Asked Questions)
- **Can I use non-dairy milk instead of eggs?** Not really as a direct substitute for the egg in *this* recipe, unfortunately. The egg here is crucial for binding and structure. If you need an egg substitute, a “flax egg” (1 tbsp ground flaxseed + 3 tbsp water, let sit for 5 mins) could potentially work, but the texture might be slightly different.
- **How do I know my bananas are ripe enough?** If they’re more brown/black than yellow, practically oozing sweetness, you’re golden. They should be very soft to the touch.
- **My banana bread came out dry, what happened?** Oh no! Did you overmix the batter? Or maybe bake it too long? Keep an eye on that oven, friend! An accurate oven thermometer can also be super helpful, as ovens can sometimes run hot.
- **Can I make muffins instead of a loaf?** Absolutely! Just fill a greased (or lined) muffin tin about 2/3 full. Bake at 375°F (190°C) for about 20-25 minutes, or until a toothpick comes out clean.
- **How long does it keep?** This deliciousness is best enjoyed within **2-3 days at room temperature** (covered, of course) or **up to a week in the fridge**. It also freezes beautifully for up to 3 months! Just wrap slices tightly in plastic wrap, then foil.
- **What if I don’t have baking soda?** Ugh, tough one. Baking soda reacts with the acids in the bananas to give it lift and that classic texture. You *could* try baking powder (1.5-2x the amount), but results might vary and it might not rise as much or have the same crumb. It’s best to stick to the recipe, FYI!
- **Can I reduce the sugar?** You totally can! The overripe bananas provide a lot of natural sweetness. You could try reducing it to 1/4 cup and see if that suits your taste.
Final Thoughts
See? Told you it was easy peasy lemon squeezy (minus the lemons, of course). You just whipped up some delicious, moist banana bread without even touching a stick of butter. Go on, pat yourself on the back. You deserve it. Slice yourself a generous piece, maybe slather it with a little cream cheese or peanut butter (because why not?), and enjoy your homemade goodness. Now, go impress someone—or yourself—with your new culinary skills. You’ve earned it!


