“`html
So, you’re staring into your fruit bowl and see those lonely, freckled bananas giving you the side-eye, huh? You know they’re past their prime for snacking, but tossing them feels like a culinary crime. What’s a baker-wannabe to do? Fear not, my friend! We’re diving headfirst into Martha Stewart’s legendary Banana Bread, the kind that makes your kitchen smell like pure happiness. And guess what? It’s surprisingly doable, even if your last baking adventure involved setting off the smoke alarm. Let’s get this bread!
Why This Recipe is Basically Magic (and Delicious)
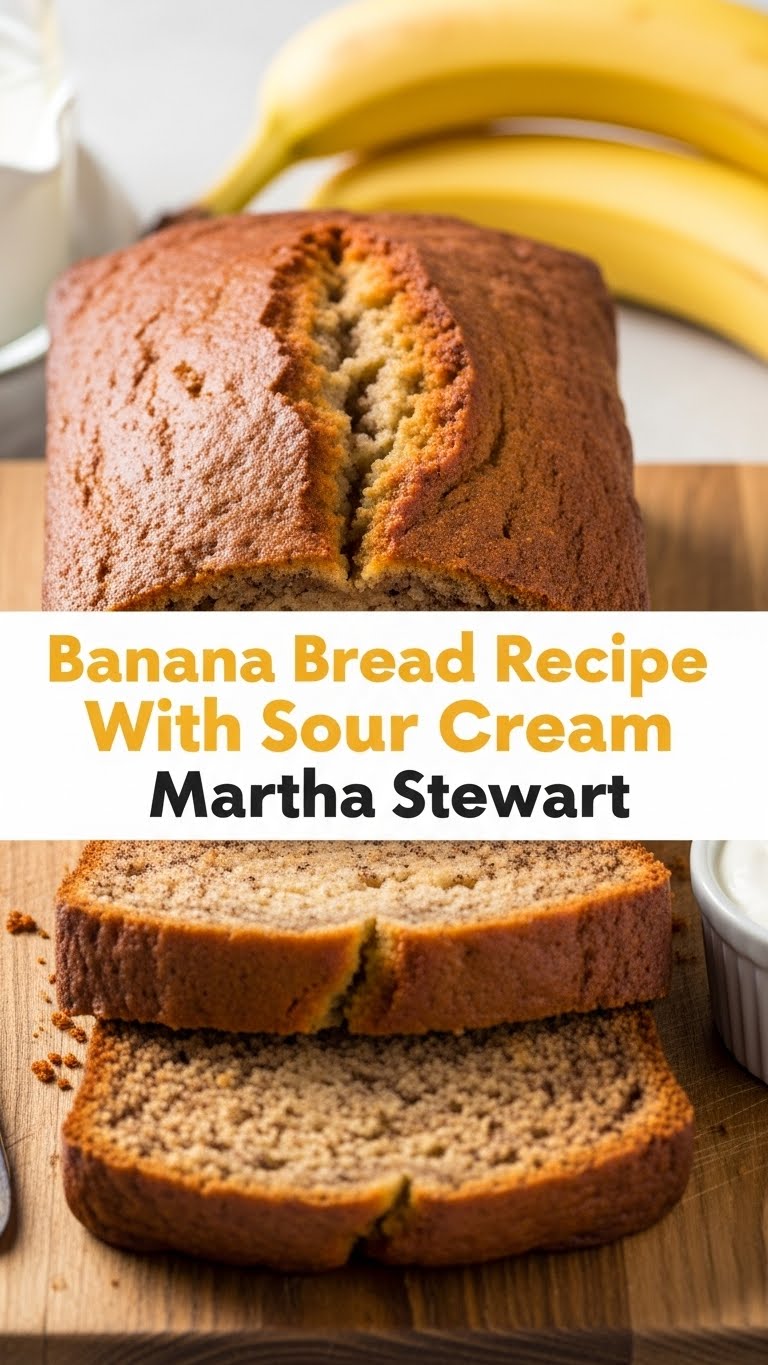
Honestly, this banana bread recipe is a lifesaver. It’s ridiculously moist, has that perfect sweet-but-not-too-sweet flavor, and the sour cream? Oh, the sour cream is the secret weapon that makes it unbelievably tender. It’s the kind of bread that tastes fancy but is so easy to whip up, you’ll feel like a domestic goddess (or god!) without breaking a sweat. Plus, Martha Stewart approved? You’re basically getting a gold star for baking. It’s also pretty hard to screw up, which, let’s be real, is a major win.
Ingredients You’ll Need (No Fancy Chef Hat Required)
- Ripe Bananas: The spottier, the better! Seriously, let those bananas get practically black. That’s where the sweetness lives.
- All-Purpose Flour: Your trusty baking staple.
- Baking Soda: For that lovely lift.
- Salt: Just a pinch to balance the sweetness.
- Unsalted Butter: Softened, not melted into a sad puddle.
- Granulated Sugar: For a touch of sweetness.
- Eggs: Large ones, preferably.
- Sour Cream: This is our secret weapon for ultimate moistness. Don’t skip it!
- Vanilla Extract: Because everything is better with vanilla.
- Optional additions: Chopped walnuts, chocolate chips, a sprinkle of cinnamon if you’re feeling wild.
Step-by-Step Instructions (Let’s Get Baking!)
- Preheat your oven to 350°F (175°C). Grease and flour a standard loaf pan. Trust me, you don’t want your masterpiece sticking.
- In a medium bowl, whisk together your flour, baking soda, and salt. Set aside. This is your dry squad.
- In a large bowl, cream together the softened butter and sugar until light and fluffy. Imagine you’re fluffing a tiny cloud.
- Beat in the eggs, one at a time, until well combined. Then, stir in the vanilla extract.
- Mash those ripe bananas until they’re smooth-ish. A few lumps are totally fine – they add character!
- Add the mashed bananas and sour cream to the wet ingredients. Stir until everything is just combined. Don’t overmix, or you’ll make it tough!
- Gradually add the dry ingredients to the wet ingredients, mixing until *just* combined. Seriously, go easy on the mixing.
- If you’re adding nuts or chocolate chips, now’s the time to gently fold them in.
- Pour the batter into your prepared loaf pan. Smooth the top.
- Bake for 50-65 minutes, or until a toothpick inserted into the center comes out clean. Keep an eye on it towards the end! Ovens can be divas.
- Let it cool in the pan for about 10 minutes before turning it out onto a wire rack to cool completely. Patience is a virtue, even in baking.
Common Mistakes to Avoid (So You Don’t Cry Over Spilled Batter)
- Under-ripe bananas: These guys won’t give you the sweetness or moisture you need. Embrace the brown!
- Overmixing the batter: This is a recipe for a tough, dense loaf. Mix until *just* combined, and then stop.
- Not preheating the oven: Rookie mistake! Your bread won’t bake evenly, and you’ll end up with a sad, flat disc.
- Opening the oven door too often: Let the bread bake in peace! Every time you peek, you’re messing with the temperature.
- Not letting it cool: I know, I know. It’s tempting. But cutting into hot banana bread is a recipe for a crumbly disaster. Let it rest!
Alternatives & Substitutions (When Life Gives You Lemons… or Different Dairy)
So, you’re out of sour cream? Bummer. But fear not! You can often substitute it with plain Greek yogurt or even a dollop of mayonnaise (yes, really!). They both offer that creamy richness. If you’re feeling adventurous, you could even try a dairy-free yogurt alternative. As for the bananas, if they’re not quite ripe enough, you can sometimes speed things up by baking them in their peels for about 15 minutes at 300°F (150°C). Just make sure they’re not *too* hot to handle!
FAQ (Your Burning Banana Bread Questions, Answered Casually)
Q: Can I use less sugar?
A: Sure! But remember, bananas aren’t *that* sweet on their own, and the sugar helps with texture too. You might end up with a slightly less moist loaf.
Q: My banana bread is too dry. What did I do wrong?
A: Most likely, you either overbaked it or overmixed the batter. Also, ensure you’re using *really* ripe bananas!
Q: Can I make muffins instead of a loaf?
A: Absolutely! Bake them at the same temperature, but they’ll likely take about 20-25 minutes. Keep an eye on them!
Q: What’s the deal with the sour cream? Why is it so important?
A: Sour cream adds fat and acidity, which helps tenderize the gluten in the flour, resulting in a super soft and moist crumb. It’s pure magic!
Q: Can I freeze this banana bread?
A: Yup! Wrap it tightly in plastic wrap and then foil. It should keep for a couple of months. Thaw it on the counter, and it’s like it was baked yesterday.
Q: My bananas aren’t spotty enough. What should I do?
A: See the “Alternatives & Substitutions” section for a quick oven trick! Or, you know, just go buy more bananas and wait patiently. The anticipation is part of the fun!
Final Thoughts (Go Forth and Bake!)
And there you have it! Your ticket to banana bread bliss, courtesy of Martha and a little bit of my own chaos. This recipe is seriously a game-changer, perfect for using up those sad, forgotten bananas. Don’t be afraid to experiment with add-ins, and most importantly, have fun with it! Baking should be joyful, not stressful. Now go forth and bake something delicious. You’ve totally got this, and your taste buds will thank you. Happy baking!
“`


