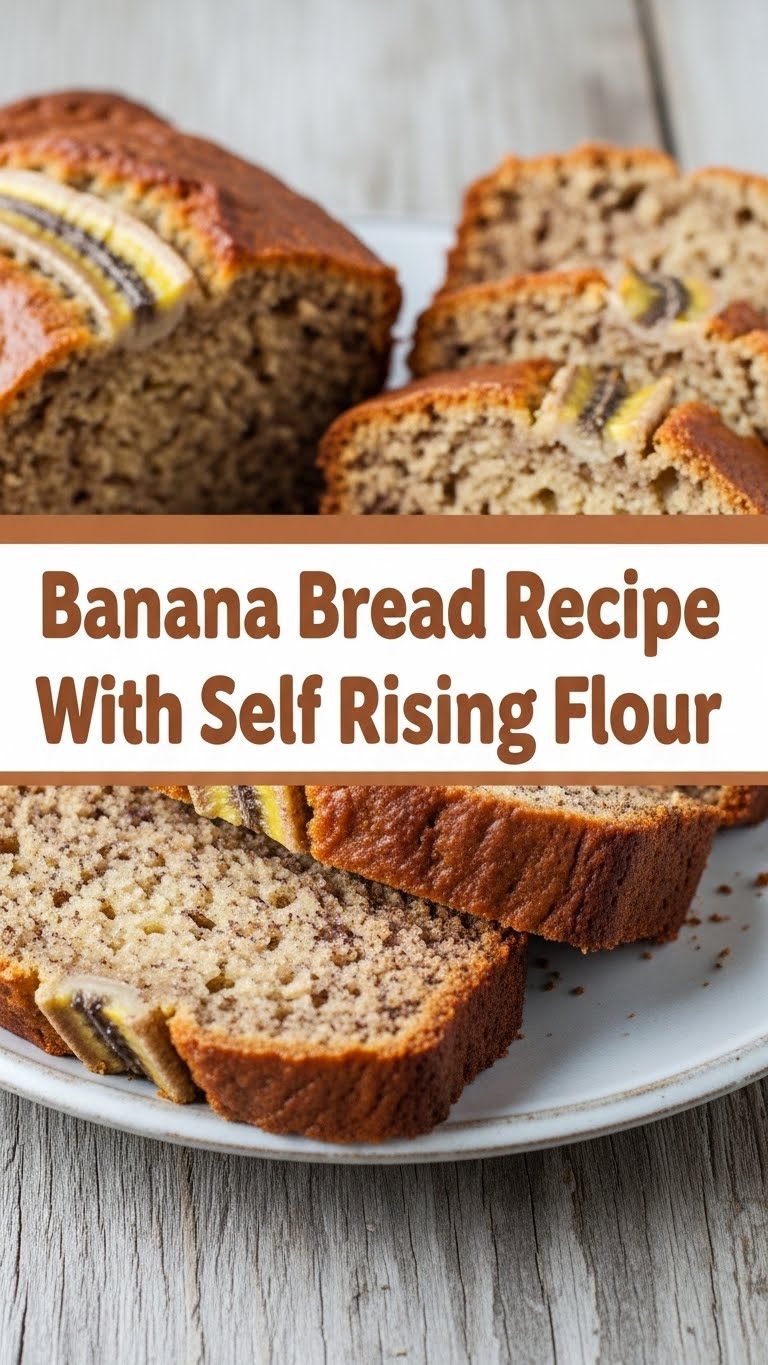
Hey there, fellow kitchen adventurer! Got some spotty bananas staring at you, silently judging your procrastination skills? And a sudden, insatiable craving for something warm, sweet, and comforting? Perfect. Because today, we’re making banana bread. But not just any banana bread – we’re going the *easy* route, because who needs extra stress, right? Especially when deliciousness is just around the corner!
Why This Recipe is Awesome
Okay, so why this particular banana bread recipe? Let’s be real, you’ve probably seen a gazillion. But this one? It’s the MVP. Seriously. Here’s why it’s about to become your new best friend:
- Self-Rising Flour is Your BFF: No fumbling for baking powder *and* baking soda. It’s all in there! One less thing to measure, one less chance to mess it up. Genius, I tell ya. It basically does half the work for you, which, let’s be honest, is peak adulting.
- Minimal Effort, Maximum Deliciousness: We’re talking one-bowl action, maybe two if you’re feeling fancy. Less cleanup, more eating. It’s basically a life hack in bread form. You’ll be basking in glory with minimal kitchen warfare.
- Idiot-Proof: And I say that with love, because honestly, if *I* can make it without setting off the smoke alarm, you’re golden. This recipe is practically guaranteed to make you look like a baking guru.
- Smells Like Heaven: Your house will smell so good, your neighbors might just ‘accidentally’ drop by. You’ve been warned. Prepare for compliments (and maybe share a slice, if you’re feeling generous).
Ingredients You’ll Need
Gather ’round, my friends, for the cast of characters in our banana bread saga:
- 3-4 Overripe Bananas: The browner, the better – almost black is ideal, don’t be scared! These are the real heroes, bringing all the natural sweetness and moisture. Seriously, if they look like they’re ready for the compost bin, they’re perfect for this.
- 1 ½ cups Self-Rising Flour: The star of the show, remember? It’s got the leavening agents already in it, so you don’t have to think. Thank you, science!
- ½ cup Granulated Sugar: ‘Cause we’re classic, and a little sweetness never hurt anyone.
- 1 Large Egg: Just one, uncrack it directly into the bowl, you rebel. It’s our binder-upper.
- ⅓ cup Melted Unsalted Butter: (Or neutral oil, if you’re feeling frisky, but butter tastes better, IMO). Make sure it’s cooled a bit so it doesn’t scramble your egg.
- 1 teaspoon Vanilla Extract: A splash for that *chef’s kiss* flavor. Don’t skip this, it really elevates things.
- A Pinch of Salt: (Optional, but recommended if your self-rising flour isn’t heavily salted). It enhances everything, like a good friend that quietly makes you look better.
Step-by-Step Instructions
Alright, apron on (or not, who cares?), let’s get this deliciousness going!
- Preheat & Prep: Get that oven heated to 350°F (175°C). Then, grab a standard loaf pan (around 9×5 inches). Line it with parchment paper, leaving a slight overhang on the sides for easy lifting, or grease and flour it like you mean it. Nobody likes a stuck loaf!
- Mash ’em Up: In a large mixing bowl, mash those sad-looking bananas with a fork. Don’t worry about perfection; a few lumps are totally fine and add a nice texture.
- Wet Ingredients Party: Add the melted butter (make sure it’s cooled a bit!), sugar, egg, and vanilla to the mashed bananas. Stir with your fork or a whisk until just combined. We’re not making a soufflé here, so don’t overmix!
- Flour Power: Gently fold in the self-rising flour and that optional pinch of salt. Mix *just* until no dry streaks of flour remain. **Overmixing equals tough bread, and nobody wants that.** Seriously, once the flour disappears, put down the spoon!
- Into the Pan: Pour the glorious batter into your prepared loaf pan. Give it a gentle tap on the counter to settle.
- Bake It Good: Bake for approximately 50-60 minutes. You’ll know it’s done when a skewer, toothpick, or thin knife inserted into the center comes out clean. If the top starts browning too quickly, you can loosely tent it with foil.
- Cool Down: Let it cool in the pan for about 10-15 minutes. This helps it firm up. Then, carefully transfer it to a wire rack to cool completely. Yes, waiting is torture, but it’s worth it for clean slices!
Common Mistakes to Avoid
We’ve all been there, staring at a slightly questionable bake. Here are a few pitfalls to dodge:
- Under-ripe Bananas: Green-ish bananas? Nope. You want brown, spotty, almost black ones. Trust me, it makes all the difference in sweetness and moisture. Using firm bananas will result in a less flavorful, drier loaf.
- Overmixing: I cannot stress this enough. Once that flour is incorporated, stop stirring. Your biceps might feel good, but your bread won’t. **Tough bread is sad bread.**
- Opening the Oven Door Too Soon: Resist the urge to peek! Let it bake undisturbed for at least 40 minutes, or your bread might sink in the middle like a sad little boat. Patience, grasshopper.
- Not Greasing/Lining the Pan Properly: Ever had half your banana bread stick to the pan? Yeah, it’s soul-crushing. Take the extra 30 seconds to grease or line it well. Your future self will thank you.
Alternatives & Substitutions
Feeling creative? Here are a few ways to jazz up your banana bread:
- Chocolate Chips: A handful (or two, I’m not judging) of chocolate chips makes everything better. Milk, dark, white – your call!
- Nuts: Walnuts or pecans for a bit of crunch. Toast them lightly beforehand for an extra burst of flavor!
- Spice It Up: A dash of cinnamon or nutmeg (about ½ teaspoon) can add a wonderfully cozy, warm vibe.
- Dairy-Free: Use a plant-based milk (like almond or oat) and neutral oil (like canola or vegetable) instead of butter. Still delicious!
- Sweetener Swap: Brown sugar instead of white for a deeper, caramel-y flavor. Yum! You can do a 1:1 swap.
FAQ (Frequently Asked Questions)
Got questions? I’ve got answers (mostly, and with a dash of sarcasm):
- “My bananas aren’t ripe enough, help!” Oh, the horror! If you’re in a pinch, you can put ’em in a paper bag with an apple overnight to speed things up. Or, if you’re *really* desperate, bake them *with the peel on* at 300°F (150°C) for 15-20 minutes until they’re black and squishy. Let them cool before mashing, obviously.
- “Can I use regular all-purpose flour?” You *can*, but why make life harder? You’ll need to add about 1.5 teaspoons of baking powder and a ½ teaspoon of salt per cup of all-purpose flour. But seriously, stick to self-rising for this one, **FYI**, it’s so much easier.
- “How long does it last?” Covered tightly at room temperature, it’s good for 3-4 days. In the fridge, it’ll last up to a week. If it lasts that long, you’re clearly not eating enough of it.
- “Can I freeze it?” Absolutely! Slice it or wrap the whole loaf tightly in plastic wrap and then foil. It’ll keep beautifully in the freezer for up to 3 months. Thaw at room temperature when the craving hits again.
- “Why did my bread sink in the middle?” Rookie mistake! You probably opened the oven door too early, letting all the hot air out. Or perhaps your self-rising flour was super old (unlikely if it’s new), or you overmixed. Next time, give it more undisturbed time in the oven before peeking!
- “Can I use margarine instead of butter?” Well, technically yes, but why hurt your soul like that? Butter just tastes better, let’s be honest. Treat yourself!
Final Thoughts
And there you have it! Your very own, ridiculously easy, incredibly delicious banana bread. Now go forth, slice yourself a thick piece, maybe add a pat of butter (because why not?), or a dollop of cream cheese, and enjoy your masterpiece. You’ve earned those bragging rights. Go impress someone—or yourself—with your new culinary skills. You’ve earned it!

