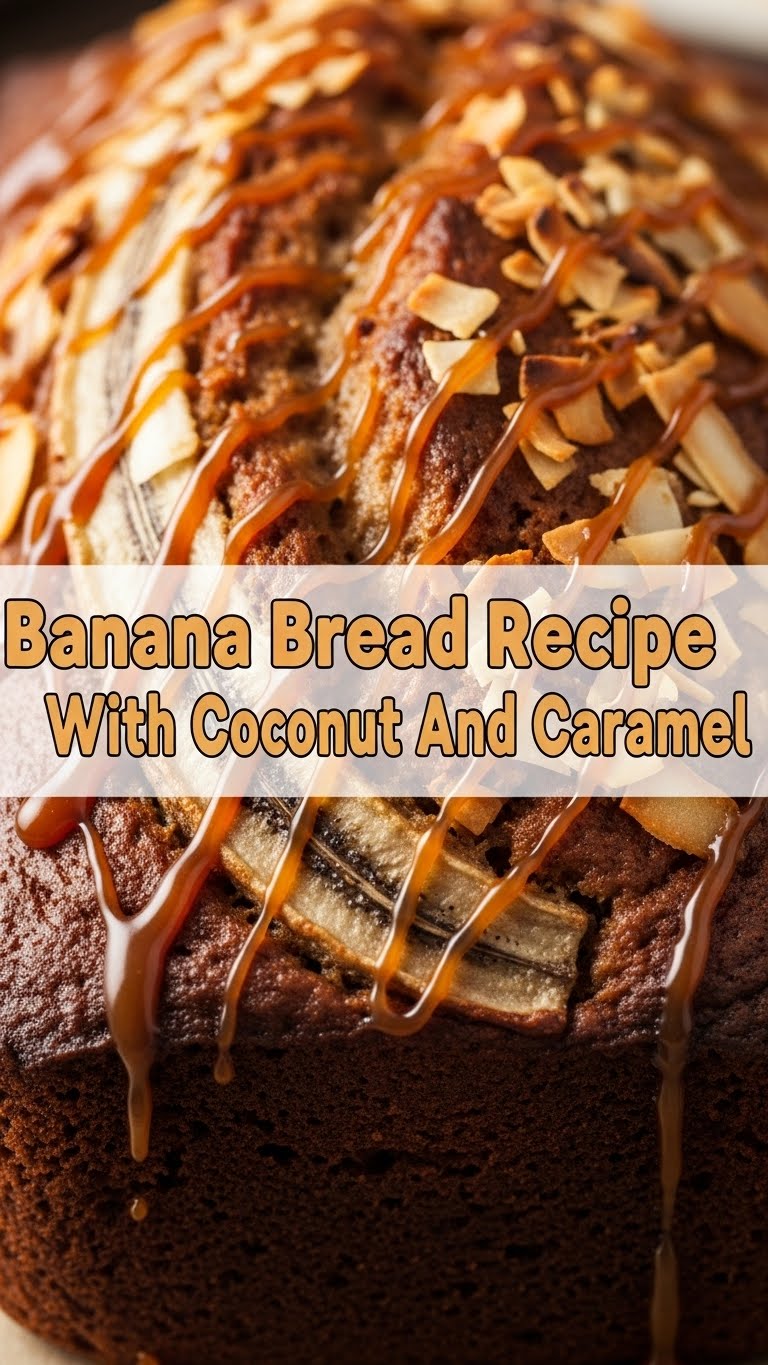
Banana Bread with Coconut and Caramel: Because Life is Too Short for Boring Snacks!
So, you’ve got a bunch of bananas staring you down, looking sad and spotty? Don’t even *think* about throwing them out. Those are your ticket to pure, unadulterated deliciousness. We’re talking banana bread, but not just any banana bread. We’re leveling up with the tropical hug of coconut and the sweet, gooey siren song of caramel. Prepare for your taste buds to do a happy dance, and your kitchen to smell like a tropical vacation with a side of dessert heaven.
Why This Recipe is Awesome (Seriously, It Is)
Let’s be real, baking can be intimidating. But this recipe? It’s practically idiot-proof. Even if your oven temperature is more of a “suggestion” and your measuring skills are… creative, you can totally nail this. It’s forgiving, it’s fuss-free, and the end result is so ridiculously good, people will think you’re a baking wizard. Plus, who doesn’t love a little coconut and caramel action? It’s like a party in your mouth, and everyone’s invited.
Ingredients You’ll Need (Don’t Panic, It’s Not That Much)
- 3-4 very ripe bananas, the mushier the better (aka, your bananas are officially “over the hill” and ready for glory)
- 1/3 cup melted unsalted butter (or margarine if you’re feeling adventurous, but butter is life)
- 1/2 teaspoon baking soda (the magic dust that makes things rise)
- Pinch of salt (don’t skip this, it makes the sweet things sweeter!)
- 3/4 cup all-purpose flour (regular old flour is fine, no need for fancy stuff)
- 1/2 cup granulated sugar (or brown sugar for extra caramel-y vibes)
- 1 large egg (room temp is best, but eh, life happens)
- 1 teaspoon vanilla extract (the secret weapon of deliciousness)
- 1/2 cup shredded coconut (sweetened or unsweetened, your call!)
- 1/4 cup caramel sauce (store-bought or homemade, just make sure it’s thick enough to swirl)
Step-by-Step Instructions (You Got This!)
- Preheat your oven to 350°F (175°C). **Grease and flour a standard loaf pan.** This is crucial, folks. Nobody likes a banana bread stuck to the pan.
- In a big bowl, mash those sad bananas until they’re practically liquid. A fork works, but a potato masher is your best friend here.
- Stir in the melted butter, then sprinkle in the baking soda and salt. Mix it up until it’s all combined.
- Add the flour and sugar to the banana mixture. Stir gently until *just* combined. **Don’t overmix!** Overmixing is the enemy of tender banana bread.
- Now, whisk in the egg and vanilla extract. Again, mix until it’s just incorporated.
- Fold in the shredded coconut. Imagine you’re tucking your ingredients into a cozy bed.
- Pour about half the batter into your prepared loaf pan. Drizzle about half of your caramel sauce over the top.
- Add the remaining batter, then drizzle the rest of the caramel sauce. Use a toothpick or knife to **gently swirl** the caramel into the batter. Don’t go crazy; we want swirls, not a caramel swamp.
- Bake for 50-65 minutes, or until a toothpick inserted into the center comes out clean (or with a few moist crumbs, that’s fine too!).
- Let it cool in the pan for about 10 minutes before transferring it to a wire rack to cool completely. Patience is a virtue, especially when it involves deliciousness.
Common Mistakes to Avoid (Because We’ve All Been There)
- Using underripe bananas: Seriously, the spottier the better. They’re sweeter and mash easier. Green bananas = sad bread.
- Overmixing the batter: This is probably the most common culprit for tough bread. Just mix until you don’t see dry flour anymore.
- Not preheating the oven: Rookie mistake alert! Your bread won’t bake evenly, and that’s just a tragedy.
- Opening the oven door too often: Resist the urge! Every time you peek, you’re letting precious heat escape and potentially messing with your bake.
- Cutting it too soon: While it’s tempting to dive in, letting it cool a bit allows the flavors to meld and the structure to set.
Alternatives & Substitutions (Because We’re Flexible Like That)
Don’t have shredded coconut? No sweat! You can totally skip it, or try adding some chopped nuts like walnuts or pecans for a different kind of crunch. If you’re not a caramel fan (weird, but okay), a drizzle of honey or even some chocolate chips would be pretty epic. And if you’re feeling extra fancy, a sprinkle of sea salt on top of the caramel before baking is pure genius. FYI, using unsweetened applesauce instead of some of the butter can make it a bit healthier, but I won’t judge if you stick with the butter – this is about indulgence, after all!
FAQ (The Burning Questions You *Might* Have)
Can I make this gluten-free?
Sure can! Just swap out the all-purpose flour for your favorite gluten-free blend. Might need a little more liquid, so keep an eye on the batter consistency.
What if my bananas aren’t *that* ripe?
You *can* use them, but they won’t be as sweet or mash as easily. Pop them in a brown paper bag for a day or two to speed things up, or just embrace a slightly less intense banana flavor.
Can I add chocolate chips? YES!
YES, you absolutely can! Fold in about 1/2 cup of your favorite chocolate chips along with the coconut. It’s a game-changer.
How long does this last?
Stored in an airtight container at room temperature, it’s good for about 2-3 days. But let’s be honest, it’s usually gone way before then.
Can I freeze banana bread?
Absolutely! Let it cool completely, wrap it tightly in plastic wrap, then foil, and it’ll keep in the freezer for up to 3 months. Thaw overnight on the counter.
What’s the deal with the swirl? Do I *have* to swirl?
The swirl is more for visual appeal and pockets of caramel goodness. If swirling stresses you out, just mix it all in, or dollop it on top before baking. It’ll still taste amazing.
Final Thoughts (Go Bake Something Awesome)
See? That wasn’t so bad, was it? You’ve just created a masterpiece that’s going to make your house smell divine and your taste buds sing. So go ahead, slice into that warm, glorious banana bread. Share it if you’re feeling generous, but I won’t tell anyone if you hoard it all for yourself. Now go impress someone—or yourself—with your new culinary skills. You’ve earned it!
