“`html
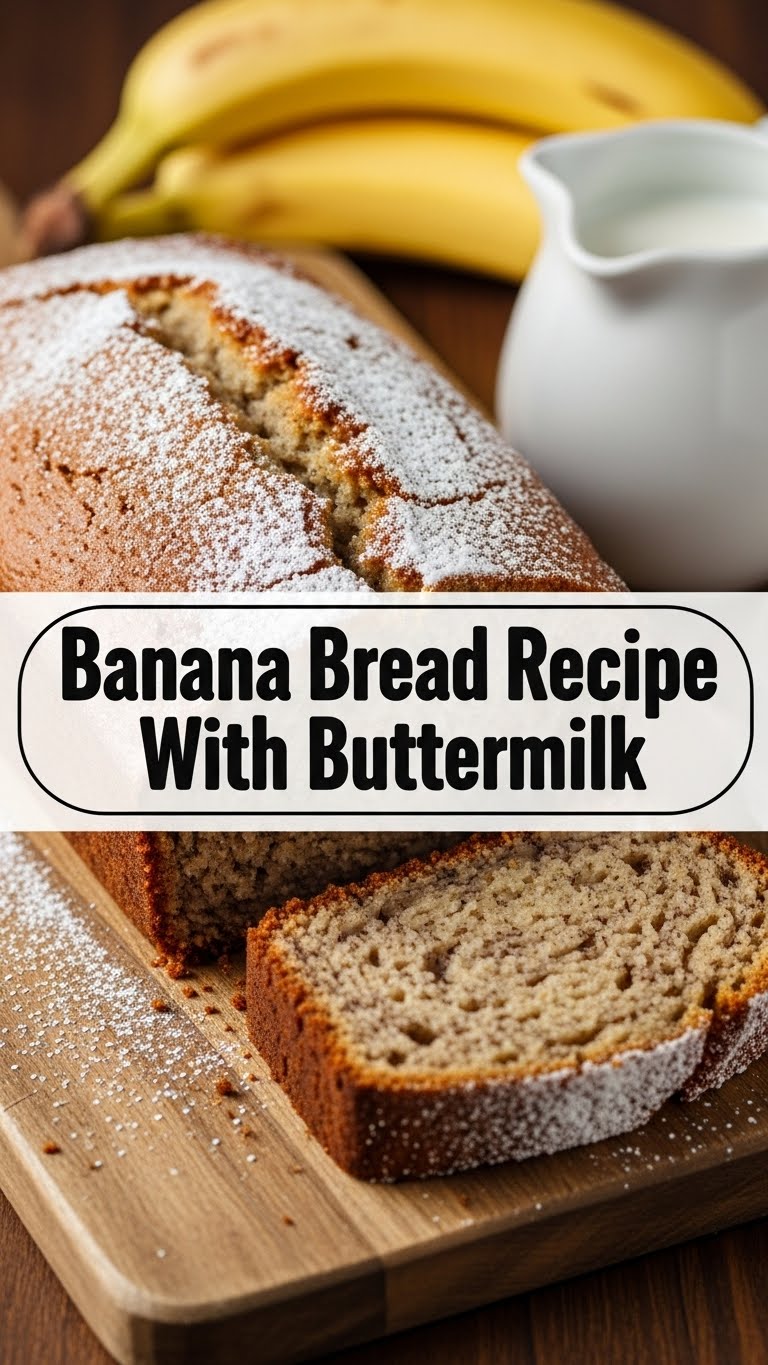
So, you’ve got some sad, forgotten bananas looking like they’ve seen better days, huh? Don’t even *think* about tossing them! They’re not retired, they’re just… pre-baked for awesomeness. And guess what? We’re about to transform those mushy guys into the most ridiculously moist and delicious banana bread you’ve ever had the pleasure of shoving in your face. This isn’t just any banana bread; this is the buttermilk kind, and it’s about to become your new obsession.
Why This Recipe is Pure Genius (and Maybe a Little Magic)
Okay, let’s be real. Some recipes make you feel like you need a PhD in pastry. Not this one. This is the recipe your slightly-more-organized-than-you friend would give you, the one that practically *cooks itself*. The buttermilk is the secret weapon here, making every bite unbelievably tender and moist. Seriously, it’s like a fluffy hug in bread form. It’s so forgiving, even if you accidentally use a whisk instead of a spatula for a second, you’ll still end up with a masterpiece.
Ingredients You’ll Need (No Fancy Stuff Required)
- 3-4 very ripe bananas: The browner and spottier, the better. These are the flavor stars, people!
- 1/3 cup melted unsalted butter: Because butter makes everything better. Duh.
- 1 teaspoon baking soda: The little guy that makes your bread rise like a champ.
- A pinch of salt: Just a tiny bit to wake up all those flavors.
- 3/4 cup sugar: Adjust to your sweetness level, but don’t be shy!
- 1 large egg: The binder of champions.
- 1 teaspoon vanilla extract: For that irresistible aroma.
- 1 1/4 cups all-purpose flour: The trusty workhorse.
- 1/2 cup buttermilk: The magical moisture maker. If you don’t have it, don’t freak out (more on that later).
Step-by-Step Instructions: Let’s Get Baking!
- First things first: **preheat your oven to 350°F (175°C)**. And seriously, grease and flour a loaf pan. Nobody wants stuck bread. Trust me on this.
- In a big bowl, go ahead and **mash those sad bananas** with a fork until they’re mostly smooth but still have a few lumps. Embrace the texture! Add the melted butter and give it a good stir.
- Now, whisk in the sugar, egg, vanilla, and buttermilk. It might look a little weird and lumpy – that’s perfectly fine! Don’t overthink it.
- In a separate, smaller bowl, **whisk together the flour, baking soda, and salt**. This ensures everything is evenly distributed, which is a fancy way of saying it’ll bake properly.
- Gradually **add the dry ingredients to the wet ingredients**. Mix until *just combined*. **Overmixing is the enemy of tender banana bread**, so resist the urge to beat it like it owes you money. A few streaks of flour are okay; they’ll disappear in the oven.
- Pour that glorious batter into your prepared loaf pan. Pop it into the preheated oven and **bake for 50-65 minutes**. How do you know it’s done? Stick a toothpick in the center. If it comes out clean (or with a few moist crumbs, not wet batter), it’s ready.
- Let it cool in the pan for about 10 minutes before turning it out onto a wire rack to **cool completely**. Patience is a virtue, especially when it comes to warm, delicious bread.
Common Mistakes to Avoid (So You Don’t Cry Over Spilled Batter)
- Using underripe bananas: They won’t be sweet or soft enough, and your bread will taste… well, less like banana bread and more like sad flour bread.
- Overmixing the batter: This is a classic! It develops the gluten too much, resulting in a tough, dense loaf. Gentle does it!
- Opening the oven door too early: Let that beautiful bread rise in peace! Constantly peeking can make it sink.
- Not preheating the oven: Seriously, don’t do it. It’s like trying to run a race without starting the clock.
Alternatives & Substitutions (Because Life Happens)
Ran out of buttermilk? No sweat! You can make your own by mixing **3/4 cup of milk with 3/4 tablespoon of lemon juice or white vinegar**. Let it sit for 5-10 minutes until it looks a bit curdled. It’s not *exactly* the same, but it’s a fantastic substitute. You can also use yogurt or sour cream thinned with a little milk if you have those on hand. For the butter, melted coconut oil or even vegetable oil can work in a pinch, but the butter flavor is *chef’s kiss*.
FAQ (Your Burning Questions, Answered Casually)
- Can I add chocolate chips or nuts? YES! Please do. Stir in about 1/2 cup of your favorites at the end with the flour. It’s basically a crime not to.
- My bananas aren’t *that* ripe. What now? You can bake them in their peels on a baking sheet at 300°F (150°C) for about 15-20 minutes until they turn dark and soft. Voila! Instant ripe bananas.
- Why is my banana bread so dense? Almost always from overmixing! Be gentle, and stop mixing as soon as you don’t see large streaks of flour.
- Can I make muffins instead? Absolutely! Spoon the batter into a muffin tin lined with paper liners and bake for about 20-25 minutes, or until a toothpick comes out clean.
- How long does this last? It’s best eaten within 2-3 days at room temperature, tightly wrapped. But let’s be honest, it rarely lasts that long. It also freezes beautifully!
- Can I use self-rising flour? You *could*, but you’d need to omit the baking soda and salt. However, for this recipe, the precise ratio of ingredients is part of what makes it so awesome, so sticking to all-purpose is best.
Final Thoughts
There you have it! The ultimate guide to ridiculously good, ridiculously easy buttermilk banana bread. Now go forth and bake! You’ve got this. Whether you’re sharing it with loved ones or hoarding it all for yourself (no judgment here), you’re about to create something truly special. Enjoy every single moist, flavorful bite!
“`

