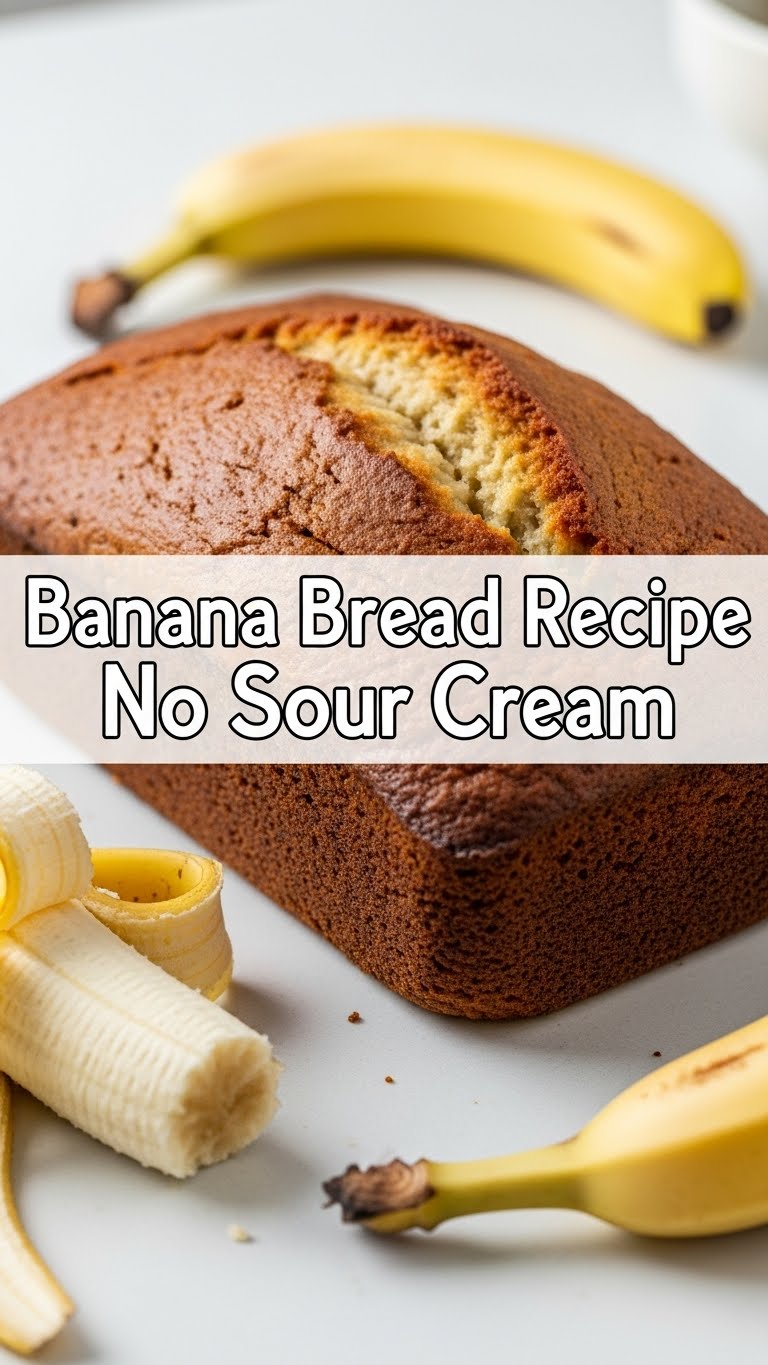
So you’re craving something warm, comforting, and *actually* easy to make, but your fridge just gave you a blank stare when you mentioned sour cream? Been there, friend. And guess what? We’re about to make the best banana bread of your life, no fancy dairy required. It’s a miracle, I tell ya!
Why This Recipe is Awesome
First off, this isn’t your grandma’s ‘measure everything precisely or face her wrath’ kind of recipe. This is ‘dump it all in and pray for the best’ – and it actually works! Seriously, it’s pretty much **idiot-proof**. I’ve made it on days where my brain was 70% coffee fumes and 30% existential dread, and it still turned out perfectly. Plus, no sour cream means fewer trips to the grocery store and more time for important things, like binging your favorite show. Win-win!
Ingredients You’ll Need
- Ripe Bananas: 3-4 medium, **super spotty** ones. We’re talking almost black, looking-like-they-belong-in-the-bin kind of bananas. The spottier, the sweeter!
- All-Purpose Flour: 1 ½ cups. The basic stuff, no fancy almond or coconut flour unless you’re feeling adventurous (and prepared for different results, FYI).
- Granulated Sugar: ¾ cup. Sweetness is key, my friend. Adjust if your bananas are *insanely* sweet or if you prefer less.
- Melted Butter: ½ cup (1 stick). Unsalted, because we’re controlling the salt here. And yes, butter is non-negotiable for flavor. Don’t even think about oil first.
- Egg: 1 large. The binder, the glue, the reason it all sticks together.
- Vanilla Extract: 1 teaspoon. Pure stuff, please. It makes a difference, trust me.
- Baking Soda: 1 teaspoon. Our leavening agent. Don’t skip this, unless you want a banana brick.
- Salt: ½ teaspoon. Balances the sweetness and brings out all those lovely flavors.
- Optional Mix-ins: Chocolate chips (duh!), chopped nuts, cinnamon – go wild!
Step-by-Step Instructions
- Preheat & Prep: Get that oven to 350°F (175°C) and grease a 9×5 inch loaf pan. Line it with parchment paper if you want an easy lift-out later. **Don’t skip the preheat!**
- Mash ‘Em Up: In a large bowl, mash those gloriously ugly bananas with a fork until they’re mostly smooth but still have a few small lumps. We like texture!
- Wet Ingredients Party: Add the melted butter, sugar, egg, and vanilla extract to the mashed bananas. Whisk it all together until it’s just combined. Don’t overmix!
- Dry Ingredients Unite: In a separate medium bowl, whisk together the flour, baking soda, and salt. Make sure there are no lumpy bits.
- Combine Forces: Pour the dry ingredients into the wet ingredients. Mix with a spatula or spoon **just until combined**. A few streaks of flour are totally fine; overmixing develops gluten and makes tough bread. We want tender, not tough!
- Add the Goodies: Fold in any optional mix-ins now. Chocolate chips are always a good idea, IMO.
- Bake It Baby: Pour the batter into your prepared loaf pan. Pop it into the preheated oven and bake for 50-65 minutes.
- The Poke Test: To check for doneness, insert a toothpick into the center. If it comes out clean (or with a few moist crumbs), it’s ready!
- Cool Down: Let it cool in the pan for about 10-15 minutes before transferring it to a wire rack to cool completely. Patience is a virtue, especially when warm banana bread is involved.
Common Mistakes to Avoid
- Using yellow bananas: They aren’t sweet enough, and your bread will be sad. **Always go for spotty, practically black bananas!**
- Overmixing the batter: This is a big one! It activates the gluten and makes your bread tough and chewy. Mix just until the dry ingredients disappear.
- Not preheating the oven: Rookie mistake! Your bread won’t rise properly, and the texture will be off. Give that oven time to get hot.
- Cutting into it too soon: I know, the smell is intoxicating. But let it cool a bit in the pan, then fully on a rack. It continues to cook slightly and firm up as it cools.
- Using cold butter: If you forget to melt it, the texture won’t be as good. Melted butter ensures an even distribution and moist crumb.
Alternatives & Substitutions
- No butter? While I’d strongly suggest butter for flavor, you *can* use an equal amount of neutral oil (like vegetable or canola). Just know the flavor profile will be slightly different – less rich, more… oily.
- No plain flour? Whole wheat pastry flour can work for a slightly healthier twist, but it might be a bit denser. I’d stick to AP for the first go.
- Want more spice? Add 1 teaspoon of ground cinnamon or a pinch of nutmeg to the dry ingredients for an extra cozy vibe.
- Craving nuts? Walnuts or pecans are classic. Toast them first for extra oomph!
FAQ (Frequently Asked Questions)
- Can I use margarine instead of butter? Well, technically yes, but why hurt your soul like that? Butter just tastes better and gives a richer crumb. But if it’s all you have, go for it!
- My bananas aren’t ripe enough! Help! You can try baking them on a baking sheet at 300°F (150°C) for 15-30 minutes until the peels are black and shiny. Let them cool before mashing. Crisis averted!
- How long does it last? Covered tightly at room temp, it’s good for 3-4 days. In the fridge, it stretches to about a week. But honestly, it rarely lasts that long!
- Can I freeze banana bread? Absolutely! Wrap cooled slices or the whole loaf tightly in plastic wrap, then foil. It’s good for up to 3 months. Perfect for a future craving!
- Can I add more sugar? You *can*, but those ripe bananas are already bringing a lot of sweetness to the party. Taste the batter (before adding egg if you’re worried) and adjust if needed, but I find ¾ cup is usually perfect.
Final Thoughts
See? Told you it was easy! Now you’ve got a warm, fragrant loaf of homemade goodness, all thanks to your amazing (and slightly lazy) self. This banana bread is perfect for breakfast, an afternoon snack, or a late-night indulgence. Go ahead, slice yourself a thick piece, maybe add a pat of butter, and revel in your success. You’ve earned it, chef! Now go impress someone – or yourself – with your new culinary skills. Happy baking!

