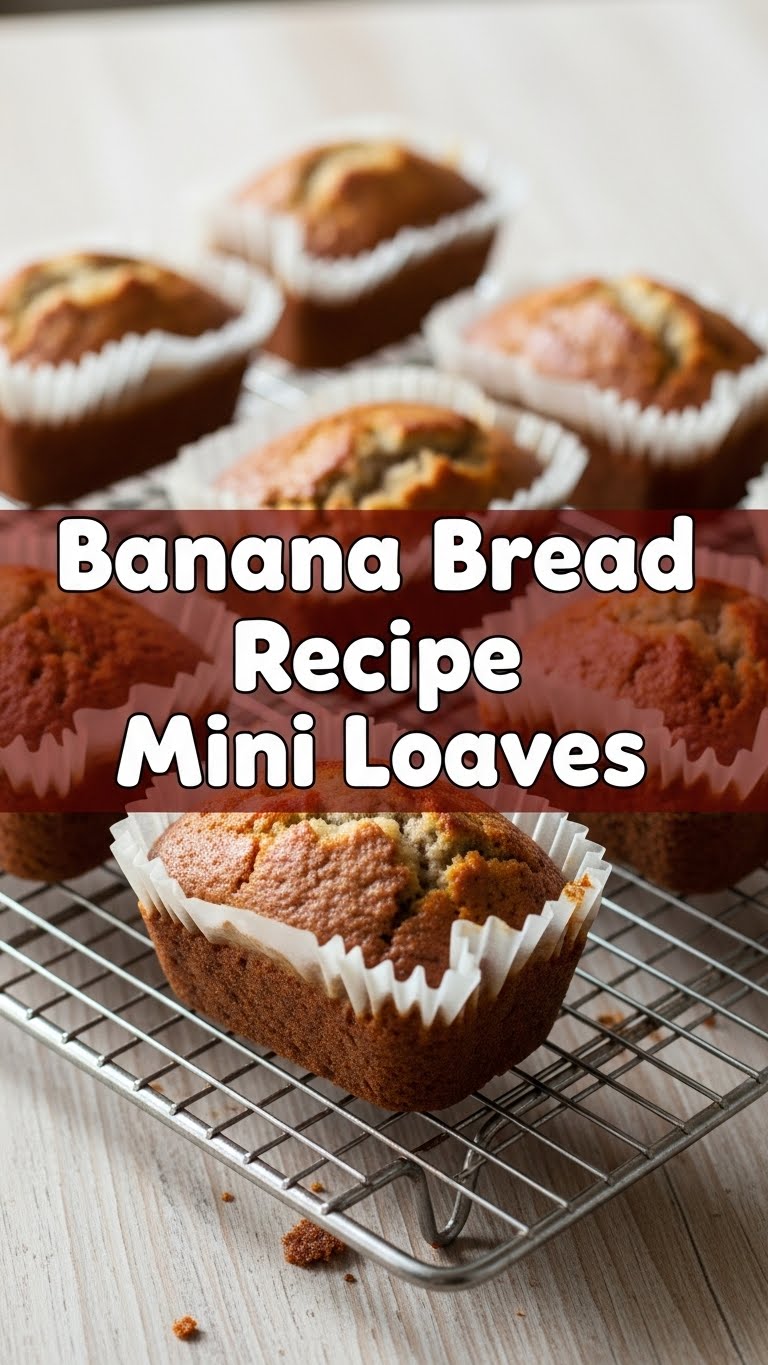
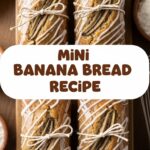
So you’re craving something tasty but too lazy to spend forever in the kitchen, huh? Same. We’ve all been there, staring at those suspiciously brown bananas on the counter, knowing their destiny involves either the trash can or pure deliciousness. Well, today, my friend, we choose deliciousness. But not just any deliciousness – we’re talking about **Banana Bread Mini Loaves**. Because who wants to share a big loaf when you can have your own personal, adorable, handheld happiness?
Why This Recipe is Awesome
Okay, let’s be real. This isn’t just *any* banana bread recipe. This is THE banana bread recipe. Why? Because it’s practically **idiot-proof**. And if *I* can make it without setting off the smoke detector, you definitely can too. Seriously, it’s that easy. Plus, mini loaves mean faster baking, individual portions (so you don’t have to pretend you’re only having “one slice”), and they look ridiculously cute. Perfect for gifting, pretending you’re a fancy baker, or just hoarding all for yourself. No judgment here, folks.
Ingredients You’ll Need
Gather ’round, my culinary comrades! Here’s what you’ll need to transform those sad, spotty bananas into glorious mini breads:
- **3-4 Overripe Bananas:** The spottier, the better! We’re talking brown, mushy, practically liquid bananas. This is where all the flavor comes from, so don’t be shy.
- **1/2 cup (1 stick) Unsalted Butter:** Melted, because we’re not about that cold butter life today.
- **1 cup Granulated Sugar:** For that sweet, sweet goodness. Adjust to your sweet tooth, but this is a good starting point.
- **1 Large Egg:** Lightly beaten. At room temperature if you’re feeling extra fancy, but honestly, who plans that far ahead?
- **1 tsp Vanilla Extract:** The secret sauce that makes everything smell and taste amazing. Don’t skip this!
- **1 1/2 cups All-Purpose Flour:** Standard stuff, nothing complicated.
- **1 tsp Baking Soda:** The magic poof powder that makes your bread rise.
- **1/2 tsp Salt:** Just a pinch, to balance the sweetness. Don’t want it tasting like the ocean, but it makes a difference.
- **Optional Add-ins:** 1/2 cup chocolate chips (because, duh), chopped walnuts or pecans (for a grown-up vibe).
Step-by-Step Instructions
- **Preheat Your Oven & Prep Your Pans:** Crank that oven to **350°F (175°C)**. Grease and flour (or use baking spray) a mini loaf pan (usually makes 6-8 mini loaves). Trust me, you don’t want your beautiful creations sticking.
- **Mash Those Bananas:** In a medium bowl, mash your overripe bananas with a fork until they’re mostly smooth but still have a few small lumps. We’re going for “rustic,” not “baby food.”
- **Combine Wet Ingredients:** Add the melted butter, sugar, beaten egg, and vanilla extract to the mashed bananas. Stir until everything is well combined and looks like a glorious, slightly chunky, golden-brown goo.
- **Mix Dry Ingredients:** In a separate, smaller bowl, whisk together the flour, baking soda, and salt. Make sure there are no lumpy bits of baking soda chilling out.
- **Unite the Mixtures:** Pour the dry ingredients into the wet ingredients. Now, here’s the crucial part: **Mix just until combined.** A few streaks of flour are totally fine. Overmixing is the enemy of tender banana bread; it makes it tough and chewy. And nobody wants tough banana bread, IMO.
- **Stir in Add-ins (Optional):** If you’re using chocolate chips or nuts, gently fold them in now.
- **Fill ‘Em Up:** Divide the batter evenly among your prepared mini loaf pans. Fill them about two-thirds full to leave room for rising.
- **Bake ‘Em Beautiful:** Pop the pans into your preheated oven. Bake for **20-25 minutes**, or until a toothpick inserted into the center of a loaf comes out clean. Mini loaves bake faster, FYI!
- **Cool Down:** Let the mini loaves cool in the pan for about 10 minutes before carefully transferring them to a wire rack to cool completely. Or, you know, eat one while it’s still warm. Your house, your rules.
Common Mistakes to Avoid
Listen, we all make mistakes. But let’s try to avoid these:
- **Using Under-ripe Bananas:** Seriously, green bananas will give you sad, flavorless bread. Wait until they’re practically black. Patience, grasshopper.
- **Overmixing the Batter:** This is a big one! As mentioned, overmixing develops the gluten too much, resulting in dense, chewy, and generally unhappy bread. Mix until *just* combined.
- **Overfilling the Pans:** You might think more batter equals more bread, but it just equals an overflowing mess in your oven. Leave some room for them to rise!
- **Not Greasing Your Pans Properly:** Rookie mistake! Your precious mini loaves will stick, and you’ll end up with crumbly sadness instead of perfect little breads.
- **Cutting Too Soon:** I know, the smell is intoxicating. But if you cut into hot banana bread, it’ll likely fall apart. Let it cool a bit; it’s worth the wait.
Alternatives & Substitutions
Feeling adventurous? Or just missing an ingredient? No stress! This recipe is pretty forgiving:
- **Butter Alternatives:** You can totally use 1/2 cup of vegetable oil, melted coconut oil, or even applesauce (for a healthier twist, though it might change the texture slightly) instead of butter.
- **Sugar Swaps:** Brown sugar can replace granulated sugar for a deeper, molasses-y flavor. You might even reduce the sugar if your bananas are super ripe!
- **Flour Power:** Want to make it a bit healthier? Swap out 1/2 cup of all-purpose flour for whole wheat flour. Just know it might be a tad denser. Gluten-free flour blends work well too!
- **Spice It Up:** Add 1 teaspoon of cinnamon or a pinch of nutmeg for some extra warmth.
- **Different Mix-ins:** Raisins, dried cranberries, shredded coconut, or even a swirl of nut butter can be awesome additions. Get creative!
- **No Mini Loaf Pan? No Problem!** Pour the batter into a standard 9×5 inch loaf pan and bake for 50-60 minutes, or until a toothpick comes out clean. Easy peasy.
FAQ (Frequently Asked Questions)
Because I know you’ve got questions!
- **How ripe should bananas really be?** Seriously, the riper, the better. We’re talking brown, spotty, almost black. If they look like you’re about to throw them out, they’re perfect.
- **Can I freeze banana bread mini loaves?** Absolutely! Once completely cooled, wrap each mini loaf tightly in plastic wrap, then place them in a freezer-safe bag or container. They’ll last for up to 3 months. Just thaw at room temp when you’re ready for a treat!
- **How long do these mini loaves last?** At room temperature, in an airtight container, they’ll be good for about 3-4 days. In the fridge, they can stretch to about a week.
- **What if I don’t have mini loaf pans?** No worries! Use a muffin tin! Fill liners about two-thirds full and bake for 18-22 minutes. Or, as mentioned, a standard loaf pan.
- **Can I use margarine instead of butter?** Well, technically yes, but why hurt your soul like that? Butter just tastes better, period. But if that’s all you have, it’ll work in a pinch.
- **Can I make this vegan?** You bet! Substitute the butter with vegan butter or oil, and use a “flax egg” (1 tbsp ground flaxseed + 3 tbsp water, let sit for 5 mins) instead of a regular egg.
Final Thoughts
So there you have it, folks! Your new go-to recipe for the most delightful, easy-peasy banana bread mini loaves. You’ve officially conquered those sad, lonely bananas and turned them into something truly magical. Now go impress someone—or yourself—with your new culinary skills. You’ve earned it! Grab a cup of coffee (or wine, no judgment), kick back, and enjoy your perfectly portioned, incredibly delicious creation. You’re basically a professional baker now. You’re welcome!
