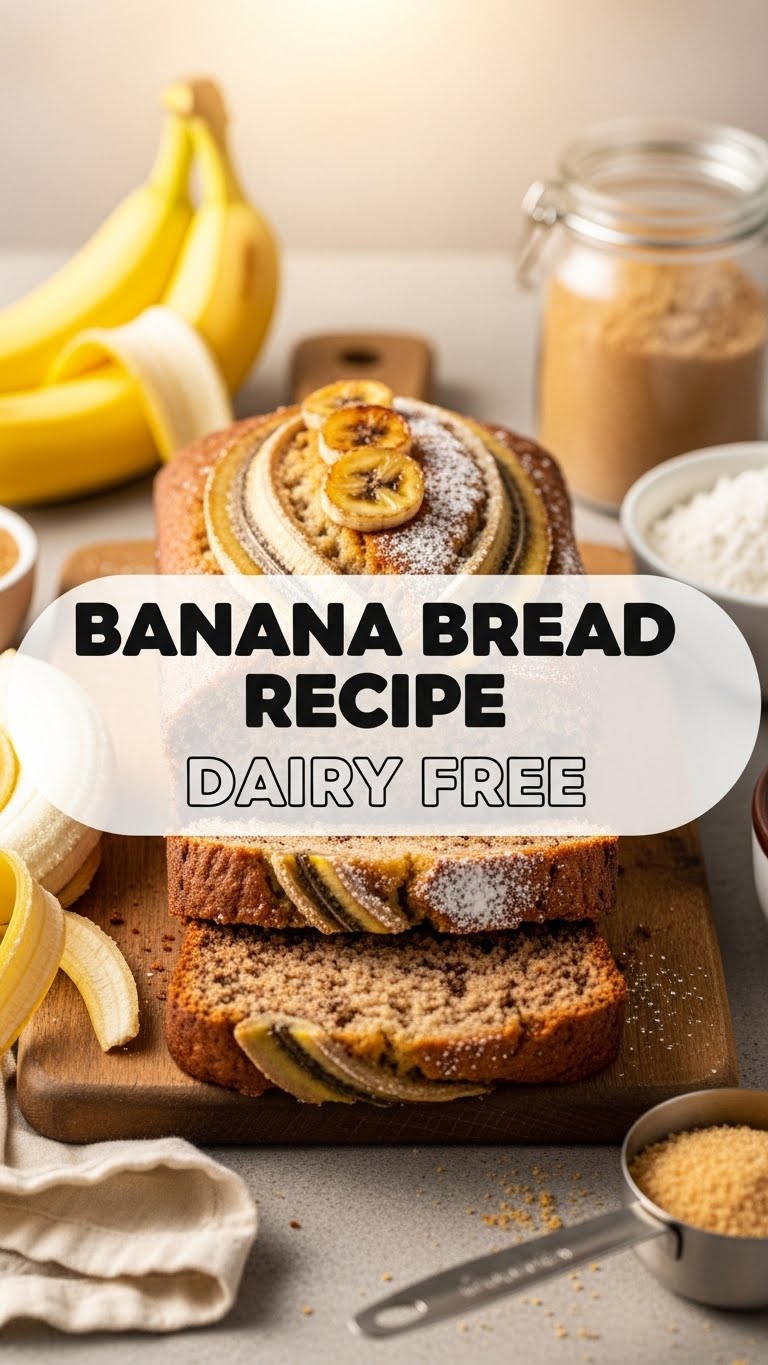
So you’re staring at those spotty bananas on your counter, feeling a mix of guilt and potential. You want something delicious, comforting, and ideally, something that doesn’t require you to, like, *adult* too much in the kitchen, right? Good news, pal. We’re about to make some ridiculously good dairy-free banana bread that’s so easy, your cat could probably supervise.
Why This Recipe is Awesome
Okay, first things first: this isn’t just *any* banana bread. This is the ‘I swear I’m a baking genius’ banana bread. It’s ridiculously moist, perfectly sweet, and guess what? It’s dairy-free, meaning more happy tummies for everyone, or just for you if you’re hoarding it all (no judgment here). Plus, it’s pretty much a one-bowl wonder, so cleanup is a breeze. It’s practically foolproof – even for those of us who occasionally burn water. True story.
Ingredients You’ll Need
- 3 ripe bananas, mashed: The spottier, the better! We’re talking ‘looks like it’s been through a street fight’ ripe. Don’t be shy.
- 1/3 cup dairy-free butter, melted: Or any neutral oil if you’re feeling wild. Just don’t use motor oil, obviously.
- 1/2 cup granulated sugar: Because life’s too short for unsweetened baked goods.
- 1 large egg: The binder! Like the glue of deliciousness.
- 1 teaspoon vanilla extract: Liquid gold. Don’t skimp.
- 1 1/2 cups all-purpose flour: The base of our masterpiece.
- 1 teaspoon baking soda: Our leavening MVP, making it fluffy, not flat.
- 1/2 teaspoon salt: Just a pinch to make everything else taste even better.
- Optional: 1/2 cup chocolate chips or chopped nuts: Because sometimes, you just need a little extra pizzazz. YOLO.
Step-by-Step Instructions
- Get that oven ready: Preheat your oven to 350°F (175°C). Line a 9×5 inch loaf pan with parchment paper or give it a good spray with cooking oil. Nobody wants sticky situations.
- Mash ’em up: In a large bowl, mash those gloriously ripe bananas. Get out any aggression you might have.
- Wet ingredients party: Add the melted dairy-free butter (or oil), sugar, egg, and vanilla extract to the mashed bananas. Stir ’em all together until just combined. Don’t overmix; we’re not making a soufflé here.
- Dry ingredients join in: In a separate bowl (or just dump them straight in if you’re living dangerously), whisk together the flour, baking soda, and salt.
- Combine the crew: Gradually add the dry ingredients to the wet ingredients. Mix until *just* combined. A few lumps are totally fine, even desirable. Overmixing leads to tough bread, and nobody wants that. Pro tip: Fold in those optional chocolate chips or nuts now if you’re using them.
- Into the pan: Pour the batter into your prepared loaf pan. Give it a gentle tap on the counter to settle.
- Bake it ’til beautiful: Bake for 50-60 minutes, or until a toothpick inserted into the center comes out clean. If the top starts browning too fast, you can loosely tent it with foil.
- Cool down, buttercup: Let it cool in the pan for about 10 minutes before transferring it to a wire rack to cool completely. Patience, young padawan, it’s worth it.
Common Mistakes to Avoid
- Using under-ripe bananas: You know, the firm, yellow ones? Save those for smoothies. We need spotty, mushy, almost-past-their-prime bananas for peak flavor. This isn’t a beauty contest.
- Overmixing the batter: Seriously, I can’t stress this enough. Once the wet and dry ingredients are *just* combined, stop. Mixing too much develops the gluten, making your bread tough and chewy. We want tender, moist goodness, not a rubber tire.
- Not preheating your oven: Thinking you can skip this step? Rookie mistake! A properly preheated oven ensures even baking from the get-go.
- Cutting it too soon: I know, the smell is intoxicating. But slicing into hot banana bread is a recipe for a crumbly mess. Let it chill out.
Alternatives & Substitutions
- No dairy-free butter? No problem! Use an equal amount of any neutral-flavored oil like canola, vegetable, or melted coconut oil. Coconut oil will give it a slight coconut flavor, which, IMO, isn’t a bad thing!
- Different sugars? You can try brown sugar for a richer, more caramel-y flavor. Just swap it 1:1. Maple syrup or agave *might* work, but it can affect the moisture content, so proceed with caution, my friend.
- Gluten-free flour? Yep, you can totally do that! Just grab a 1:1 gluten-free all-purpose flour blend. Your bread might have a slightly different texture, but still delish.
- Add-ins galore! Feel free to experiment. Walnuts, pecans, shredded coconut, dried cranberries – whatever makes your heart sing (and your taste buds tingle).
FAQ (Frequently Asked Questions)
- My bananas aren’t ripe enough! What do I do? Panic? Nah. You can speed up ripening by baking them *with their peels on* at 300°F (150°C) for 15-30 minutes until they’re black and soft. Or, if you’re truly desperate, just use what you have and accept it might be a bit less banana-y.
- Can I make this into muffins? Um, yes! Absolutely! Reduce the baking time to about 20-25 minutes, checking for doneness. Mini loaf pans work great too!
- How do I store this masterpiece? At room temp, tightly covered, for 2-3 days. Or in the fridge for up to a week. For longer, slice it up and freeze the slices for an easy grab-and-go treat. Just zap in the microwave!
- Can I add spices? Spice it up, buttercup! A teaspoon of cinnamon or a pinch of nutmeg would be *divine*.
- Is it really dairy-free? Like, truly? If you use dairy-free butter/oil and no other dairy products, then yes! Pat yourself on the back, you savvy baker.
- What if I don’t have an egg? You *could* try an egg substitute like a flax egg (1 tbsp ground flaxseed + 3 tbsp water, let sit for 5 mins). The texture might be a smidge different, but it usually works!
Final Thoughts
And there you have it, folks! A dairy-free banana bread recipe that’s about to become your new favorite go-to. It’s proof that sometimes, the simplest things are the most satisfying. So go ahead, whip up a batch, fill your home with that glorious smell, and then proceed to devour it, slice by glorious slice. You’ve earned it, culinary rockstar! Now go impress someone—or yourself—with your new skills. No dairy, no problem!
