So, you’re scrolling through your phone, minding your own business, and BAM! A sudden, irresistible craving for something warm, sweet, and comforting hits you. But, like, without the whole “spent five hours in the kitchen” drama, right? You’re not alone, my friend. We’ve all been there. And that, my dear lazy-but-culinarily-aspirational chef, is why we’re making Banana Bread with Honey today. It’s basically a hug in loaf form, and guess what? It’s ridiculously easy. Let’s dive in!
Why This Recipe is Awesome
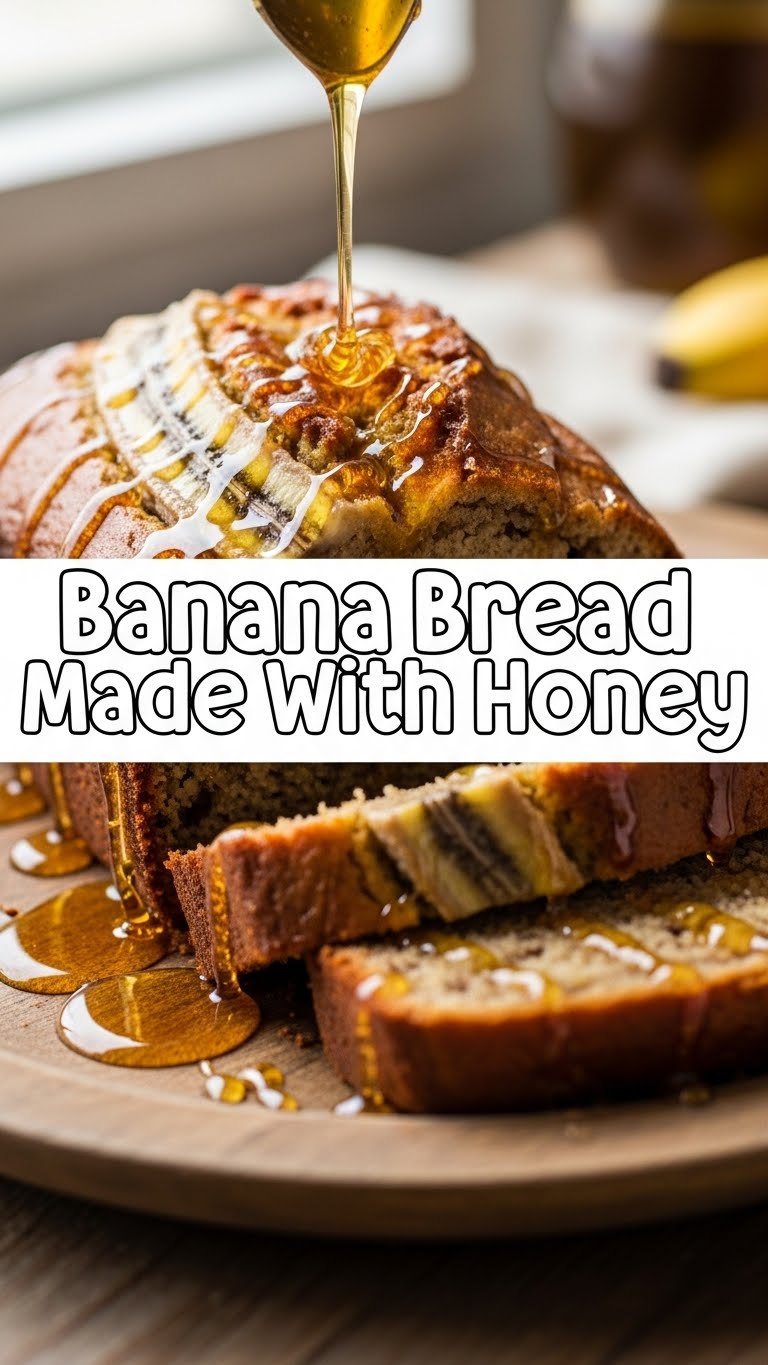
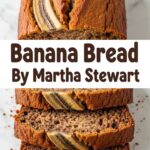
Okay, first things first: this isn’t just *any* banana bread. This is the banana bread. Why? Because we’re swapping out some of the usual sugar for glorious, golden honey. This means your bread stays incredibly moist, gets that beautiful subtle sweetness, and honestly, just tastes a bit more sophisticated without you having to lift an extra finger. Plus, it’s basically a one-bowl wonder, meaning less washing up. And let’s be real, less washing up is always a win. Seriously, it’s pretty much idiot-proof; I even managed it without a catastrophic kitchen incident, and that’s saying something.
Ingredients You’ll Need
Gather ’round, pantry explorers! Here’s your hit list for deliciousness:
- 3 Ripe Bananas: And by “ripe,” I mean borderline offensive. Black spots, mushy texture? Perfect! Don’t even *think* about using yellow ones, you monster.
- 1/2 cup Honey: The star of our show! Any good quality honey will do. Local is a bonus if you’re feeling fancy.
- 1/4 cup Granulated Sugar: Just a little extra sweetness to balance things out. You can slightly reduce if your bananas are super sweet.
- 1/2 cup Unsalted Butter: Melted and slightly cooled. Because everything’s better with butter, duh.
- 1 Large Egg: Room temperature, if you’re really trying to impress, but honestly, straight from the fridge works too. Don’t stress it.
- 1 teaspoon Vanilla Extract: A splash of magic to make everything smell amazing.
- 1 1/2 cups All-Purpose Flour: The foundation of our delicious loaf.
- 1 teaspoon Baking Soda: Our trusty leavening agent. This is what makes it rise and feel all fluffy.
- 1/2 teaspoon Salt: Don’t skip this! It balances the sweetness and brings out all the flavors.
- Optional: A handful of chocolate chips, chopped nuts (walnuts or pecans are great), or a pinch of cinnamon/nutmeg if you’re feeling spicy.
Step-by-Step Instructions
Ready? Set? Bake!
- Preheat Power: First things first, get your oven to 350°F (175°C). And grease up a 9×5 inch loaf pan. Seriously, don’t forget the greasing part unless you want your banana bread to become one with the pan.
- Banana Mash-Up: In a large bowl, take those gloriously ripe bananas and mash them up with a fork. You want some chunks, not baby food, so don’t go overboard.
- Wet Wonders: To your mashed bananas, add the melted butter, honey, granulated sugar, egg, and vanilla extract. Whisk it all together until it’s just combined. Don’t overmix; we’re making bread, not a science experiment.
- Dry Mix Magic: In a separate, medium-sized bowl, whisk together the flour, baking soda, and salt. Make sure there are no lumpy bits.
- Combine Forces: Now, gently pour the dry ingredients into the wet ingredients. Mix until just combined. A few streaks of flour are totally fine. Overmixing is the enemy of tender banana bread, remember that! If you’re adding optional goodies like nuts or chocolate chips, fold them in now.
- Pan It Up: Pour your glorious batter into the prepared loaf pan. Give it a gentle tap on the counter to settle.
- Bake Time Bliss: Pop that pan into your preheated oven. Bake for about 50-65 minutes. How do you know it’s done? A toothpick inserted into the center should come out clean, or with just a few moist crumbs.
- Cool Down: Once baked, let it cool in the pan for about 10 minutes (patience, young padawan!). Then, carefully remove it from the pan and let it cool completely on a wire rack. Or, if you’re like me, cut into it warm because who can resist?
Common Mistakes to Avoid
Listen up, buttercup. We’re here to make deliciousness, not disasters. Steer clear of these rookie errors:
- Using Under-Ripe Bananas: We covered this, but it bears repeating. Green or yellow bananas mean less flavor and sweetness. Embrace the brown!
- Overmixing the Batter: This is a big one. Mixing too much develops the gluten, making your bread tough and chewy. We want tender, moist goodness, not a rubbery brick. Mix until just combined, period.
- Forgetting to Grease the Pan: Unless you enjoy chiseling your bread out of the pan, don’t skip this step. A quick spray or a swipe of butter and flour is all it takes.
- Opening the Oven Door Too Early: Resist the urge! Opening the door too soon can cause your bread to sink in the middle. Give it at least 45 minutes before you peek.
Alternatives & Substitutions
Feeling a little adventurous, or just missing an ingredient? No worries, I got you!
- Flour Power: You can swap out up to half of the all-purpose flour for whole wheat flour if you’re feeling wholesome. It adds a lovely nutty flavor, IMO.
- Sweet Swap: While this is a honey recipe, if you’re ever in a pinch and don’t have enough, you can use maple syrup for some of the honey. The flavor will change, but it’ll still be delish.
- Fat Facts: No butter? You can use vegetable oil or melted coconut oil instead. The texture might be slightly different, but it’ll still be good.
- Add-Ins Galore: This recipe is a canvas! Feel free to throw in chocolate chips, chopped walnuts, pecans, shredded coconut, or even dried cranberries. Just a 1/2 to 3/4 cup is usually plenty.
FAQ (Frequently Asked Questions)
Got questions? I’ve got answers (mostly humorous ones).
- “Can I use less sugar since I’m using honey?”
You totally can! Honey is sweeter than sugar, so feel free to reduce the granulated sugar by a tablespoon or two if your bananas are super ripe and you prefer a less sweet bread. Just don’t eliminate it completely unless you know what you’re doing; it affects the texture too.
- “My bananas aren’t ripe enough! What do I do?”
Panic? Just kidding! You can speed up ripening by baking them in their skins on a baking sheet at 300°F (150°C) for 15-30 minutes until they’re black and soft. Or just wait. Patience is a virtue, especially for banana bread.
- “How should I store this amazing banana bread?”
Once completely cooled, store it in an airtight container at room temperature for up to 3-4 days. For longer storage, wrap it tightly in plastic wrap and then foil, and freeze for up to 3 months. It thaws beautifully!
- “Can I add spices like cinnamon?”
YES! A full teaspoon of cinnamon or a half teaspoon of nutmeg would be a fantastic addition. It just adds another layer of cozy flavor. Go wild!
- “Is it okay if my batter looks lumpy?”
Absolutely! A slightly lumpy batter is actually preferred. It means you haven’t overmixed it, which leads to a more tender and moist final product. Embrace the lumps!
Final Thoughts
And there you have it, folks! Your very own, incredibly delicious, honey-kissed banana bread. It’s perfect for breakfast, a snack, dessert, or just, you know, because it’s Tuesday. You’ve navigated the tricky waters of banana mashing and oven temperatures, and now you have a loaf of pure joy to show for it. So go ahead, slice yourself a thick piece, grab a cup of coffee (or tea, or wine, I’m not judging), and bask in your baking glory. Now go impress someone—or yourself—with your new culinary skills. You’ve earned it!

