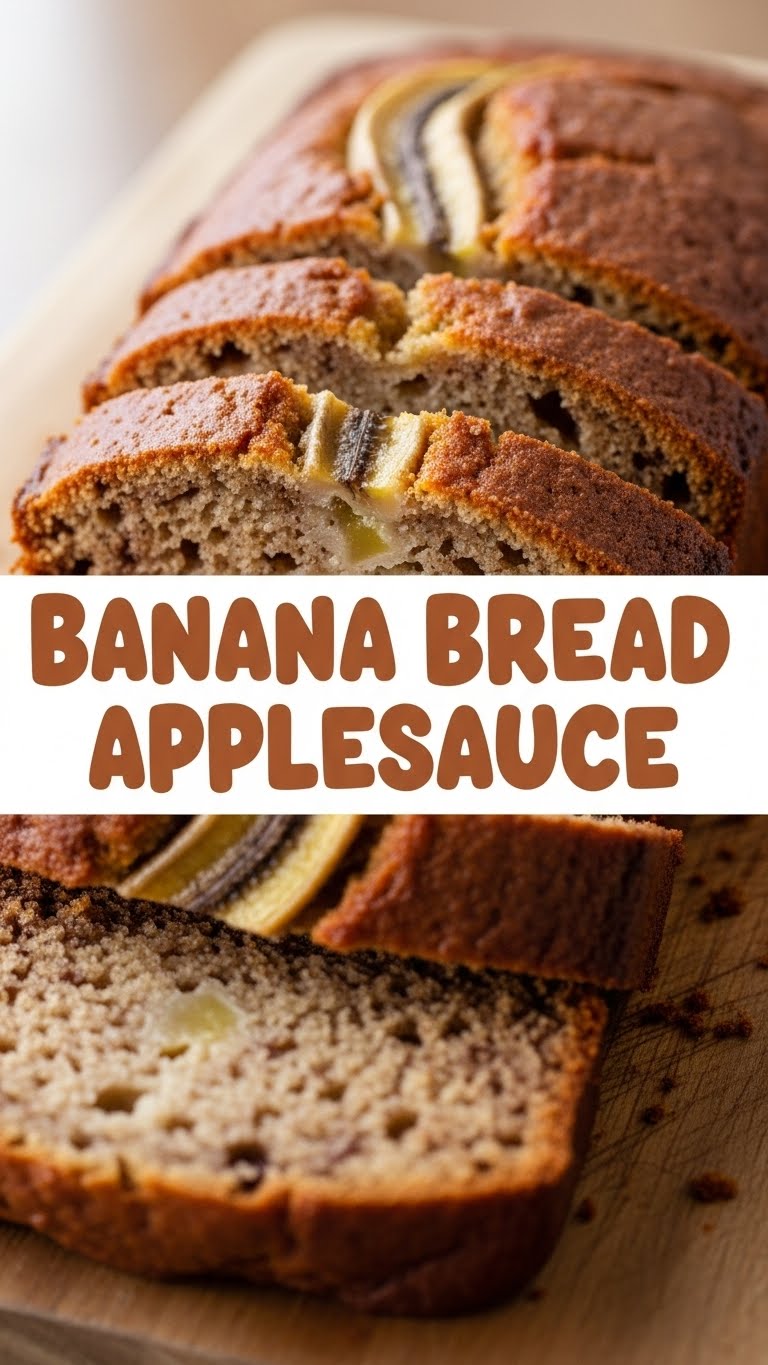
So, you’ve got a bunch of bananas on your counter looking a bit… well, *experienced*? And maybe you’ve also got some applesauce chilling in the back of your fridge, wondering when its moment in the sun will come? My friend, today is that day! We’re not just making banana bread; we’re making **Banana Bread Applesauce**. It’s basically two comfort food superheroes teaming up to save your taste buds from boredom. Get ready, because this is about to be your new go-to for using up those sad, brown bananas and getting a hug in carb form.
Why This Recipe is Awesome
Okay, so why should you even bother with *this* particular banana bread recipe? Let me count the ways:
- **It’s Idiot-Proof:** Seriously. If you can mash a banana and stir things, you can nail this. I’ve personally put this to the test on days when my brain felt like scrambled eggs, and it still came out amazing.
- **Moisture Level 1000:** The applesauce isn’t just there for flavour; it’s a secret weapon for an unbelievably moist crumb. No dry, crumbly banana bread on my watch!
- **Minimal Effort, Maximum Reward:** We’re talking one bowl (mostly), simple ingredients, and a payoff that’ll make your kitchen smell like a cozy autumn dream. It’s like magic, but with less actual magic and more sugar.
- **Banana Bread, But Make It ✨Extra✨:** The applesauce adds a subtle tang and an extra layer of fruitiness that takes your classic banana bread from “good” to “OMG, what’s your secret?”
Ingredients You’ll Need
Gather your troops! Here’s what you’ll need to make this magic happen:
- **3-4 Very Ripe Bananas:** The browner, the better. We’re talking “ready for the compost” brown, not just “a few spots” brown. These are your flavor bombs!
- **1/2 cup Unsweetened Applesauce:** Your moisture hero. Store-bought is totally fine; no need to make your own unless you’re feeling extra fancy.
- **1/2 cup (1 stick) Unsalted Butter, melted:** Because everything is better with butter.
- **1 Large Egg:** A binder, a friend, a necessary evil.
- **1 tsp Vanilla Extract:** The good stuff, please. It really does make a difference.
- **1 3/4 cups All-Purpose Flour:** The structural integrity of our deliciousness.
- **1 tsp Baking Soda:** Our leavening agent. Don’t skip this unless you want a flat banana brick.
- **1/2 tsp Salt:** Balances all the sweetness. Don’t underestimate its power!
- **1/2 cup Granulated Sugar:** Just enough sweetness without being cloyingly so.
- **(Optional) 1/2 cup Chocolate Chips, Nuts, or Other Mix-ins:** Go wild or keep it pure. Your bread, your rules!
Step-by-Step Instructions
Time to get your bake on! Follow these super simple steps:
- **Preheat Your Oven & Prep Your Pan:** Get that oven up to **350°F (175°C)**. While it’s heating, grease and flour a 9×5 inch loaf pan. Or, if you’re lazy like me, just spray it with non-stick spray.
- **Mash Those Bananas:** In a large bowl, mash your super ripe bananas with a fork until they’re mostly smooth, but a few lumps are totally fine. Texture, right?
- **Wet Ingredients Unite:** Add the melted butter, applesauce, egg, and vanilla extract to your mashed bananas. Stir them all together until everything is well combined. Don’t overthink it, just mix!
- **Dry Team Assembles:** In a separate, medium bowl, whisk together the flour, baking soda, salt, and sugar. Give it a good whisk to ensure everything is evenly distributed.
- **Combine & Conquer:** Pour the dry ingredients into the wet ingredients. Mix until *just* combined. And here’s a **pro-tip: stop mixing as soon as you don’t see any dry flour anymore.** Overmixing is the enemy of tender banana bread! If you’re adding mix-ins, gently fold them in now.
- **Pour & Bake:** Scrape that glorious batter into your prepared loaf pan. Pop it into the preheated oven and bake for **55-65 minutes**.
- **Check for Doneness:** The easiest way to tell if it’s done? Insert a toothpick into the center. If it comes out clean (or with just a few moist crumbs), you’re golden!
- **Cool Down, Then Dig In:** Let the loaf cool in the pan for about 10-15 minutes before turning it out onto a wire rack to cool completely. Or, if you’re like me and have zero patience, slice into it while it’s still warm. Your house will smell amazing either way.
Common Mistakes to Avoid
Listen, we all make mistakes. But with a little heads-up, you can avoid these classic blunders:
- **Using Under-Ripe Bananas:** This isn’t a suggestion, it’s a rule. Greenish-yellow bananas will give you a bland, less sweet bread. **Wait for those brown spots!**
- **Overmixing the Batter:** Seriously, I can’t stress this enough. Once the dry and wet ingredients meet, mix *just until* combined. Lumps are okay! Overmixing develops the gluten too much, leading to a tough, dense loaf. Nobody wants that.
- **Forgetting to Grease the Pan:** Unless you enjoy chiseling your banana bread out of the pan, don’t skip this step. A little butter or cooking spray goes a long way.
- **Opening the Oven Door Too Soon:** Resist the urge! Let your bread bake for at least 45 minutes before peeking, or it might sink in the middle. Patience, young Padawan.
Alternatives & Substitutions
Feeling adventurous? Or just realized you’re missing an ingredient? No stress! Here are some ideas:
- **Brown Sugar vs. Granulated:** You can totally swap out some or all of the granulated sugar for **brown sugar** for a deeper, more caramel-y flavour. IMO, it’s a delicious move!
- **Spices:** Feeling festive? Add 1/2 tsp of cinnamon, a pinch of nutmeg, or even a tiny bit of ground cloves. Pumpkin pie spice mix works too!
- **Dairy-Free?:** Swap the butter for a neutral oil (like canola or vegetable) and make sure your applesauce is unsweetened. Boom, mostly dairy-free!
- **Mix-ins:** Beyond chocolate chips or walnuts, consider pecans, dried cranberries, shredded coconut, or even a swirl of cream cheese for an extra decadent treat.
- **Applesauce Flavor:** While unsweetened is my go-to, if you only have cinnamon applesauce, go for it! Just maybe reduce the added sugar by a tablespoon or two, or not, if you have a sweet tooth like mine.
FAQ (Frequently Asked Questions)
- **Can I use frozen bananas?**
Heck yes! Just thaw them completely, drain any excess liquid (don’t skip this, otherwise your bread will be too wet), and mash away. They often become even mushier and sweeter when thawed, which is perfect.
- **My bananas aren’t super ripe, can I still make it?**
Well, technically yes, but why hurt your potential for deliciousness like that? If you absolutely must, you can bake them in their skins at 300°F (150°C) for 15-20 minutes until they turn black. Let them cool, then proceed. FYI, it’s a lifesaver trick!
- **What kind of applesauce is best?**
Unsweetened plain applesauce is my preference because it gives you more control over the sugar content and lets the banana flavor shine. But if you have sweetened or cinnamon applesauce on hand, it’ll still work great; your bread might just be a tad sweeter or spicier.
- **How do I store this deliciousness?**
Once cooled, wrap it tightly in plastic wrap or foil. It’ll stay fresh at room temperature for 2-3 days, or in the fridge for up to a week. If it lasts that long, you’re a stronger person than I am.
- **Can I freeze banana bread?**
Absolutely! Wrap the cooled loaf (or individual slices for easy thawing) tightly in plastic wrap, then a layer of foil. It freezes beautifully for up to 3 months. Just thaw at room temperature before serving.
Final Thoughts
So there you have it, folks! Your new favorite way to make banana bread – kicked up a notch with the humble, yet mighty, applesauce. This recipe is a testament to how simple ingredients can create something truly spectacular and comforting. It’s perfect for breakfast, an afternoon snack, or a sneaky midnight treat (no judgment here!). Now go impress someone—or yourself—with your new culinary skills. You’ve earned it!


