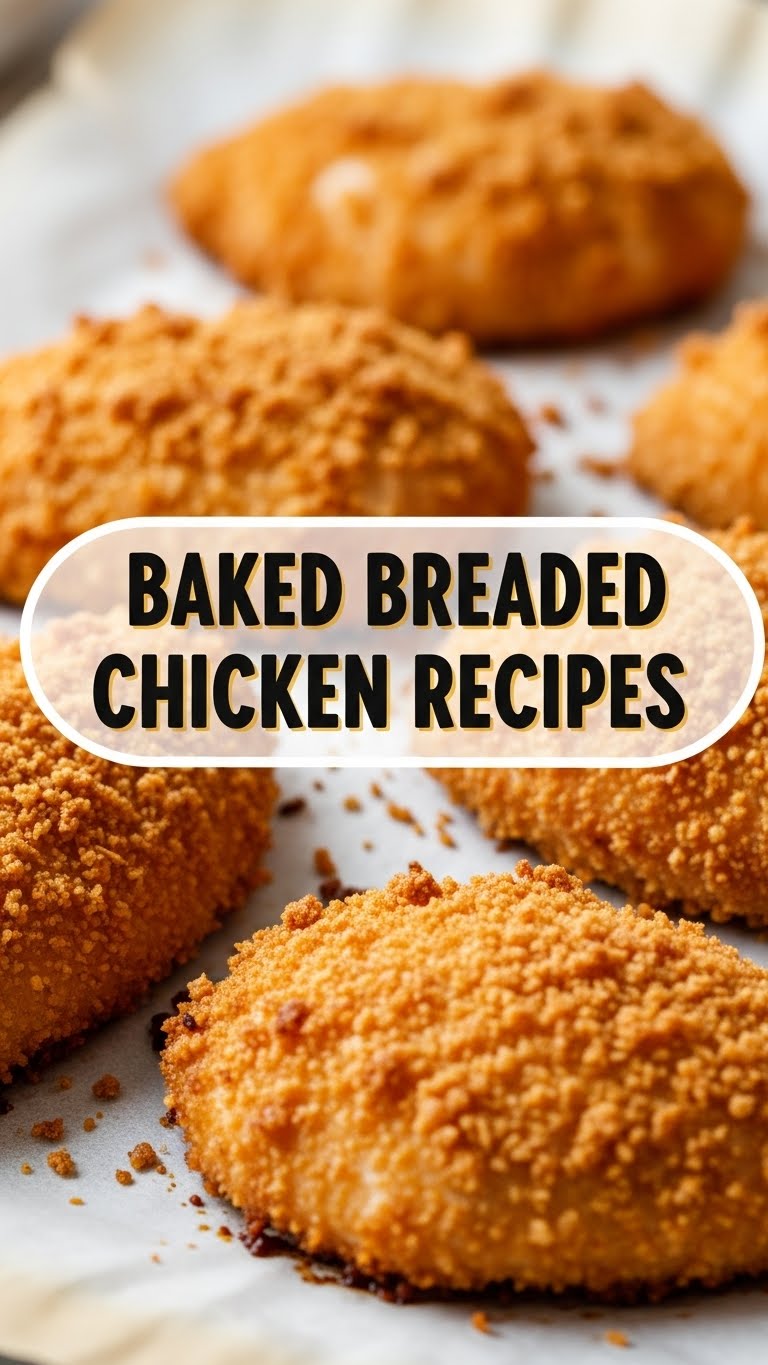
So, you’re staring into the fridge, dreaming of something crispy, juicy, and utterly delicious, but the thought of deep-frying makes you want to crawl back into bed? Been there, done that, bought the T-shirt! Well, my friend, get ready because we’re about to dive into the wonderful world of **baked breaded chicken**. It’s all the crunch, none of the oil-splatter drama, and seriously, *so* much easier than you think. Let’s get clucking!
Why This Recipe is Awesome
Okay, let’s be real. This isn’t just “awesome”; it’s a culinary hug for your soul that doesn’t require a culinary degree. First off, it’s **baked, not fried**, which means less mess, fewer calories (hooray for small victories!), and you won’t smell like a fast-food joint for the rest of the day. Plus, it’s pretty much **idiot-proof**. If I can make it without setting off the smoke detector, you totally can too. It’s quick enough for a weeknight but impressive enough for when you accidentally invite your boss over. Win-win, right?
Ingredients You’ll Need
Gather ’round, my little chef-in-training! Here’s your shopping list. Don’t worry, it’s mostly stuff you probably already have lurking in your pantry.
- **Chicken Breasts (2-4, boneless, skinless):** The star of our show! Pounded thin for even cooking, unless you like your chicken shaped like a mountain.
- **All-Purpose Flour (½ cup):** Our first stop in the breading station. Think of it as the primer.
- **Eggs (2 large):** The glue that holds all the deliciousness together. Give ’em a good whisk!
- **Panko Breadcrumbs (1.5 cups):** Or regular breadcrumbs, but Panko is **the secret to next-level crispiness**. Trust me on this.
- **Parmesan Cheese (½ cup, grated):** Optional, but why would you skip this? Adds a nutty, cheesy zing.
- **Seasonings (1 tsp garlic powder, 1 tsp onion powder, ½ tsp paprika, salt & pepper to taste):** The flavor gang! Feel free to spice it up with your faves.
- **Olive Oil Spray (or a tablespoon of olive oil):** For that golden glow and extra crisp.
Step-by-Step Instructions
Alright, apron on (or not, we don’t judge), let’s get cooking!
- **Preheat Power:** First things first, get that oven screaming hot to **400°F (200°C)**. And line a baking sheet with parchment paper or foil, then give it a little spritz of olive oil spray. This prevents sticking and helps with crispiness.
- **Pound It Out:** If your chicken breasts are thick, place them between two sheets of plastic wrap and pound them to an even ¾-inch thickness. This ensures they cook through evenly and quickly.
- **Set Up Your Stations:** Grab three shallow dishes. In the first, put the flour. In the second, whisk the eggs. In the third, combine the panko breadcrumbs, Parmesan (if using), garlic powder, onion powder, paprika, salt, and pepper. Mix it all up like you’re a DJ on a Friday night.
- **Dredge Like a Boss:** Take a chicken breast, dredge it in the flour (shaking off any excess), then dip it in the egg wash, letting any extra drip off. Finally, press it firmly into the breadcrumb mixture, making sure it’s fully coated. **Really press it** – this is key for a good crust!
- **Bake It Baby:** Place your beautifully coated chicken breasts on the prepared baking sheet. Give the tops a final light spray of olive oil (or drizzle a tiny bit) for extra crispness.
- **Golden Goodness:** Bake for **18-25 minutes**, flipping halfway through, or until the chicken is golden brown and cooked through. You’re looking for an internal temperature of **165°F (74°C)**. Don’t eyeball it; use a meat thermometer if you have one!
- **Rest & Serve:** Let the chicken rest for a few minutes before slicing or serving. This keeps it juicy. Voila! Dinner is served.
Common Mistakes to Avoid
We all make ’em, but here’s how to avoid some classic blunders that’ll make your chicken less than stellar:
- **Skipping the Preheat:** Thinking you don’t need to preheat the oven? **Rookie mistake!** A cold oven means soggy breading. Don’t do it to yourself.
- **Overcrowding the Pan:** Trying to cram all four breasts onto one small sheet? They’ll steam instead of bake, and you’ll end up with sad, limp chicken. Give ’em space!
- **Not Pounding the Chicken:** If your chicken breasts are thick and uneven, they won’t cook at the same rate. You’ll have dry edges and raw centers. Nobody wants that.
- **Under-Seasoning:** Don’t be shy with the salt, pepper, and spices in your breadcrumbs! Bland chicken is a tragedy.
- **Forgetting the Oil Spray:** A little spritz goes a long way in achieving that golden, crispy exterior.
Alternatives & Substitutions
Feeling adventurous or just out of one ingredient? No stress, we can totally improvise!
- **Breadcrumbs:** No Panko? Regular breadcrumbs work just fine, though they might be slightly less crispy. You can also crush up some crackers (Ritz are surprisingly good!), cornflakes, or even stale bread for a DIY crumb.
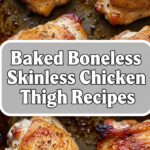
- **Chicken Cut:** Not a breast person? This recipe works great with **boneless, skinless chicken thighs** too! Just adjust baking time slightly, as thighs are a bit more forgiving.
- **Spice It Up:** Instead of the basic seasonings, try adding a pinch of cayenne for heat, some Italian seasoning for an herby vibe, or smoked paprika for depth. Go wild!
- **Gluten-Free:** Swap the all-purpose flour for a gluten-free flour blend and use gluten-free breadcrumbs. Easy peasy!
- **Dairy-Free:** Skip the Parmesan cheese, or use a dairy-free grated “Parmesan” substitute.
FAQ (Frequently Asked Questions)
Got questions? I’ve got answers! (Mostly.)
- **Q: Can I use frozen chicken?**
A: Technically, yes, but please **thaw it completely first**. Trying to bread and bake frozen chicken is a recipe for disaster (uneven cooking, watery breading – just no). - **Q: How do I know if it’s cooked through without a thermometer?**
A: While a thermometer is best, if you cut into the thickest part and the juices run clear, and the meat is opaque white, it’s usually good to go. But seriously, grab a thermometer – they’re cheap and a total game-changer. - **Q: Can I prepare these ahead of time?**
A: You can bread them and keep them in the fridge for a few hours before baking. Any longer and the breading might get a bit soggy. **IMO, fresh is always best!** - **Q: What do I serve with this?**
A: Oh, the possibilities! A simple side salad, roasted veggies, mashed potatoes, or even some pasta with marinara. This chicken is super versatile. - **Q: My breading isn’t sticking! What went wrong?**
A: Likely you didn’t press it firmly enough into the breadcrumbs, or your chicken was too wet after the egg wash. Shake off that excess liquid at each step! - **Q: Can I air fry this?**
A: **Absolutely!** Air fry at 375°F (190°C) for about 12-18 minutes, flipping halfway. It gets incredibly crispy!
Final Thoughts
See? That wasn’t scary at all, was it? You just whipped up some seriously delicious baked breaded chicken, and you barely broke a sweat. This recipe is a keeper for those nights when you want something comforting, crispy, and just plain good, without all the fuss. Now go impress someone—or yourself—with your new culinary skills. You’ve earned it!

