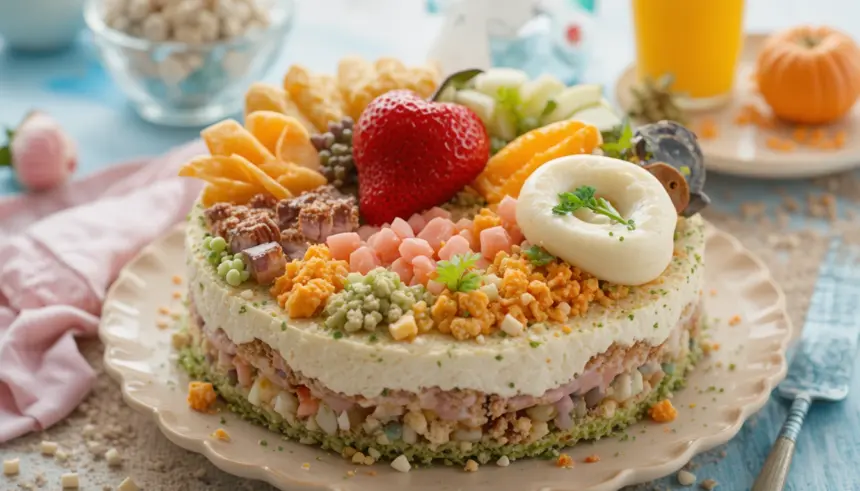
So, the school bells are ringing (or maybe just the persistent ‘ding!’ of your email inbox reminding you of a new term), and you’re feeling a mix of ‘yay, structure!’ and ‘ugh, responsibilities!’. What better way to navigate this emotional rollercoaster than with cake? But not just *any* cake. We’re talking about the adorable, perfectly portioned, “I-totally-have-my-life-together” kind of cake: the Back To School Bento Cake!
Why This Recipe is Awesome
Let’s be real, you’ve got enough on your plate right now without baking a massive, multi-tiered monstrosity. This bento cake? It’s the culinary equivalent of a perfectly sized, adorable hug. It’s small, it’s cute, and it says, “I made you something special,” without requiring you to sacrifice your entire weekend. Plus, it’s pretty much **idiot-proof**. Even I, the queen of kitchen catastrophes, managed to pull this off without setting off a smoke alarm. It’s perfect for a little self-care treat, a thoughtful gift for a teacher, or just to prove you can adult when you need to. Minimal effort, maximum “awww!” factor.
Ingredients You’ll Need
Gather your baking squad! Most of these are probably already chilling in your pantry.
- **All-Purpose Flour:** About 1 cup. The foundation of our delicious empire.
- **Granulated Sugar:** Half a cup. Because life’s sweet, and so should your cake be.
- **Baking Powder:** 1 teaspoon. Our little lift-off agent for a fluffy cake.
- **Salt:** A tiny pinch (1/4 tsp). Balances out all that sweetness.
- **Unsalted Butter:** 1/4 cup (that’s half a stick), softened. For that glorious richness. Don’t even think about margarine, unless you want to hurt your cake’s feelings.
- **Large Egg:** 1. The glue that holds it all together.
- **Milk:** 1/2 cup. Any kind works – whole, almond, oat. Your cake, your rules.
- **Vanilla Extract:** 1 teaspoon. Don’t skimp on this! It’s the soul of the cake.
For the Dreamy Buttercream Frosting:
- **Unsalted Butter:** 1/2 cup (one full stick), softened. Again, only the good stuff.
- **Powdered Sugar (Confectioners’ Sugar):** 2 cups. The magic dust that makes frosting, well, frosting!
- **Milk or Cream:** 2-3 tablespoons. To get that perfect, spreadable consistency.
- **Vanilla Extract:** 1/2 teaspoon. More vanilla, more joy.
- **Food Coloring (Optional):** A drop or two if you want to get fancy with school colors or just a fun pop!
- **Sprinkles (Also Optional, But Highly Recommended):** Because sprinkles make everything better, IMO.
Step-by-Step Instructions
- **Preheat Your Oven & Prep Your Pan:** Get your oven to 350°F (175°C). Seriously, don’t skip this; a hot oven is key! Grease and flour a 6-inch round cake pan. If you don’t have a 6-inch, a small loaf pan or even a few cupcake liners will work in a pinch – just adjust baking time.
- **Mix the Dry Stuff:** In a medium bowl, whisk together the flour, sugar, baking powder, and salt. Give it a good whisk to get rid of any lumps.
- **Combine the Wet Stuff:** In a separate, larger bowl, beat the softened butter until it’s light and fluffy. Crack in the egg and beat until combined. Pour in the milk and vanilla extract, mixing until just incorporated.
- **Bring It All Together:** Gradually add your dry ingredients to the wet ingredients. Mix on low speed until *just* combined. **Do not overmix!** Overmixing develops gluten and makes your cake tough. A few tiny lumps are totally fine.
- **Bake It Up:** Pour your beautiful batter into the prepared pan. Bake for 25-30 minutes, or until a toothpick inserted into the center comes out clean.
- **Cool Down:** Let the cake cool in the pan for about 10-15 minutes before inverting it onto a wire rack to cool completely. This part is crucial! Trying to frost a warm cake is a recipe for disaster (and melty frosting).
- **Whip Up the Frosting:** While the cake cools, make your buttercream. Beat the softened butter until creamy. Gradually add the powdered sugar, a cup at a time, mixing until smooth. Stir in the vanilla extract. Then, add milk or cream one tablespoon at a time until you reach your desired fluffy, spreadable consistency. If you’re using food coloring, now’s the time to mix it in!
- **Decorate Your Masterpiece:** Once your cake is **completely cool**, frost it! Go wild or keep it simple. Add those sprinkles for extra pizzazz. Slice it, serve it, and bask in the glory of your baking prowess.
Common Mistakes to Avoid
- **Forgetting to Preheat the Oven:** Rookie mistake! Your oven needs to be at temperature to activate the baking powder properly.
- **Overmixing the Batter:** This is a big no-no. It leads to a dense, tough cake. Mix until *just* combined. Seriously, resist the urge to keep going!
- **Not Letting the Cake Cool Completely:** We get it, you’re excited. But frosting a warm cake equals a sliding, soupy mess. Patience, young Padawan.
- **Eyeballing Ingredients:** Baking is a science, not an art (mostly). Measure properly, especially with flour and leavening agents.
- **Using Cold Butter for Frosting:** Softened butter is key for a smooth, lump-free buttercream. Take it out of the fridge ahead of time!
Alternatives & Substitutions
Feeling adventurous? Or just missing an ingredient? No stress!
- **Dairy-Free:** Swap regular milk for almond, soy, or oat milk. Use plant-based butter for both the cake and frosting. Easy peasy!
- **Flavor Boosts:** Add lemon zest to the batter for a zingy cake, or a tablespoon of cocoa powder for a chocolatey twist. A teaspoon of almond extract instead of vanilla in the frosting also works wonders!
- **Frosting Fun:** Don’t love buttercream? A simple cream cheese frosting (cream cheese, butter, powdered sugar) is also delicious. Or, for a lighter option, use whipped cream (though it won’t hold up as long at room temp).
- **No 6-inch Pan?** Bake in a small loaf pan and cut into thick slices, or use two 4-inch ramekins for mini-mini cakes. Baking time will vary, so keep an eye on it!
FAQ (Frequently Asked Questions)
Got questions? I’ve got (casual) answers!
- **Can I make this cake ahead of time?** Absolutely! You can bake the cake layers a day in advance, wrap them tightly, and store at room temp. Frosting can also be made a day ahead and stored in the fridge, then re-whipped before use.
- **What if my buttercream is too thick/thin?** Too thick? Add a tiny splash more milk/cream. Too thin? Beat in a tablespoon or two more powdered sugar. It’s all about finding that sweet spot!
- **Do I really need unsalted butter?** Yes, for baking, it gives you more control over the salt content. If you only have salted, just omit the salt from the cake recipe. But seriously, **go for unsalted.**
- **Can I add sprinkles to the batter?** You can! But fair warning, some of the color might bleed during baking. It’s usually better for pure aesthetic joy to add them after frosting.
- **How long does this Bento Cake last?** Assuming you don’t devour it all in one sitting (which, let’s be real, is a challenge), it’ll stay fresh in an airtight container at room temperature for 1-2 days, or in the fridge for up to 4 days.
Final Thoughts
And there you have it! Your very own adorable, delicious, and surprisingly easy Back To School Bento Cake. Whether you’re making it to celebrate a smooth transition back to routine, to commiserate with a friend over endless homework, or just because you deserve a damn good slice of cake (you do!), this recipe has your back. Now go impress someone—or yourself—with your new culinary skills. You’ve earned it!


