So, you’ve got a hankering for something ridiculously comforting, sweet, and moist, but the idea of a complicated baking project makes you want to curl up and rewatch your favorite show instead? Totally get it. Same, friend, same. But what if I told you we could whip up an Apple Pound Cake so moist it practically melts in your mouth, and it won’t require a culinary degree or a full day’s commitment? Yeah, I thought that’d get your attention. Let’s make some magic (the delicious kind).
Why This Recipe is Awesome
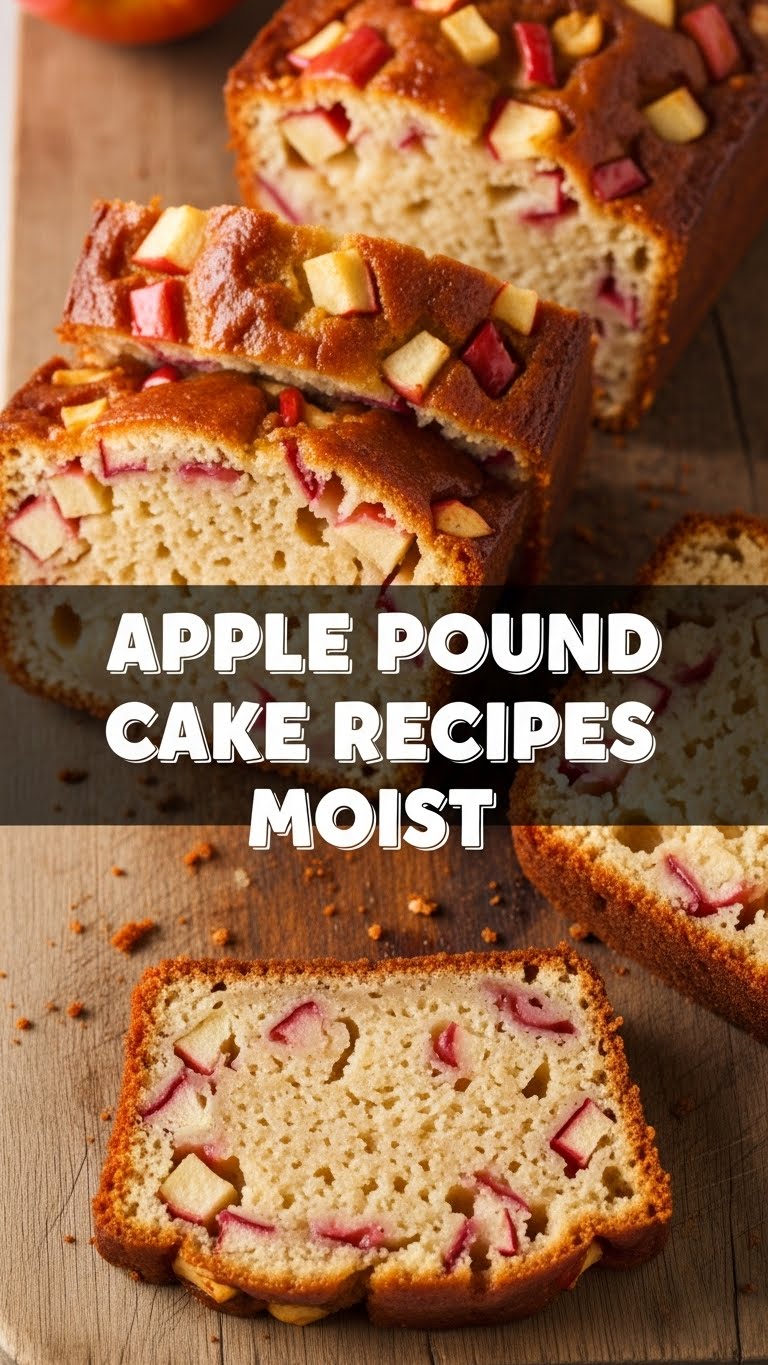
Okay, let’s be real. There are a million apple cake recipes out there. So why this one? First off, it’s moist AF. Seriously, we’re talking “forget everything you thought you knew about dry cakes” moist. It’s got that dense, buttery crumb that only a pound cake can deliver, but with bursts of tender apple goodness that keep things interesting.
Secondly, it’s pretty much idiot-proof. And coming from someone who once set off the smoke detector making toast (don’t ask), that’s saying something. The steps are straightforward, the ingredients are pantry staples, and the results? Pure bliss. It’s the kind of cake that makes people think you’ve been secretly attending French patisserie school, when really, you just followed some simple instructions. Plus, your kitchen will smell like pure autumnal heaven, which is a bonus, IMO.
Ingredients You’ll Need
Alright, gather your troops! Here’s what you’ll need to make this gloriousness happen. Don’t skimp on the good stuff, especially the butter. Trust me.
- 1 ½ cups (3 sticks) unsalted butter, softened. Yes, three sticks. This is a pound cake, not a health food smoothie. Embrace it.
- 2 ½ cups granulated sugar. For that perfect sweetness that screams “indulgence.”
- 4 large eggs, at room temperature. Happy eggs make happy cakes.
- 1 teaspoon vanilla extract. The good stuff, please. Not the imitation kind that tastes like sadness.
- 3 cups all-purpose flour. Sifted, if you’re feeling fancy, but not strictly necessary for us casual bakers.
- 1 teaspoon baking powder. Our little lift-off secret.
- ½ teaspoon salt. To balance all that sweetness and make it sing.
- ½ cup milk, full-fat is preferred for extra richness.
- 2 medium apples, peeled, cored, and finely diced. Honeycrisp or Granny Smith are my faves here—one for sweetness, one for a little tang!
- 1 teaspoon ground cinnamon. Because apples and cinnamon are soulmates.
- ¼ teaspoon ground nutmeg (optional, but highly recommended). Just a tiny pinch for that extra cozy factor.
Step-by-Step Instructions
Ready? Let’s get baking! Don’t overthink it; just follow along.
- Prep Your Pan & Oven: First things first, get that oven going! Preheat your oven to 325°F (160°C). Then, grease and flour a 10-12 cup Bundt pan or a 9×13 inch baking pan like your life depends on it. Or, spray liberally with baking spray. Don’t want your beautiful cake sticking!
- Cream the Butter & Sugar: In a large mixing bowl (or your stand mixer), cream together the softened butter and granulated sugar until it’s light and fluffy. This usually takes about 3-5 minutes. Don’t rush this step—it’s crucial for that airy texture.
- Add Eggs & Vanilla: Beat in the eggs, one at a time, mixing well after each addition. Then stir in the vanilla extract. Scrape down the sides of the bowl to make sure everything is well incorporated.
- Combine Dry Ingredients: In a separate bowl, whisk together the flour, baking powder, and salt. This ensures even distribution of your leavening agents.
- Alternate Wet & Dry: Gradually add the dry ingredients to the wet ingredients, alternating with the milk. Start and end with the dry ingredients. Mix until just combined – do not overmix! Overmixing leads to tough cakes, and we’re not about that life.
- Fold in the Apples & Spices: In a small bowl, toss your diced apples with the cinnamon and nutmeg. Gently fold the spiced apples into the batter by hand. This ensures they’re evenly distributed without bruising them or overmixing the batter.
- Bake It Up: Pour the batter into your prepared pan and smooth the top. Bake for 60-75 minutes for a Bundt pan, or 50-60 minutes for a 9×13 pan, or until a wooden skewer inserted into the center comes out clean.
- Cool Down: Let the cake cool in the pan on a wire rack for about 15-20 minutes before inverting it onto the rack to cool completely. Patience, young grasshopper. It’s worth it.
Common Mistakes to Avoid
Nobody’s perfect, but we can try to avoid these rookie errors, right?
- Not Preheating the Oven: Seriously, this isn’t a suggestion, it’s a commandment. A cold oven will mess with your cake’s texture and cooking time. Always preheat!
- Cold Ingredients: Using cold butter and eggs is a one-way ticket to a dense, sad cake. Room temperature ingredients cream together much better, resulting in a lighter, fluffier batter.
- Overmixing the Batter: Once you add the flour, mix until just combined. Overmixing develops the gluten, making your cake tough and chewy instead of tender and moist. We want cake, not a bread roll.
- Opening the Oven Door Too Early: Resist the urge! Opening the oven door repeatedly, especially in the first 30-40 minutes, can cause your cake to sink in the middle. Let it do its thing.
- Not Greasing and Flourishing the Pan Properly: There’s nothing worse than a perfectly baked cake that refuses to come out of the pan in one piece. Use plenty of grease and flour, or a good quality baking spray.
Alternatives & Substitutions
Feeling a little rebellious? Here are some ways to switch things up without totally wrecking the recipe.
- Different Apples: Not a fan of Granny Smith? Go for all Honeycrisp for extra sweetness, or Braeburn, Fuji, or Gala. Just make sure they’re firm baking apples, not super soft ones that turn to mush.
- Spices: Want more warmth? Add a pinch of ground cloves or allspice to your apple mix. Or swap the cinnamon for pumpkin pie spice for a full autumnal explosion. Yum!
- Nuts: Fold in ½ cup of chopped pecans or walnuts with the apples for a bit of crunch. Toasted nuts are even better, giving them a deeper flavor.
- Milk: If you don’t have whole milk, 2% will work just fine. You could even use buttermilk for a slightly tangier flavor and even more moisture (though it might react a bit differently with the baking powder, so be aware).
- Topping: A simple glaze of powdered sugar and a splash of milk or apple cider takes this cake to the next level. Or a dusting of powdered sugar if you’re keeping it elegant.
FAQ (Frequently Asked Questions)
Got questions? I’ve got (casual) answers!
- Can I use margarine instead of butter? Well, technically yes, you *can*. But why hurt your soul like that? Butter provides a flavor and texture that margarine just can’t replicate in a pound cake. Splurge a little; you deserve it!
- My cake sank in the middle! What happened? Oh, the dreaded sinkhole! This usually means your oven temperature was too low, you opened the oven door too early, or you overmixed the batter. Sometimes, too much leavening can also be the culprit.
- How do I know when it’s done? The best way is the skewer test! Insert a wooden skewer or toothpick into the center of the cake. If it comes out clean, you’re golden. If there’s wet batter, give it a few more minutes.
- Can I make this ahead of time? Absolutely! Pound cake is actually fantastic the next day, as the flavors have more time to meld. Store it tightly wrapped at room temperature for up to 3-4 days, or in the fridge for a week.
- Can I freeze it? You bet! Let the cake cool completely, then wrap it tightly in plastic wrap, followed by a layer of aluminum foil. It’ll keep in the freezer for up to 2-3 months. Just thaw it overnight at room temperature before serving.
- What kind of pan is best? A Bundt pan gives it that classic fancy look, but a 9×13 inch baking pan works perfectly too, especially if you’re just slicing it up for casual eating. Just adjust baking times as noted!
Final Thoughts
Alright, friend, you’ve now got all the tools and wisdom to whip up an Apple Pound Cake that will make you feel like a culinary genius (even if you just followed my ridiculously easy instructions). This cake isn’t just dessert; it’s a hug in food form. Perfect for a cozy evening, a brunch with friends, or just because you deserve something delicious. Now go impress someone—or yourself—with your new baking prowess. You’ve earned it!


