So, you’re craving something warm, comforting, and ridiculously delicious but also kind of want to impress yourself (or, let’s be real, your significant other/roommate/pet)? And you don’t want to spend all day slaving away in the kitchen, because, well, life. Same, friend, same. Get ready, because we’re about to make an Apple Pie that’s so good, it’ll make you question all your life choices before this moment. Especially when it’s topped with a scoop of melty ice cream. Mmm-hmm.
Why This Recipe is Awesome
Okay, first things first: This isn’t your grandma’s “spend two days making pastry from scratch” kind of pie (unless you *want* it to be, in which case, go for it, champ!). This is the **”I look like a baking genius but actually just followed super simple steps”** kind of pie. It’s comforting, it’s classic, and it’s practically impossible to mess up, even if your culinary skills usually extend to microwaving popcorn. Seriously, if I can do it, you absolutely can. Plus, hot apple pie with cold ice cream? It’s a literal hug in a bowl. Who doesn’t need that?
Ingredients You’ll Need
Gather your troops! Here’s what you’ll need to assemble this masterpiece. Don’t skimp on the butter, FYI. It’s pie, not a health retreat.
- **For the Crust (or cheat code!):**
- 1 box (2) pre-made pie crusts (refrigerated kind, seriously, it’s fine! Or make your own if you’re feeling fancy/masochistic).
- **For the Filling (the good stuff):**
- 6-8 medium apples (Granny Smith, Honeycrisp, or a mix are great – you want some tartness!), peeled, cored, and sliced about 1/4 inch thick. About 6 cups total.
- 1/2 cup granulated sugar (adjust if your apples are super sweet or super tart).
- 1/4 cup packed light brown sugar.
- 1/4 cup all-purpose flour (this helps thicken, trust me).
- 1 teaspoon ground cinnamon (smells like heaven).
- 1/4 teaspoon ground nutmeg (cinnamon’s bestie).
- 1/8 teaspoon ground cloves (optional, but a nice touch).
- 1 tablespoon lemon juice (prevents browning and adds zing).
- 2 tablespoons unsalted butter, cut into small pieces.
- Pinch of salt (enhances all the flavors, don’t skip!).
- **For Serving (the best part):**
- Vanilla ice cream (obligatory, non-negotiable).
Step-by-Step Instructions
Alright, apron on (or not, live dangerously), let’s get this pie in the oven!
- **Prep Your Oven & Pan:** First up, preheat your oven to 425°F (220°C). Grab a 9-inch pie dish. If you’re using store-bought crusts, unroll one and gently place it in the bottom of your pie dish. Don’t worry if it’s not perfect, we’re going for rustic charm here.
- **Apple Time!** In a large bowl, combine your sliced apples, both sugars, flour, cinnamon, nutmeg, cloves (if using), lemon juice, and salt. Give it a good stir until all the apples are nicely coated. It should smell amazing already.
- **Fill ‘Er Up:** Pour your apple mixture into the pie crust-lined dish. Try to mound them up a bit in the center, as they’ll cook down. Dot the top of the apples with those small pieces of butter. This adds richness and helps the filling get super gooey.
- **Top It Off:** Unroll your second pie crust. You can either place it whole over the apples (and cut a few slits for steam) or get fancy and do a lattice top (there are tons of YouTube videos for this if you’re feeling ambitious!). Trim any excess crust around the edges, leaving about half an inch.
- **Seal the Deal:** Fold the top crust under the bottom crust edge. Then, crimp the edges together with your fingers or a fork to seal it. This isn’t just for looks; it helps keep all that delicious filling inside!
- **Bake! (Part 1):** Place the pie on a baking sheet (to catch any potential drips, because nobody needs oven-cleaning drama). Bake at 425°F (220°C) for 15 minutes. This high heat helps to get a nice, flaky crust.
- **Bake! (Part 2):** Reduce the oven temperature to 375°F (190°C) and continue baking for another 35-45 minutes. You’ll know it’s done when the crust is golden brown and the filling is bubbling thickly (you can also poke an apple slice with a knife through a vent hole to check for tenderness). **Pro tip: If the crust edges start to brown too quickly, loosely cover them with aluminum foil.**
- **Cool Down (the hardest part):** Let the pie cool on a wire rack for at least 2-3 hours before slicing. I know, I know, it’s torture. But this allows the filling to set properly. Otherwise, you’ll have a runny, soupy mess, and nobody wants that.
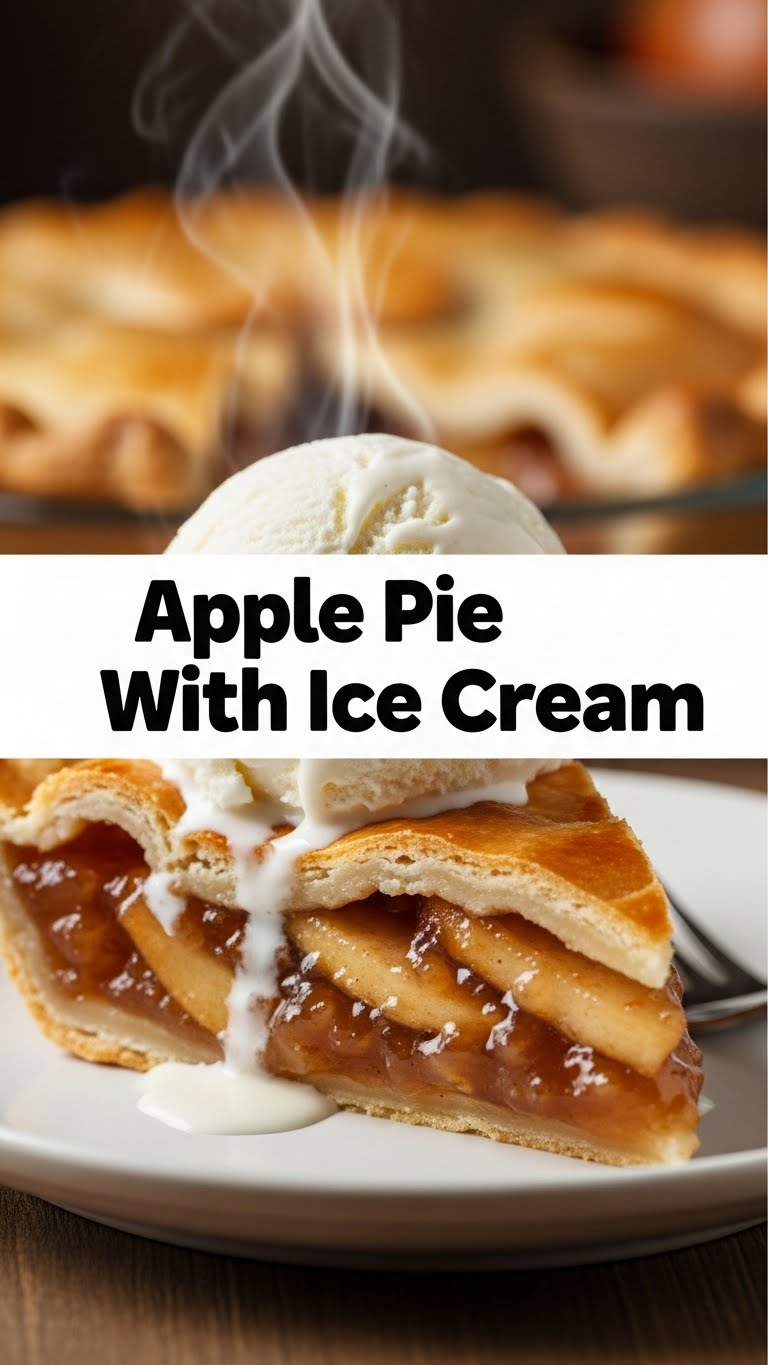
- **Serve & Devour:** Once cool enough to handle, cut a generous slice, and immediately top it with a scoop (or two, I’m not judging) of vanilla ice cream. Enjoy your masterpiece!
Common Mistakes to Avoid
We’ve all been there. Learn from my past kitchen catastrophes!
- **Not Chilling Your Crust:** If you’re making your own crust, **don’t skip the chilling step!** It prevents shrinkage and gives you that glorious flaky texture. Store-bought? Still give it a few minutes if it feels too warm.
- **Undercooked Apples:** There’s nothing worse than biting into a crunchy apple in a pie. Make sure those apples are tender! A good way to check is that bubbling filling – if it’s bubbling all over, the apples inside are likely doing their thing.
- **Skipping the Flour in the Filling:** Rookie mistake! That flour is key to a perfectly set, gooey filling. Without it, you’re looking at a watery, sad pie.
- **Cutting Too Soon:** Impatience is a virtue sometimes, but not with pie. **Seriously, let it cool!** The filling needs time to firm up. Your patience will be rewarded with perfect slices.
Alternatives & Substitutions
Feeling adventurous or missing an ingredient? No stress, we can totally adapt!
- **Different Apples:** Don’t have the exact apples? No worries! Pears can also be amazing, or a mix of apples and pears. Just avoid super mushy varieties like Red Delicious.
- **Spices:** Not a fan of cloves? Leave ’em out! Want to add a pinch of cardamom or allspice? Go for it! This is *your* pie. IMO, cinnamon is non-negotiable though.
- **Crust:** If you’re anti-store-bought (you do you!), there are tons of simple pie crust recipes out there. Or, for a super easy rustic vibe, you can even make a crumble topping instead of a second crust!
- **Topping:** While vanilla ice cream is the classic, a dollop of fresh whipped cream or a drizzle of caramel sauce is also ridiculously good. Or, you know, both.
FAQ (Frequently Asked Questions)
- **Can I use frozen pie crusts?** Totally! Just make sure they’re thawed in the fridge first, according to package directions.
- **My pie crust is getting too dark! Help!** Ah, the ol’ foil trick! Loosely tent the edges of your pie with aluminum foil to protect them. Easy peasy.
- **What if I don’t have fresh lemon juice?** A tiny splash of apple cider vinegar can work in a pinch to provide that necessary acidity, but fresh is best.
- **Can I make this pie ahead of time?** You bet! Apple pie actually tastes even better the next day. Just cover it loosely and store at room temp. Reheat slices slightly in the microwave or oven for that fresh-baked feel.
- **Can I use any type of apple?** While you can, a mix of tart and sweet (like Granny Smith with Honeycrisp or Gala) gives the best flavor balance and texture. Super sweet apples might make it a bit cloying.
- **Is ice cream *really* mandatory?** Well, technically no… but why hurt your soul like that? The hot-cold, creamy-crisp combo is pure magic. Don’t deprive yourself!
Final Thoughts
So there you have it! A perfectly delicious, not-too-complicated Apple Pie just waiting to make your kitchen smell incredible and your taste buds sing. You’ve officially leveled up your baking game. Now go impress someone—or just yourself—with your new culinary skills. You’ve earned it, you glorious baker, you!


