So you’re craving something warm, comforting, and ridiculously delicious, but the thought of spending an entire day in the kitchen makes you want to just order pizza? Same, friend, same. We’re talking about that iconic dessert that smells like childhood and hugs: Apple Pie. But not just any apple pie, oh no. We’re pairing it with a scoop (or three, no judgment) of vanilla ice cream because, frankly, life’s too short for lonely pie.
Why This Recipe is Awesome
Listen, this isn’t your grandma’s “from scratch, roll your own pastry, churn your own butter” kind of pie. We’re going for maximum deliciousness with **minimum fuss**. Think of it as a culinary cheat code. It’s so straightforward, even I, a person who once set off the smoke detector making toast, can nail it. Plus, the smell alone will make your house feel like a cozy, autumnal wonderland, regardless of the actual season. And let’s be real, hot apple pie + cold melting ice cream is a match made in dessert heaven. It’s practically a spiritual experience, IMO.
Ingredients You’ll Need
Gather your weapons, chef! Or, you know, just raid your pantry and hit up the grocery store. We’re keeping it simple.
- 2 pre-made pie crusts: Yes, pre-made. Don’t let anyone judge you. We’re here for the good times, not the dough-rolling stress.
- 6-8 medium apples: Granny Smith are my faves for that tart kick, but a mix with something sweeter like Honeycrisp or Fuji works wonders too. Just pick apples you’d actually want to eat.
- 1/2 cup granulated sugar: Adjust to your apple’s sweetness, but this is a good starting point.
- 1/4 cup packed light brown sugar: Adds that lovely caramelly depth.
- 2 tablespoons all-purpose flour: Our secret weapon to thicken that glorious apple goo. No one wants watery pie.
- 1 teaspoon ground cinnamon: Because, duh, apple pie without cinnamon is just… baked apples.
- 1/4 teaspoon ground nutmeg: Just a pinch to really elevate those warm spices.
- 1 tablespoon lemon juice: Brightens things up and stops your apples from browning too quickly. Think of it as a spa treatment for your fruit.
- 2 tablespoons unsalted butter: Cubed. For that extra richness. Trust me on this.
- 1 large egg (optional): Beaten, for an egg wash to get that golden-brown, bakery-worthy crust. Makes it look fancy without being hard.
- Vanilla ice cream: The non-negotiable sidekick. Get a good quality one; you deserve it.
Step-by-Step Instructions
- Prep Your Oven & Crust: First things first, preheat your oven to **425°F (220°C)**. Grab one of your pre-made pie crusts and gently unroll it into a 9-inch pie plate. Trim the edges if you’re feeling fancy, or just let them hang out for now.
- Apple Attack: Peel, core, and slice your apples. Aim for slices about 1/4 inch thick. Not too thin that they turn to mush, not too thick that they’re crunchy. Toss them into a large bowl.
- Mix the Magic: In a separate smaller bowl, whisk together the granulated sugar, brown sugar, flour, cinnamon, and nutmeg. It’ll smell amazing already, FYI.
- Combine & Lemon Up: Pour the sugar mixture over your sliced apples. Add the lemon juice. Now, get in there with your hands (or a spoon, if you’re not into messy fun) and mix it all up until the apples are evenly coated.
- Fill ‘Er Up: Spoon the apple filling into your pie crust, mounding it slightly in the center. Dot the top with those little cubes of butter. This is where the magic happens, people.
- Top It Off: Unroll your second pie crust and carefully place it over the filling. Trim the edges to match the bottom crust, leaving about a 1/2-inch overhang. Pinch the edges together to seal them. You can crimp them with a fork or your fingers for that classic look.
- Vent & Glaze (Optional): Cut a few small slits in the top crust. These are crucial steam vents, otherwise, you’ll have an apple explosion! If you want that gorgeous golden shine, brush the top with the beaten egg wash.
- Bake It Baby: Pop the pie into your preheated oven. Bake for **15 minutes** at 425°F. Then, reduce the oven temperature to **375°F (190°C)** and continue baking for another **35-45 minutes**, or until the crust is deeply golden brown and the filling is bubbly.
- Cool Down (Patience, Grasshopper): Let the pie cool on a wire rack for at least 30 minutes, ideally an hour. This lets the filling set up properly. I know, it’s torture, but it’s worth it!
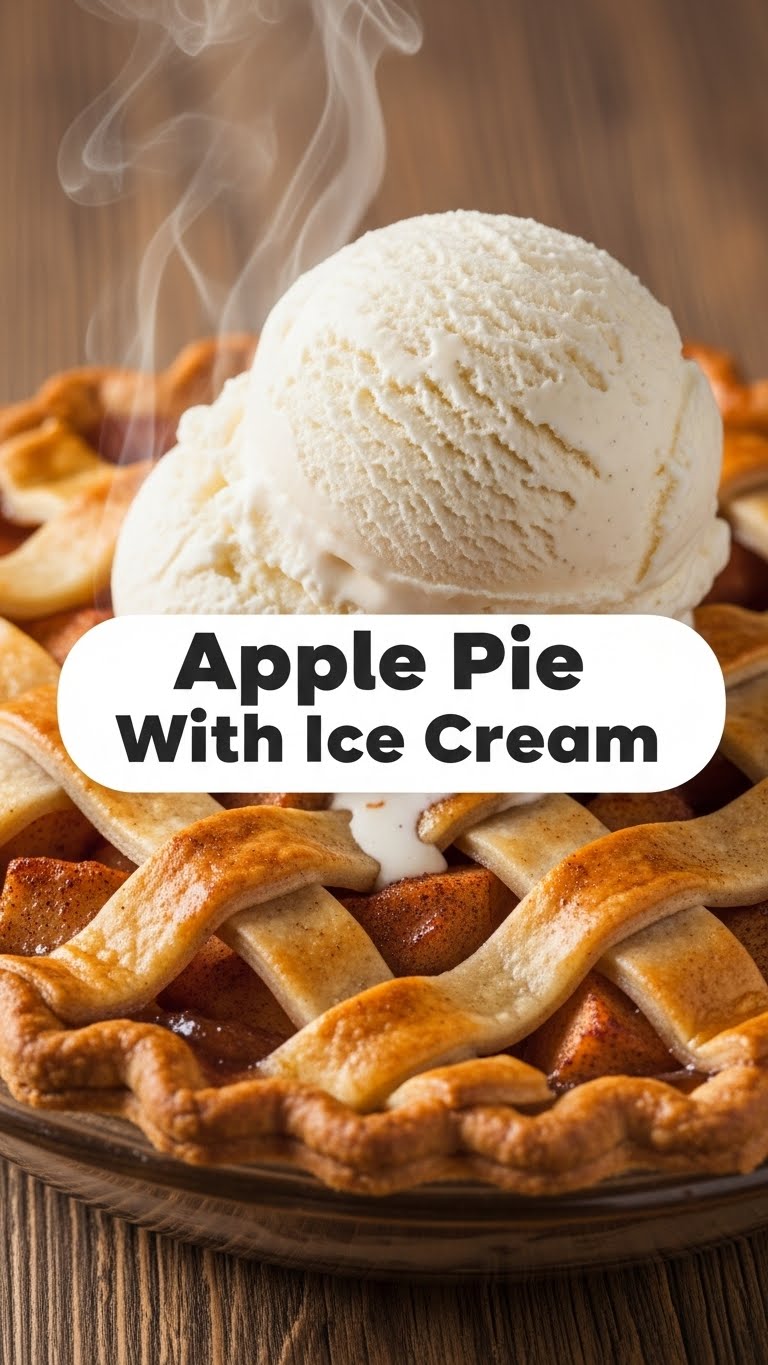
- Serve with Style: Slice up that beauty and serve warm with a generous scoop (or two!) of vanilla ice cream. Watch it melt into the nooks and crannies. Pure bliss.
Common Mistakes to Avoid
- Skipping the Lemon Juice: Your apples will brown, and the flavor won’t be as bright. Don’t be that person.
- Forgetting to Vent: Those little slits aren’t just for looks. Without them, steam builds up, and your pie crust might puff up or even burst. Rookie mistake!
- Not Cooling the Pie: I know the smell is intoxicating, but cutting into a piping hot pie means a runny, soupy mess. **Patience, my friend, patience is key for a perfect slice.**
- Undercooking the Apples: No one wants crunchy apples in their pie. Make sure it bakes long enough for them to soften.
- Forgetting the Ice Cream: Honestly, this isn’t a mistake; it’s a cardinal sin. Just don’t.
Alternatives & Substitutions
Life’s about options, right? Here are a few ways to switch things up:
- Crust: If you’re feeling ambitious (or just masochistic), go ahead and make your own pie crust. But honestly, store-bought is totally fine and saves you like, an hour of stress.
- Apples: No Granny Smith? Any firm baking apple works! A mix is usually best for a complex flavor. Just adjust sugar if using very sweet apples.
- Spices: Out of nutmeg? A tiny pinch of allspice or even a whisper of ginger can add a nice touch. Don’t have any of the above? Just extra cinnamon will do.
- Ice Cream: Vanilla is classic, but salted caramel ice cream? Cinnamon ice cream? Oh, you fancy now!
- Butter: You can skip dotting the top with butter if you’re trying to cut down on richness, but why? It’s pie!
FAQ (Frequently Asked Questions)
Got questions? I’ve got answers (mostly humorous, definitely not always scientifically proven).
- Can I use frozen pie crusts? Absolutely! That’s what we’re all about here: convenience. Just make sure to thaw them in the fridge first, according to package directions.
- Do I really need to peel the apples? Technically no, but the texture with the skin on can be a bit… rustic. If you’re into that, go for it. If you want silky smooth apple filling, peel ’em.
- My crust is browning too fast! What do I do? Ah, the delicate dance of oven temperatures! Simply cover the edges (or the whole pie) loosely with aluminum foil. This acts as a little sunblock for your crust.
- Can I add other fruit? You bet! A handful of blueberries or cranberries with the apples can be divine. Just be mindful they might release more liquid, so maybe an extra teaspoon of flour.
- How do I know when the apples are done? You can carefully insert a thin knife or skewer through one of the steam vents. If it goes in easily, the apples are tender. Also, the filling should be bubbling.
- Can I make this ahead of time? You can bake the pie a day in advance and store it at room temperature. Reheat gently in the oven before serving. But honestly, it’s best warm and fresh.
Final Thoughts
So there you have it, folks. A no-fuss, all-flavor recipe for apple pie with ice cream that will make you feel like a culinary genius without actually breaking a sweat. It’s perfect for impressing guests, satisfying a serious craving, or just making a Tuesday feel a little more special. Now go forth, bake, and bask in the glory of your warm, gooey, ice-cream-topped masterpiece. You’ve earned it!


