So you’re craving something tasty but too lazy to spend forever in the kitchen, huh? Same. What if I told you we could whip up the cozy hug of an apple pie, but in a ridiculously easy, bar-shaped form that practically begs to be eaten straight from the pan? Get ready for Apple Pie Bars – your new culinary bestie, complete with a fancy-pants dusting of powdered sugar!
Why This Recipe is Awesome
Let’s be real, traditional apple pie can be a commitment. Rolling out that perfect crust, getting the crimps just right… who has the time?! This recipe is literally apple pie without the crust drama (who needs a perfect crimped edge, honestly?). It’s like the chill younger sibling of apple pie.
- It’s portable! Snack on the go, impress at a potluck, or just hoard them all for yourself (no judgment here, I’ve been there).
- Seriously simple. If you can chop an apple and mix some stuff, you got this. It’s idiot-proof, even I didn’t mess it up.
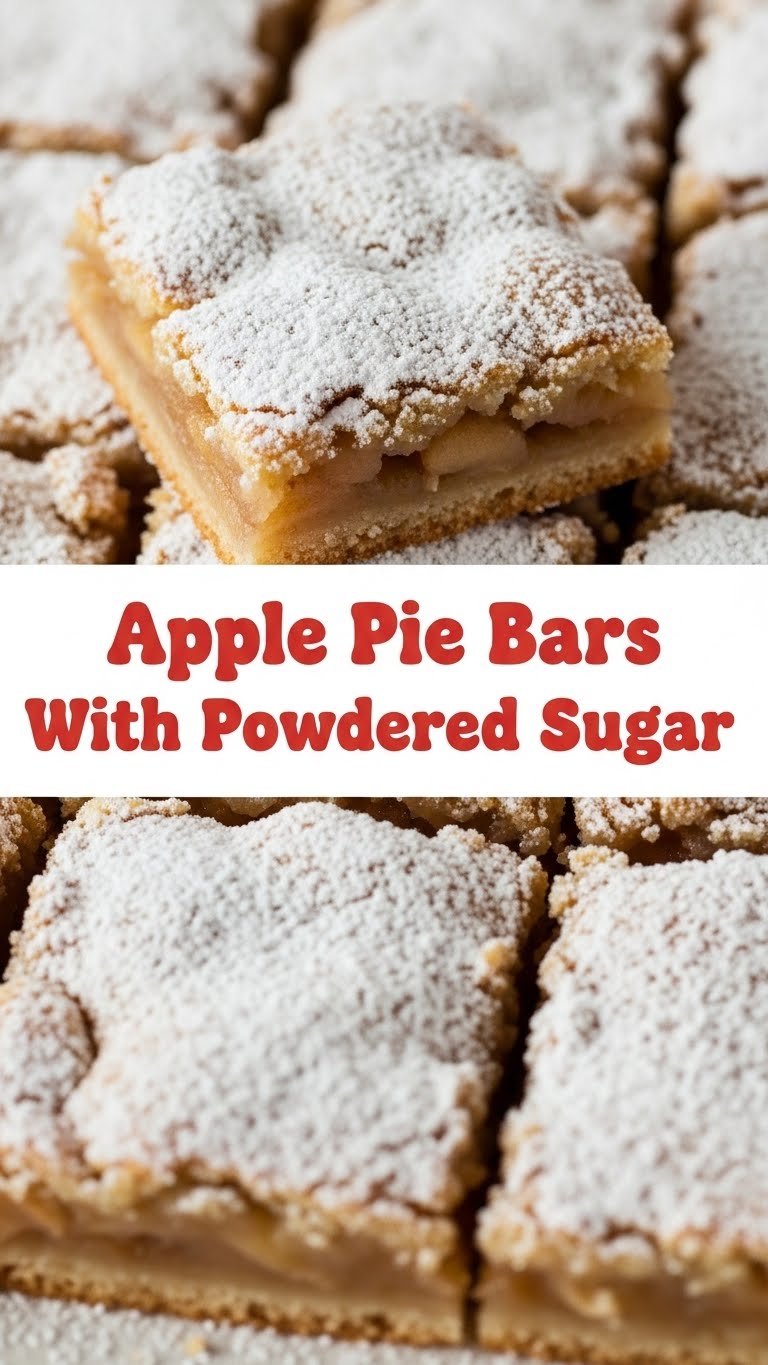
- The powdered sugar dusting? Chef’s kiss. Instantly makes you look like a gourmet baker without any extra effort. You’re welcome.
Ingredients You’ll Need
Gather your troops! Don’t worry, nothing too exotic here. Your pantry probably already has half of this stuff.
- For the Crust (aka the buttery dream base):
- 2 cups all-purpose flour: The backbone of all good baked things. Don’t worry, it’s not judging your life choices.
- ½ cup granulated sugar: Because life’s better with a little sweetness.
- ½ teaspoon salt: Just a pinch, to make everything else sing.
- 1 cup (2 sticks) unsalted butter: Cold and cubed. Yes, *cold*. Don’t get lazy here, it makes all the difference for a crumbly, tender crust. This isn’t a suggestion, it’s a command!
- For the Apple Filling (the star of the show):
- 4-5 medium apples: About 6 cups sliced. Granny Smiths are my go-to for that perfect tart-sweet balance, but feel free to mix it up. Peeled, cored, and sliced thinly – think uniform slices for even cooking.
- 1 tablespoon lemon juice: A tiny splash to keep those apples from browning and add a little zing.
- ½ cup granulated sugar: Again, sweetness!
- 1 teaspoon ground cinnamon: Can you even *have* apple pie without it? I think not.
- ¼ teaspoon ground nutmeg (optional): A whisper of warmth, if you’re feeling extra fancy.
- For the Crumb Topping (the crunchy, glorious crown):
- 1 cup all-purpose flour: More flour, more fun!
- ½ cup packed light brown sugar: Deep, caramel-y goodness.
- ½ teaspoon ground cinnamon: Because more cinnamon is *always* a good idea.
- ½ cup (1 stick) unsalted butter: Melted this time. See? We’re not always so strict.
- For the Finishing Touch:
- Powdered sugar: For dusting. Makes it pretty, makes it delicious. It’s like fairy dust for your dessert.
Step-by-Step Instructions
- Prep Time! Preheat your oven to 375°F (190°C). Grab a 9×13 inch baking dish and line it with parchment paper, leaving an overhang on the sides. This makes lifting the bars out a breeze later. Don’t skip the parchment unless you love scrubbing.
- Crust First: In a large bowl, whisk together the flour, sugar, and salt for the crust. Add the cold, cubed butter. Use a pastry blender, two knives, or even your fingertips (quickly!) to cut the butter into the flour until it resembles coarse crumbs.
- Press It Down: Press this crumbly mixture evenly into the bottom of your prepared baking dish. Make sure it’s packed tightly. Pop it into the preheated oven for about 15 minutes, or until lightly golden.
- Apple Action: While the crust bakes, toss your sliced apples with lemon juice, granulated sugar, cinnamon, and nutmeg (if using) in another bowl. Make sure every apple slice gets coated in that sweet spice mixture.
- Crumb Topping Time: In a third bowl (yes, more bowls, but it’s worth it!), combine the flour, brown sugar, and cinnamon for the topping. Pour in the melted butter and mix with a fork until moist crumbs form. It should look like sandy goodness.
- Assemble the Masterpiece: Once the crust is lightly golden, carefully spread the spiced apple mixture evenly over the hot crust. Then, sprinkle the crumb topping generously over the apples.
- Bake Away! Return the dish to the oven and bake for another 35-45 minutes. The topping should be golden brown, and the apples underneath should be tender when poked with a knife. If it’s browning too fast, loosely tent it with foil.
- Cool Down, Buttercup: This is the hardest part: let the bars cool completely in the pan on a wire rack. Seriously, completely. Like, at least 2 hours, or even longer. They’ll set up beautifully and be much easier to cut. Trust the process!
- Dust and Devour: Once cool, lift the bars out using the parchment paper overhang. Slice them into squares or rectangles. Give them a generous dusting of powdered sugar. Serve and bask in the glory!
Common Mistakes to Avoid
Don’t be that person. Learn from my past (and often delicious) failures.
- Not using cold butter for the crust: This isn’t a suggestion, it’s science! Warm butter melts too quickly, making a tough crust instead of a tender one. Don’t you dare soften that butter.
- Overmixing the crust: Again, tough crust territory. Mix just until combined. A little crumbly is good.
- Skipping the lemon juice on the apples: Hello, brown apples! It also adds a nice brightness that makes the flavors pop.
- Cutting them warm: Impatience is your enemy here. Warm bars will crumble and fall apart. Trust me, it’s a mess you don’t want. Let them chill.
- Under-baking the apples: Nobody wants crunchy apple pie. Make sure they’re tender! You can always poke one with a knife to test.
Alternatives & Substitutions
Feeling creative? Or just missing an ingredient? Here are some simple swaps.
- Apples: Feel free to swap Granny Smiths for Honeycrisp, Fuji, or even a mix! A combo often gives the best flavor. Just remember to adjust the sugar if you’re using sweeter apples.
- Spices: Not a nutmeg fan? Leave it out! Want more kick? Add a tiny pinch of allspice or ginger. It’s your kitchen, live a little!
- Butter: Can you use margarine instead of butter? Well, technically yes, but why hurt your soul like that? Stick to butter for the best flavor and texture, IMO. Coconut oil *might* work for a vegan crust, but I haven’t personally tested it.
- Crumb Topping: Feeling extra wild? Throw in a handful of chopped pecans or walnuts with the crumb topping for extra crunch.
- Gluten-Free: Swap the all-purpose flour for a 1:1 gluten-free baking blend. Results may vary slightly, but it should still be delicious!
FAQ (Frequently Asked Questions)
Got questions? I’ve got answers (and maybe some sass).
- “My crust is tough! What went wrong?” You likely overmixed it or didn’t use cold butter. Remember, cold butter is your best friend for a flaky crust!
- “Can I use canned apple pie filling?” You *can*, but it won’t be nearly as fresh or flavorful. This recipe is easy enough that fresh apples are totally worth the (minimal) effort. Don’t be lazy, you’ve got this!
- “How long do these bars last?” If you manage not to eat them all in one go, they’ll stay good in an airtight container at room temperature for 3-4 days, or up to a week in the fridge. Spoiler alert: they won’t last that long.
- “Can I freeze them?” Absolutely! Wrap cooled, unfrosted bars tightly in plastic wrap and then foil. Freeze for up to 2-3 months. Thaw at room temperature, then dust with powdered sugar before serving.
- “Do I *have* to use parchment paper?” You don’t *have* to, but it makes lifting the bars out infinitely easier and ensures a clean cut. Otherwise, be prepared for a fight with your baking dish.
- “What kind of apples are best?” I highly recommend tart apples like Granny Smith for a good balance against the sweetness, or a mix with a sweeter apple like Honeycrisp or Fuji. Variety is the spice of life, and apple pie bars!
Final Thoughts
See? That wasn’t so scary, was it? You just conquered Apple Pie Bars, practically becoming a pastry chef in the process. Now go impress someone—or yourself—with your new culinary skills. You’ve earned it! Seriously, these bars are the perfect combo of cozy, sweet, and just a little bit fancy. Enjoy every single crumb, my friend!


