Look, we need to talk about apple crisp. Not the fussy, fancy kind that your grandmother slaved over for hours. Nope! I’m talking about the “I want something amazing RIGHT NOW and I have exactly 10 minutes of prep energy” kind of apple crisp. This recipe using pie filling and oatmeal is basically the cheat code to delicious desserts. It’s like the universe is saying, “Here, have this amazing treat, and no, you don’t need to peel a single apple.” You’re welcome.
Why This Recipe is Awesome
Let’s be real for a second. The absolute worst part about making apple crisp is peeling, coring, and slicing all those apples. It’s tedious, your hands get sticky, and suddenly what was supposed to be a “quick dessert” becomes a 45-minute prep ordeal. This recipe eliminates all that nonsense by using canned apple pie filling. Yes, it’s cheating. No, I don’t feel bad about it.
Plus, the oatmeal topping gets all golden and crispy while staying slightly chewy in the middle. It’s basically like having cookies on top of warm apple pie filling. Who wouldn’t want that? Serial killers, that’s who.
Ingredients You’ll Need
- 2 cans (21 oz each) of apple pie filling (the more cinnamon-y, the better)
- 1 cup old-fashioned oats (not the quick-cooking kind, they get mushy)
- 1 cup all-purpose flour (or whatever flour is sitting in your pantry, I’m not judging)
- 1 cup brown sugar, packed (the “packed” part is important—really smush it in there)
- 1/2 teaspoon cinnamon (or more if you’re a cinnamon fiend like me)
- 1/4 teaspoon nutmeg (optional, but it adds that “what’s that amazing flavor?” element)
- 1/2 cup cold butter, cubed (real butter, people—this is not the time for substitutes)
- Vanilla ice cream for serving (technically optional, but are you really going to skip it?)
Step-by-Step Instructions
- Preheat your oven to 375°F (190°C). Yes, you actually need to preheat. Don’t be that person who throws it in a cold oven and wonders why everything’s soggy.
- Grease a 9×13 inch baking dish. I use butter because it adds flavor, but cooking spray works if you’re in a hurry.
- Dump both cans of apple pie filling into the dish. Spread it evenly, but don’t stress about making it perfect. We’re going for “delicious,” not “Instagram-worthy.”
- In a large bowl, mix the oats, flour, brown sugar, cinnamon, and nutmeg. Just use a fork or your hands—no need to dirty the stand mixer.
- Add the cold butter cubes to your dry mixture. Using your fingers or a pastry cutter, work the butter into the mixture until it resembles coarse crumbs. Think the texture of wet sand that’s just right for sandcastles.
- Sprinkle (or honestly, dump) the oat mixture evenly over the apple filling. Cover all the apple filling—that’s how you get maximum crispiness in every bite.
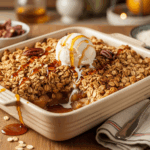
- Bake for 35-40 minutes until the topping is golden brown and you can see the filling bubbling around the edges. Your house will smell amazing, and everyone will think you’ve been slaving away all day.
- Let it cool for at least 10 minutes before serving. I know it’s tempting to dig in immediately, but nobody enjoys a burned tongue.
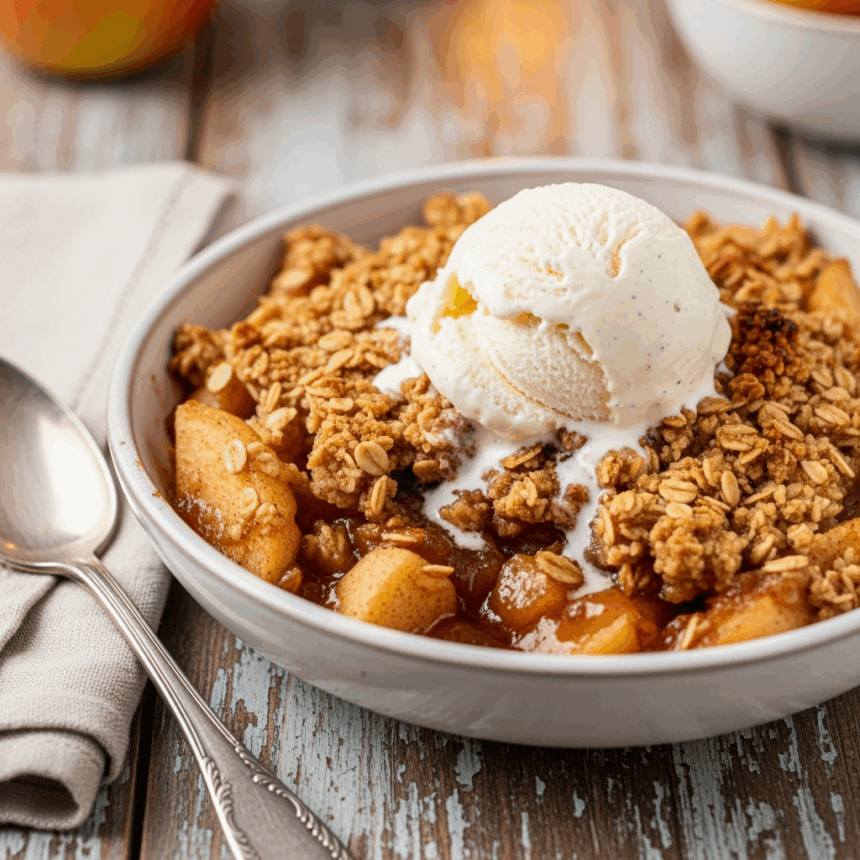
- Scoop into bowls and top with vanilla ice cream. Watch that ice cream melt into all the nooks and crannies. It’s basically kitchen therapy.
Common Mistakes to Avoid
Using hot or melted butter in the topping. You want cold butter that you cut into the dry ingredients. This creates those delicious little pockets of buttery goodness that make the topping actually, you know, crisp.
Skipping the cooling period. I get it, you want that warm dessert NOW. But unless you enjoy the sensation of molten apple lava burning the roof of your mouth, give it those 10 minutes.
Using instant oatmeal packets. Just… no. Those little packets of maple-and-brown-sugar oatmeal are not the same as old-fashioned oats. Unless you want your topping to taste like breakfast gone wrong, stick to the real deal.
Making it too complicated. The whole point of this recipe is that it’s EASY. Don’t start adding fancy ingredients or techniques. Save that energy for when you’re trying to impress your in-laws.
Alternatives & Substitutions
Apple pie filling alternatives: Not an apple fan? Shocking, but I’ll allow it. This recipe works great with cherry, peach, or blueberry pie filling too. Mix and match if you’re feeling wild!
Make it gluten-free: Swap the all-purpose flour for a gluten-free blend. The oats should already be gluten-free, but check the package if you’re cooking for someone with celiac disease.
Healthier version: Replace half the butter with applesauce and reduce the sugar to 3/4 cup. It won’t be quite as decadent, but it’ll still be tasty. Or just eat a smaller portion of the real thing, IMO.
Add some texture: Throw in 1/2 cup of chopped nuts (walnuts or pecans are fantastic) or even some shredded coconut to the topping mixture. It adds a whole new dimension!
FAQ (Frequently Asked Questions)
Can I make this ahead of time?
Absolutely! Assemble it, cover with plastic wrap, and refrigerate for up to 24 hours before baking. You might need to add a few extra minutes to the baking time if it’s cold from the fridge.
How do I store leftovers?
Cover and refrigerate for up to 4 days. But let’s be real—there probably won’t be leftovers. If there are, I question your commitment to dessert.
Can I freeze this?
Yep! Freeze after baking and cooling completely. It’ll keep for about 3 months. Thaw overnight in the fridge and reheat in a 350°F oven until warmed through (about 20 minutes).
Is this REALLY as easy as you say it is?
Unless you somehow manage to light your kitchen on fire while making this, yes. It’s essentially “dump cans, mix stuff, put stuff on top of other stuff, bake.” If you can make a sandwich, you can make this.
Do I have to use a 9×13 dish?
Nope! Any similarly sized baking dish works. I’ve even made individual servings in ramekins for when I don’t want to share. Just adjust the baking time down by about 5-10 minutes for smaller containers.
Final Thoughts
Listen, we all have those days when we want something homemade-tasting without the homemade effort. This apple crisp is your secret weapon. It’s the dessert equivalent of wearing sweatpants that look like real pants—comfortable, easy, but still impressive enough to serve to others.
The next time you need a dessert that makes people think you actually tried (when you barely did), pull this recipe out. Whether you’re serving it at a dinner party or eating it straight from the pan while watching Netflix, this apple crisp has your back. Now go preheat that oven—dessert glory awaits!

