Ever notice how the minute fall hits, you suddenly need to bake something with apples? It’s like a primal instinct kicks in – temperatures drop below 65°F and boom! You’re rummaging through your pantry for cinnamon. Well, good news, fellow seasonal baking victim: this Macintosh Apple Crisp is about to become your new autumn addiction. It’s quick, it’s impressive, and it makes your home smell better than any $24.99 fall-themed candle ever could.
Why This Recipe is Awesome
Let me count the ways this apple crisp will change your life (or at least your dessert game). First, Macintosh apples are the unsung heroes of the baking world – they get all soft and tender without turning to mush. Second, the topping hits that perfect sweet spot between crunchy, buttery, and oaty goodness. And third, this recipe is basically foolproof – I once made it while simultaneously binge-watching Netflix and texting, and it still turned out Instagram-worthy.
The best part? While everyone thinks you slaved away for hours, this bad boy comes together in about 15 minutes (plus baking time, but that’s just you lounging on the couch while your oven does the work). It’s the ultimate low-effort, high-praise dessert.
Ingredients You’ll Need
For the apple filling:
- 6 medium Macintosh apples (about 2 pounds) – preferably ones without those annoying little produce stickers still on them
- ¾ cup granulated sugar – yes, that much
- 1 tablespoon all-purpose flour – to thicken things up
- 1 teaspoon cinnamon – the non-negotiable fall flavor MVP
- ¼ teaspoon nutmeg – for that “what’s that amazing flavor?” moment
- 2 tablespoons lemon juice – to keep those apples from turning an unappetizing brown
- 2 tablespoons butter – cut into small pieces (because butter makes everything better)
For the crisp topping (AKA the best part):
- 1 cup all-purpose flour – the foundation of all good things
- 1 cup old-fashioned oats – not the instant kind, please and thank you
- 1 cup brown sugar – packed like you’re trying to fit a week’s worth of clothes in a carry-on
- ½ teaspoon cinnamon – because there’s no such thing as too much cinnamon
- ½ cup cold butter – cut into cubes (keep it cold, people!)
- Pinch of salt – to make the sweet taste sweeter (science!)
Step-by-Step Instructions
- Preheat your oven to 375°F. I know it’s tempting to skip this step, but your future self will thank you for not having to wait around later.
- Prepare your baking dish. Grab a 9×9-inch baking dish and give it a light coating of butter or cooking spray. This prevents the dreaded stuck-on apple syndrome.
- Prep those Macintosh beauties. Peel, core, and slice your apples into roughly ¼-inch slices. Don’t stress about perfection – they’re getting baked anyway. Aim for “roughly even” so they cook at the same rate.
- Make the apple filling. In a large bowl, toss the apple slices with granulated sugar, 1 tablespoon flour, 1 teaspoon cinnamon, nutmeg, and lemon juice until the apples are evenly coated. Think of it as giving your apples a delicious spa treatment.
- Transfer to your baking dish. Arrange the coated apples in your prepared dish, then dot the top with those small pieces of butter. This adds richness that’ll make your taste buds do a happy dance.
- Create the crisp topping. In another bowl, combine flour, oats, brown sugar, ½ teaspoon cinnamon, and salt. Mix it up with a fork or your fingers until it looks like, well, crisp topping ingredients.
- Add the cold butter. Using your fingers or a pastry cutter, work the cold butter cubes into the dry mixture until it resembles coarse crumbs. The butter should stay cold and visible in small pieces – this is what creates that irresistible crumbly texture.
- Top your apples. Sprinkle (or let’s be honest, dump) the crumb mixture evenly over the apples. Cover every inch – the topping-to-apple ratio should be borderline ridiculous.
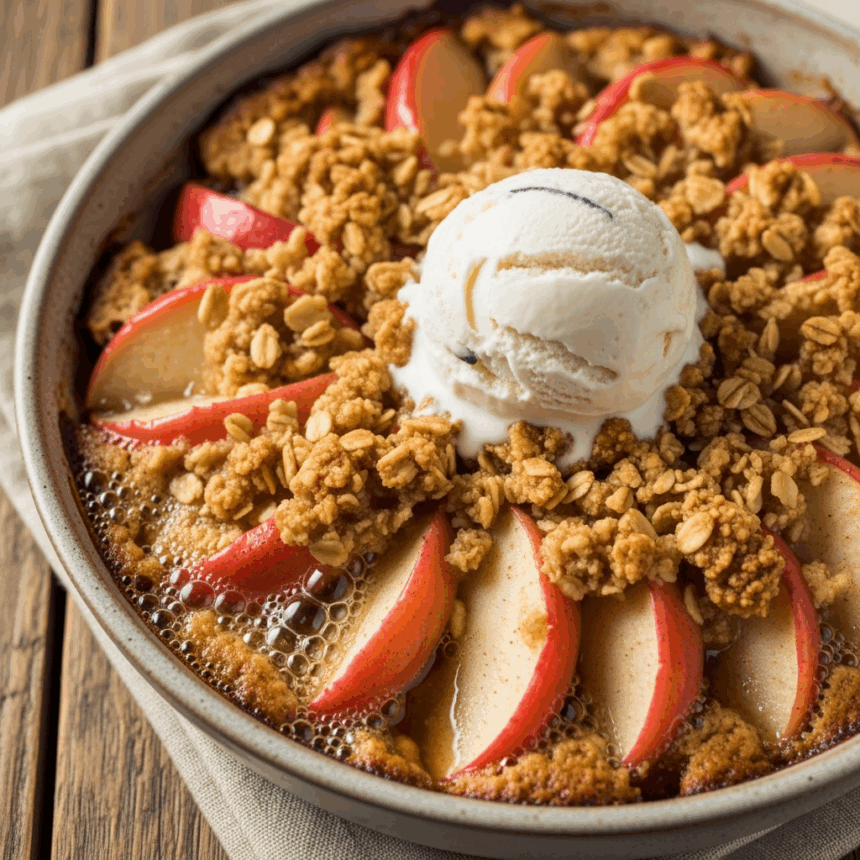
- Bake until golden and bubbly. Pop it in your preheated oven for 45-50 minutes, or until the topping is golden brown and you can see the apple filling bubbling around the edges like delicious lava.
- Cool slightly for about 10-15 minutes. I know it’s torturous to wait, but molten apple filling is basically napalm for your mouth. Safety first, friends.
Common Mistakes to Avoid
Let’s talk about how not to mess this up, shall we?
- Using the wrong apples. Granny Smiths are great for many things, but they’re too firm for this recipe. Stick with Macintosh for that perfect tender-not-mushy texture.
- Skipping the lemon juice. Unless you want your beautiful apple crisp to look like it’s been sitting in your fridge since last fall, add the lemon juice. It prevents browning and adds a nice zing.
- Using warm or melted butter in the topping. This is how you end up with a solid sheet of cookie-like topping instead of that crumbly goodness. Cold butter = crumbly topping. It’s science.
- Covering the dish while baking. You want a crisp, not a steamed apple casserole. Leave it uncovered to get that textural contrast between soft apples and crunchy topping.
- Serving it straight from the oven. I get the excitement, but give it at least 10 minutes to cool unless you enjoy emergency room visits for severe tongue burns.
Alternatives & Substitutions
Need to switch things up? I gotchu:
- Apple options: If you can’t find Macintosh, Honeycrisp or Jonagold will work. Avoid Red Delicious at all costs – those are for school lunches, not baking.
- Make it healthier: Reduce the sugar to ½ cup in both components if you want to pretend this is somehow good for you. You can also sub in whole wheat flour for half the all-purpose if you’re feeling virtuous.
- Mix up the spices: Add a pinch of cardamom or ginger to give it a more complex flavor profile. Or go wild with a splash of bourbon in the apple mixture. I won’t tell.
- Dietary restrictions: Make it gluten-free by using certified GF oats and a cup-for-cup gluten-free flour blend. For dairy-free, use coconut oil instead of butter (though TBH, it won’t be quite the same).
- Topping boost: Add ½ cup chopped pecans or walnuts to the topping for extra crunch and that fancy gourmet look.
FAQ (Frequently Asked Questions)
Can I make this ahead of time?
Absolutely! Assemble everything but hold off on baking. Cover and refrigerate for up to 24 hours, then bake when you’re ready. You might need to add an extra 5-10 minutes to the baking time if it’s coming straight from the fridge.
Do I really have to peel the apples?
Technically no, but unless you enjoy random pieces of apple skin getting stuck in your teeth while you’re trying to impress your dinner guests, I’d recommend peeling them. Your call though – I’m not the apple police.
My topping isn’t crispy enough. What gives?
Your oven might be lying to you about its temperature. Next time, try increasing the heat by 25°F or pop it under the broiler for a minute at the end (but watch it like a hawk – the difference between “golden” and “charcoal” is about 30 seconds).
Can I double this recipe?
FYI, this is absolutely doubleable! Just use a 9×13-inch baking dish instead and maybe add 5-10 minutes to the baking time. More apple crisp is never a bad idea.
How do I store leftovers?
In the unlikely event you have leftovers, cover and refrigerate for up to 3 days. The topping will soften a bit, but a few minutes in a 350°F oven will crisp it back up. Or just eat it cold from the fridge at midnight like a normal person.
Is this a dessert or breakfast?
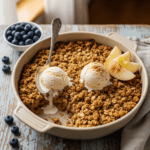
Yes. The answer is yes. Add a scoop of vanilla ice cream for dessert, or a dollop of Greek yogurt for a “totally legitimate” breakfast. IMO, any dessert with fruit automatically qualifies as breakfast food.
Final Thoughts
There you have it – a foolproof Macintosh Apple Crisp that’ll have everyone thinking you’re some kind of dessert wizard. The beauty of this recipe is that it’s rustic (that’s fancy talk for “doesn’t need to look perfect”), so even if your kitchen skills are questionable, you’ll still end up with something delicious.
This apple crisp is the perfect excuse to go apple picking, a great way to use up those slightly sad apples in your fridge, and the ideal dessert to make when you want people to think you’re a domestic genius without actually putting in that much effort.
So grab those Macintosh apples, crank up some music in your kitchen, and get baking. Your house is about to smell amazing, and your taste buds are in for a treat. And when everyone asks for the recipe? Just send them this link and take all the credit. I won’t mind.

