Ah, apple crisp – that perfect treat where the fruit totally pretends to cancel out all the butter and sugar. But you know what makes a good apple crisp absolutely legendary? A bottom crust. That’s right. We’re talking about that glorious middle ground between a pie and a crumble where you get the best of both worlds. Buckle up, friends – your autumn dessert game is about to level up.
Why This Recipe is Awesome
Let’s be real for a second. Regular apple crisp is delicious, but sometimes it’s just… soupy. You know what I’m talking about – that moment when you scoop it onto a plate and it’s basically apple soup with some crumbs floating on top. Tragic. With a bottom crust, you get structure, people! You get integrity! You get a dessert that holds its shape when you serve it, making you look like you actually know what you’re doing in the kitchen.
Plus, this recipe strikes that perfect balance between “impressive enough to serve guests” and “won’t have you cursing in the kitchen for three hours.” It’s the dessert equivalent of wearing secret pajama jeans to a fancy dinner – looks fancy, feels comfortable.
Ingredients You’ll Need
For the bottom crust (aka the game-changer):
- 1 cup all-purpose flour (the regular stuff, nothing fancy)
- 1/3 cup granulated sugar (the white stuff that makes life worth living)
- 1/4 teaspoon salt (just a pinch – we’re not curing meat here)
- 1/2 cup cold butter, cubed (the colder, the better – like my ex’s heart)
For the apple filling (the reason we’re all here):
- 6 medium apples, peeled and sliced (Granny Smith if you’re fancy, whatever’s on sale if you’re me)
- 2/3 cup granulated sugar (yes, more sugar – it’s dessert, not a salad)
- 2 tablespoons all-purpose flour (to thicken things up)
- 1 teaspoon cinnamon (the spice that makes everything nice)
- 1/4 teaspoon nutmeg (optional, for those who like to live dangerously)
- 2 tablespoons lemon juice (to keep those apples from turning brown and sad)
For the crisp topping (the crowning glory):
- 3/4 cup old-fashioned oats (not the instant kind, have some self-respect)
- 3/4 cup brown sugar, packed (pack it like you’re angry at it)
- 1/2 cup all-purpose flour (yes, more flour – we’re building layers here, people)
- 1 teaspoon cinnamon (because one layer of cinnamon is never enough)
- 1/2 cup cold butter, cubed (your butter drawer is getting empty, I know)
Step-by-Step Instructions
- Preheat your oven to 350°F (175°C). This is not optional – don’t be that person who puts food in a cold oven and then wonders why everything is terrible.
- For the bottom crust, mix flour, sugar, and salt in a bowl. Cut in the cold butter using a pastry cutter, two knives, or your fingers if you’re a rebel. Keep going until it looks like coarse crumbs. Don’t overmix or your crust will be tough enough to use as a frisbee.
- Press this mixture firmly into the bottom of a 9×13-inch baking dish. It should look like you’re making a sandy beach for tiny dessert people.
- Bake just the crust for 10 minutes. This is called “par-baking” and it will make you sound sophisticated when you explain it to people.
- While the crust is getting its tan on, mix all the apple filling ingredients in a large bowl. Toss until the apples are coated like they’re wearing tiny sugar jackets.
- In another bowl, combine all the topping ingredients except the butter. Then cut in the butter until you have pea-sized crumbs. If some pieces are bigger, congratulations – those will be the extra delicious bits.
- Once the crust has had its 10-minute vacation in the oven, spread the apple mixture evenly over it. Try to restrain yourself from eating half the apples in the process.
- Sprinkle the crumb topping over the apples. Be generous here – we’re not counting calories today.
- Bake for 40-45 minutes until the top is golden brown and the apples are bubbling around the edges like a witch’s cauldron. If your kitchen doesn’t smell amazing at this point, something has gone terribly wrong.
- Let it cool for at least 15 minutes before serving. I know this is the hardest part, but your mouth will thank you for not burning all your taste buds off.
Common Mistakes to Avoid
Here’s where people tend to go off the rails with this recipe:
- Using warm or room temperature butter – Your crust and topping will be sad, greasy messes. Cold butter = flaky, crispy goodness.
- Skipping the par-bake – Unless you enjoy soggy bottoms (and not in a good way), don’t skip this step.
- Cutting apple slices too thick – Unless you want to be chewing until next Tuesday, aim for about 1/4-inch slices.
- Overcrowding the pan – This isn’t a Tokyo subway at rush hour. If your pan is heaped like a mountain, the middle will never cook properly.
- Serving it piping hot – I get it, you’re excited. But this dessert needs time to set, or you’ll just have apple avalanche on your plate.
Alternatives & Substitutions
Because sometimes you need to improvise or your pantry is judging you:
For the apples: Pears work beautifully here if you’re feeling fancy. You can also mix apple varieties for more complex flavor – I’m partial to a Granny Smith/Honeycrisp combo, personally. It’s like the dessert equivalent of a buddy cop movie – one’s tart, one’s sweet, together they fight crime (or in this case, boring desserts).
For the oats: No old-fashioned oats? Quick oats will work in a pinch, but your topping won’t have as much texture. Just don’t use instant oatmeal packets unless you want your dessert to taste like artificial maple and sadness.
Make it gluten-free: Swap regular flour for a 1:1 gluten-free flour blend. Most people won’t even notice the difference, especially after you’ve loaded it with butter and sugar. Magic!
Lower sugar option: You can reduce the sugar by about 25% without major disaster. Any more than that and, well… why are you even making dessert? Just eat an apple, Karen.
FAQ (Frequently Asked Questions)
Do I really need to peel the apples?
Technically no, but do you enjoy random pieces of tough skin in your otherwise heavenly dessert? Some things are worth the extra five minutes, and peeling apples is one of them, IMO.
Can I make this ahead of time?
Absolutely! You can assemble the whole thing and refrigerate it for up to 24 hours before baking. Just add about 10 minutes to the baking time if you’re going from fridge to oven. Your future self will high-five you for this level of planning.
Will this recipe work with canned apple pie filling?
Look, I can’t stop you, but I can judge you silently from across the internet. Fresh apples take this from “meh” to “where has this been all my life?”
Can I freeze leftovers?
Yes, if by some miracle you have leftovers. Freeze in an airtight container for up to 3 months. Thaw in the fridge overnight, then warm in a 300°F oven until heated through. The topping might not be quite as crispy, but it’ll still be delicious.
Is this the same as an apple pie?
Did you even read the recipe title? This is the rebellious cousin of apple pie – less fussy, more texture, and 100% more attitude. It’s what apple pie wishes it could be if it wasn’t so uptight.
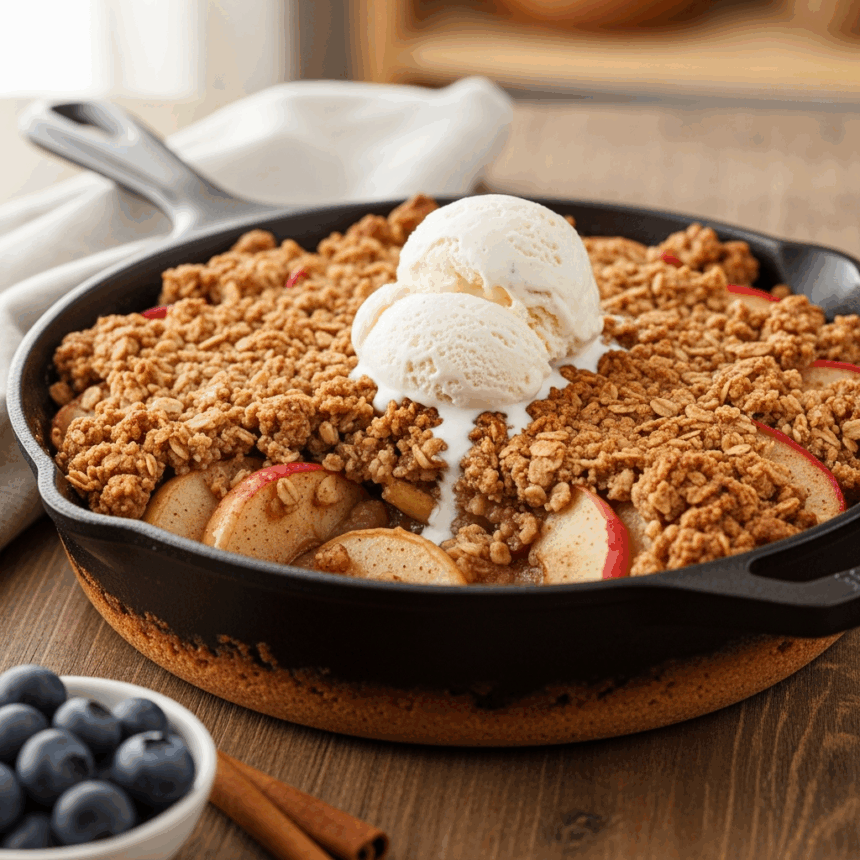
Can I serve this with ice cream?
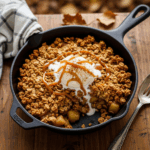
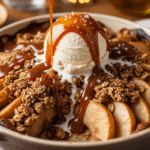
Not only can you, but I might have to revoke your dessert privileges if you don’t. Vanilla ice cream on warm apple crisp is basically the reason taste buds were invented.
Final Thoughts
There you have it – apple crisp with a bottom crust, aka the dessert that will make your friends think you’ve been taking secret pastry classes. It’s homey enough for a random Tuesday night but impressive enough for company, which is pretty much the sweet spot for any recipe.
The best part? While everyone’s ooh-ing and ahh-ing over your creation, only you’ll know how ridiculously easy it was. That’s what we call a culinary power move, friends.
Now go preheat that oven and get peeling. Fall waits for no one, and neither do apple cravings once they hit. Your house is about to smell like everything good about autumn – you can thank me later!
