Look, I get it. You’ve got four apples sitting in your fruit bowl giving you that judgmental “we’re about to go bad” stare. Don’t panic! I’ve got the perfect solution that’ll turn those guilt-inducing fruits into a dessert that’ll make your entire house smell like you’ve got your life together. Let’s make some apple crisp, shall we?
Why This Recipe is Awesome
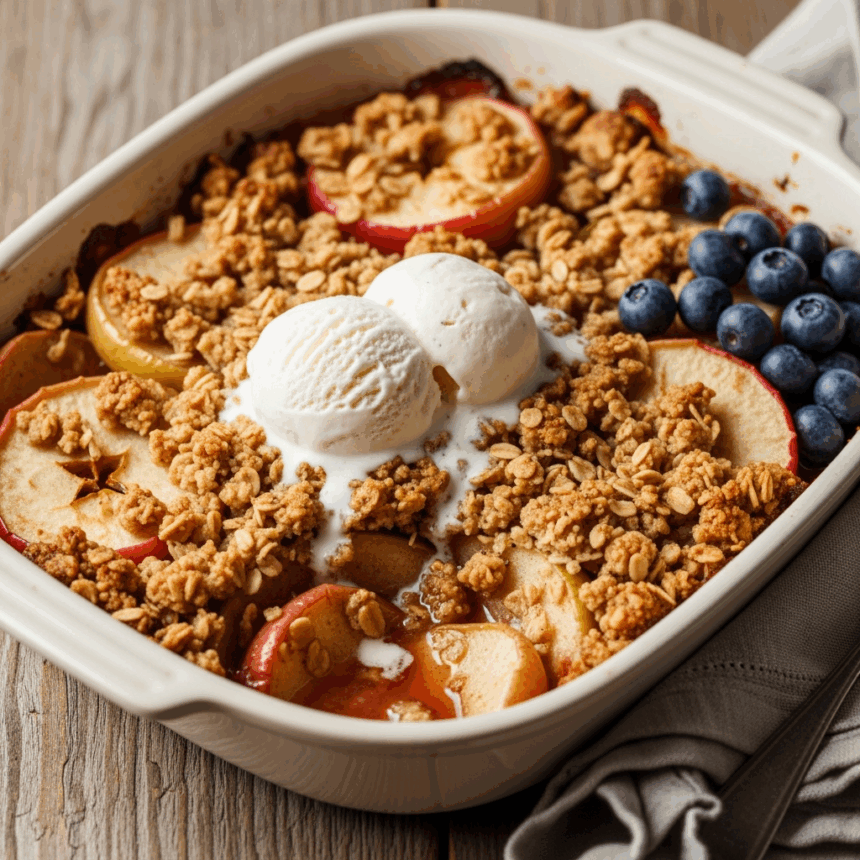
First off, this apple crisp requires exactly four apples. Not three. Not five. Four. It’s like the recipe gods knew about your specific fruit drawer situation. Plus, it’s ridiculously simple—we’re talking “I’ve had three glasses of wine and can still make this” level of easy. The topping gets all golden and crunchy while the apples underneath turn into this warm, cinnamon-y magic that practically begs for a scoop of vanilla ice cream. And the best part? Your kitchen will smell so good that your neighbors might “coincidentally” drop by.
Ingredients You’ll Need
For the apple filling:
- 4 medium apples (any variety works, but Granny Smith, Honeycrisp, or Gala are my go-to’s)
- 2 tablespoons lemon juice (to keep your apples from turning that sad brown color)
- 3 tablespoons granulated sugar (or more if you’ve got a sweet tooth)
- 1 teaspoon cinnamon (the non-negotiable ingredient here, people)
- 1/4 teaspoon nutmeg (optional, but highly recommended for that “what’s that amazing flavor?” factor)
For the crisp topping (AKA the best part):
- 3/4 cup all-purpose flour
- 3/4 cup old-fashioned rolled oats (not the instant stuff—we’re not savages)
- 1/2 cup brown sugar, packed (like your emotional baggage)
- 1/2 teaspoon cinnamon (yes, more cinnamon—trust me)
- 1/4 teaspoon salt
- 1/2 cup (1 stick) cold butter, cubed (the colder the better)
Step-by-Step Instructions
- Preheat your oven to 350°F (175°C). Yes, you actually need to do this first. Patience, young Padawan.
- Prep your apples. Peel, core, and slice those four apples into roughly 1/4-inch slices. Thin enough to cook through, thick enough not to disintegrate. Toss them with lemon juice in a bowl.
- Season the apples. Add the granulated sugar, 1 teaspoon cinnamon, and nutmeg. Toss until the apple slices look like they’re wearing tiny cinnamon coats. Transfer them to an 8×8 inch baking dish.
- Make the crisp topping. In a medium bowl, combine flour, oats, brown sugar, the remaining cinnamon, and salt. Mix it up. Now add your cold butter cubes and use your fingers to work it in. Keep pinching and mixing until it looks like coarse crumbs. Should take about 2-3 minutes or one TikTok video’s worth of time.
- Top and bake. Sprinkle (or let’s be honest, dump) the topping evenly over the apples. Pop it in the oven for 40-45 minutes, or until the top is golden brown and the apples are bubbling around the edges like a witch’s cauldron.
- Cool slightly. Let it cool for at least 10 minutes before serving. I know it’s tempting to dive in, but molten apple filling is basically napalm.
Common Mistakes to Avoid
Let’s talk about ways to not mess this up:
- Using room-temperature butter for the topping. Cold butter = crumbly topping. Warm butter = sad, flat topping. Don’t be sad.
- Skipping the lemon juice. Unless you want brown, mushy apples that look like they’ve been sitting out since last Tuesday, use the dang lemon juice.
- Slicing your apples too thin or thick. Too thin and they’ll turn to mush; too thick and you’ll be crunching on raw apple. Aim for that Goldilocks zone.
- Forgetting to let it cool. I’m not saying I’ve burned the roof of my mouth on hot apple crisp before, but I’m also not saying I haven’t. Learn from my sacrifices.
Alternatives & Substitutions
Because we all know you’re going to ask about changing something:
- Apple varieties: Any apple works, but mixing varieties gives the best flavor. FYI, Red Delicious apples are the worst choice—they’re the participation trophies of the apple world.
- Make it gluten-free: Swap the all-purpose flour with a gluten-free blend. The oats should be certified gluten-free too if you’re serious about it.
- Vegan version: Use cold coconut oil instead of butter. It works surprisingly well, though it does add a slight coconut flavor (which is actually pretty delicious).
- Spice it up: Add a pinch of cardamom, ginger, or allspice to the mix for an extra flavor dimension. Or toss in a handful of cranberries or raisins if you’re feeling fancy.
- Sugar alternatives: Maple syrup or honey can replace the granulated sugar in the filling, but the topping really needs that brown sugar to get crispy. Science and stuff.
FAQ (Frequently Asked Questions)
Do I really need to peel the apples?
Can you leave the peels on? Yes. Should you? Depends on how much you enjoy random tough bits in your otherwise heavenly dessert. The texture is better without peels, but I’m not the boss of you.
Can I make this ahead of time?
Absolutely! You can assemble it a day ahead and refrigerate it unbaked. Just add 5-10 minutes to the baking time if you’re cooking it cold. The topping might not be quite as crispy, but at 11pm when you’re having a dessert craving, you won’t care.
How do I store leftovers?
Cover and refrigerate for up to 3 days. Though let’s be real—what leftovers?
Can I freeze apple crisp?
Yes, but the topping might lose some of its… well… crispness. Freeze for up to 3 months and thaw overnight in the fridge before reheating in a 350°F oven until warm.
What can I serve with this?
Ice cream is the obvious choice (vanilla is classic, but butter pecan is secretly amazing here). Whipped cream works too. Or go full breakfast mode and top it with Greek yogurt. I won’t tell anyone.
Final Thoughts
And there you have it—the perfect solution for those four apples and your dessert cravings in one fell swoop. This apple crisp is like a warm hug on a plate, and you absolutely deserve it. The best part? You can totally tell people it’s an “old family recipe” and no one will know you found it online while procrastinating. Your secret’s safe with me. Now go forth and bake—your apples are waiting!
