Look, we all know the drill. The weather gets slightly cooler, you’ve got apples piling up, and suddenly you’re scrolling through TikTok watching people make elaborate desserts. But let’s be real—who has time for all that fancy nonsense? Not me, and probably not you either. That’s why this apple crisp recipe is about to become your new fall BFF. It’s quick, it’s stupid easy, and topped with vanilla ice cream? *chef’s kiss* Absolute heaven in a bowl.
Why This Recipe is Awesome
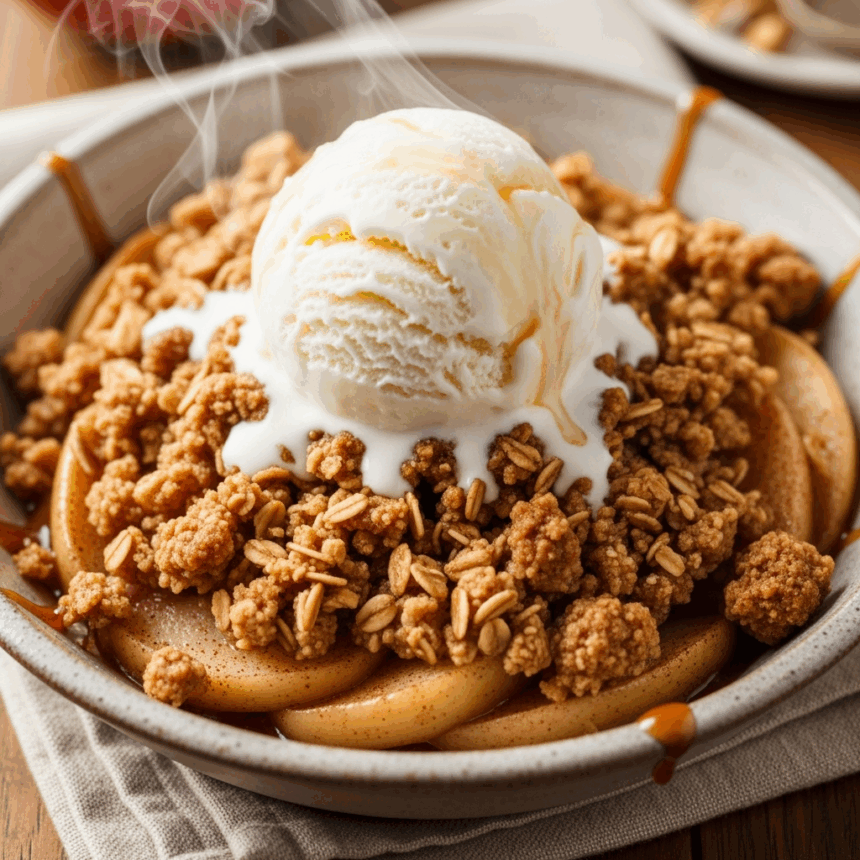
First off, this isn’t some pretentious dessert that requires a culinary degree. This apple crisp is what I call a “confident beginner” recipe—you can nail it even if your cooking skills are usually limited to microwave popcorn. Plus, the combo of warm, cinnamon-spiced apples and that crispy, buttery topping creates the perfect excuse to add a melting scoop of vanilla ice cream on top. And let’s be honest, isn’t the ice cream why we’re all really here?
The best part? Your kitchen will smell absolutely incredible. Like “everyone will think you’ve been baking all day” incredible, when really you spent maybe 15 minutes of actual effort. That’s what I call a win-win situation.
Ingredients You’ll Need
For the apple filling:
- 6-7 medium apples (Granny Smith or Honeycrisp work best, but use whatever’s in your fruit bowl—I won’t judge)
- ¾ cup granulated sugar (or less if you’re “watching your sugar intake”… sure, Jan)
- 1 tablespoon all-purpose flour (yes, just one—I promise it’s enough)
- 1 teaspoon cinnamon (feel free to go heavy-handed here)
- ¼ teaspoon nutmeg (the secret weapon)
- 2 tablespoons lemon juice (stops everything from turning that sad brown color)
For the crisp topping (aka the best part):
- 1 cup old-fashioned oats (not the instant stuff you eat when you’re trying to be healthy)
- 1 cup all-purpose flour (the gluten-free folks can substitute here)
- 1 cup brown sugar, packed (don’t skimp—this is dessert, not a salad)
- ½ teaspoon salt (trust me on this one)
- 1 teaspoon cinnamon (yes, more cinnamon—deal with it)
- ½ cup cold butter, cubed (THE BUTTER MUST BE COLD, people!)
For serving:
- Vanilla ice cream (the good stuff, not that freezer-burned container from last summer)
Step-by-Step Instructions
- Preheat your oven to 350°F (175°C). And yes, you actually need to preheat. Don’t be that person who throws it in a cold oven.
- Peel, core, and slice your apples into ¼-inch slices. If they’re not all exactly the same thickness, don’t stress—this isn’t a baking competition show.
- Toss those apple slices in a bowl with the sugar, 1 tablespoon flour, cinnamon, nutmeg, and lemon juice. Make sure everything’s coated evenly. It should look like apples wearing a cinnamon sweater.
- Dump the apple mixture into a 9×13 baking dish. Spread them out but don’t press down—we’re not making apple cement here.
- In another bowl, mix together the oats, 1 cup flour, brown sugar, salt, and cinnamon. This is your crisp topping mixture.
- Add the cold butter cubes to your topping mixture. Now get your hands dirty and use your fingers to work the butter into the dry ingredients. You want it to look like coarse crumbles, not a smooth dough. Think: delicious sand castles.
- Sprinkle (or let’s be real—dump) this topping all over your apples. Cover every inch of those apples like they owe you money.
- Bake for 45-50 minutes, or until the top is golden brown and you can see the apple filling bubbling up around the edges like delicious lava.
- Let it cool for 10-15 minutes. I know it’s tempting to dive in immediately, but I value your taste buds and don’t want you to burn them off.
- Scoop into bowls, top with vanilla ice cream, and watch that ice cream start to melt into all the nooks and crannies. This right here is the money moment.
Common Mistakes to Avoid
Let’s talk about how not to mess this up:
- Using warm butter in the topping. If your butter isn’t cold, you’ll end up with a sad, flat cookie on top instead of a glorious, crunchy crisp. Nobody wants that disappointment.
- Skipping the lemon juice. Unless you want your apples turning an unappetizing brown (spoiler: you don’t), use the lemon juice.
- Slicing the apples too thin or thick. Too thin = apple mush. Too thick = partially raw apples. Aim for that Goldilocks zone of about ¼ inch.
- Forgetting to let it cool. I get it, you’re impatient. But if you don’t wait a few minutes, your ice cream will melt faster than a snowman in July, and you’ll burn the roof of your mouth. Double fail.
Alternatives & Substitutions
Because we all know you’re going to ask if you can change things up:
- Apples: Any firm baking apple works. Granny Smith if you like it tart, Honeycrisp for sweeter, or mix them for the best of both worlds. Pears also work in a pinch, FYI.
- Make it gluten-free: Substitute the flour with almond flour or a 1:1 gluten-free flour blend. The oats should be certified gluten-free if you’re serious about it.
- Lower the sugar: You can reduce the sugar by about 25% without ruining everything, but don’t go crazy. This is dessert, not a health food.
- Spice it up: Add some cardamom, ginger, or even a pinch of cloves if you’re feeling adventurous. Or keep it simple—I’m not the spice police.
- Vegan version: Use coconut oil or vegan butter instead of regular butter. Serve with non-dairy ice cream. It’s almost as good. Almost.
FAQ (Frequently Asked Questions)
Can I make this ahead of time?
Absolutely! You can assemble the whole thing, cover it, and refrigerate for up to 24 hours before baking. Just add about 10 minutes to the baking time since you’re starting cold. Your future self will thank you.
Do I really need to peel the apples?
In theory, no. In practice, unless you enjoy random pieces of apple skin getting stuck in your teeth while you’re trying to look sophisticated eating dessert, just peel them. It takes like 5 minutes.
Can I freeze leftovers?
Leftovers? What leftovers? But yes, you can freeze it for up to 3 months. The topping might lose some crispness, but it’ll still taste good. Reheat in the oven, not the microwave, if you have any respect for yourself.
What if I don’t have oats?
Then technically you’re making an apple crumble, not a crisp. Still delicious! Just increase the flour to 1½ cups and carry on with your life.
Can I use something other than vanilla ice cream?
I mean, you’re an adult (I assume), so you can do whatever you want. Caramel or cinnamon ice cream works great. Whipped cream is acceptable. Chocolate ice cream is questionable but you do you. Serving it with nothing is just sad.
How do I know when it’s done?
The top should be golden brown, not pale and sad-looking. And you’ll see the apple filling bubbling around the edges, often trying to escape the dish. That’s your cue!
Final Thoughts
Look, making this apple crisp isn’t going to solve world hunger or bring about world peace. But it might just make your day a little better, especially when you’re watching that vanilla ice cream melt into all those warm, cinnamon-y apple crevices.
This is the kind of dessert that makes people think you’ve got your life together, even if your laundry has been sitting in the dryer for three days. It’s comforting, it’s classic, and it requires minimal brain power to execute.
So go ahead—grab those apples that are about to go bad, preheat that oven, and create some dessert magic. The hardest part will be stopping yourself from eating it straight from the baking dish. Not that I’ve ever done that… more than a few times.
