So you’re craving something tasty but too lazy to spend forever in the kitchen, huh? Same. We’ve all been there: that deep, primal urge for something warm, sweet, and comforting, but the thought of peeling a dozen apples just makes you want to curl up with Netflix instead. Well, my friend, get ready to have your dessert dreams answered by the *laziest, yet most brilliant* apple crisp hack ever. Yes, we’re talking Apple Crisp Made With Apple Pie Filling. Your inner chef (and couch potato) will thank you.
Why This Recipe is Awesome
Let’s be real, time is precious, and so is your sanity. This isn’t just a recipe; it’s a life hack disguised as dessert. Why is it so awesome, you ask? Because it’s practically **idiot-proof**. Seriously, even I, the queen of “oops, I forgot a step,” haven’t messed this one up. We’re skipping all the tedious apple prep (peeling, coring, slicing – ugh!) by using pre-made apple pie filling. That means less mess, less stress, and more time for important things, like deciding which show to binge-watch while your kitchen fills with the most heavenly aroma. **Minimal effort, maximum deliciousness.** Trust me, your taste buds are about to send you a thank-you note.
Ingredients You’ll Need
Gather ’round, my little kitchen wizard! Here’s what you’ll need to make magic happen. Don’t worry, it’s nothing fancy, just the good stuff:
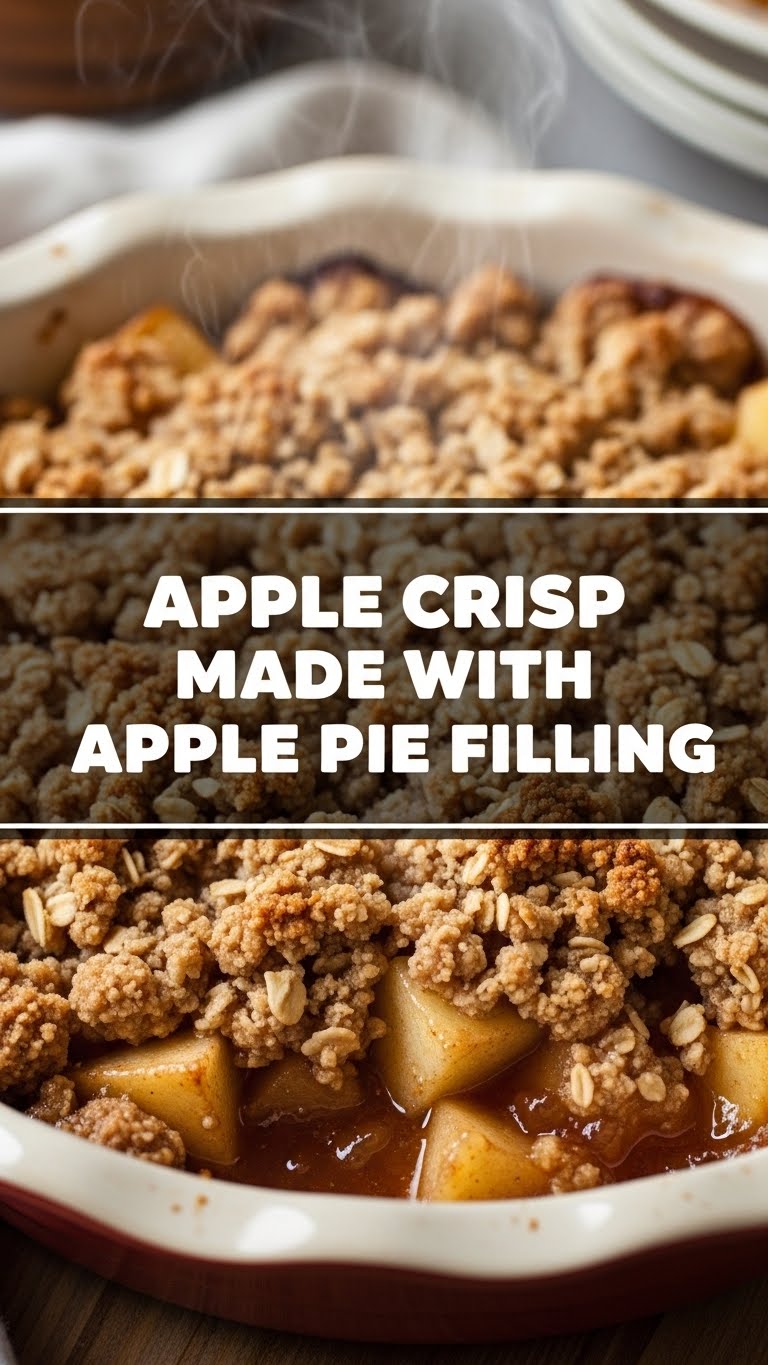
- **1 (21 oz) can apple pie filling:** The superstar of this show. Pick your favorite!
- **1 cup all-purpose flour:** Your trusty base for that crunchy topping.
- **1/2 cup rolled oats:** Gives it that classic crisp texture and a little extra chew.
- **1/2 cup packed light brown sugar:** For that deep, caramel-y sweetness.
- **1/4 teaspoon ground cinnamon:** Because apples and cinnamon are soulmates.
- **Pinch of salt:** Enhances all those lovely flavors. Don’t skip it!
- **1/2 cup (1 stick) unsalted butter, COLD and cubed:** This is key for that crumbly perfection. Warm butter is a no-go, unless you want a buttery paste (which we don’t).
- **Optional: Vanilla ice cream or whipped cream:** For serving, because are you even living if you don’t add a scoop?
Step-by-Step Instructions
Alright, apron on (or not, we don’t judge). Let’s get this deliciousness going:
- **Preheat Your Oven:** Set your oven to **375°F (190°C)**. While it’s heating up, grab an 8×8 inch baking dish or a similar size. Give it a light spray with cooking oil, just to be safe.
- **Fill ‘Er Up:** Pour that glorious can of apple pie filling into your prepared baking dish. Spread it out evenly. See? Half the work is already done!
- **Make the Crumble Topping:** In a medium bowl, whisk together the flour, oats, brown sugar, cinnamon, and salt. Get it all nicely combined.
- **Cut in the Butter:** Now for the fun part! Add your **cold, cubed butter** to the dry ingredients. Using your fingers, a pastry blender, or even two knives, work the butter into the mixture until it resembles coarse crumbs. Think tiny pebbles, not a smooth dough. **Don’t overmix!**
- **Top It Off:** Evenly sprinkle that delightful crumb topping all over the apple pie filling. Make sure you get good coverage.
- **Bake Until Golden:** Pop your dish into the preheated oven. Bake for **30-35 minutes**, or until the topping is beautifully golden brown and the apple filling is bubbly around the edges. You want that perfect crisp-tender vibe.
- **Cool (If You Can Wait!):** Let it cool for at least 10-15 minutes before serving. This allows the filling to set up a bit and prevents you from burning your tongue off (ask me how I know).
- **Serve and Enjoy:** Scoop out generous portions. Top with a dollop of vanilla ice cream or whipped cream, because you deserve it.
Common Mistakes to Avoid
Nobody’s perfect, but we can try to avoid these rookie blunders, right?
- **Thinking you don’t need to preheat the oven:** Seriously? That’s like trying to run a marathon without stretching. **Always preheat!** Your crisp will thank you with even baking.
- **Using warm butter for the topping:** This is a biggie. Warm butter will melt into the flour too quickly, giving you a tough, clumpy mess instead of light, crumbly goodness. **Cold butter is your friend.**
- **Overmixing the crumble:** Once it looks like coarse crumbs, stop! Overmixing develops gluten, which makes for a tougher topping. We want tender, not tough.
- **Skipping the cooling time:** I know it smells amazing and you want to dive in immediately. But trust me, giving it 10-15 minutes allows the filling to thicken and prevents a molten lava tongue situation. Patience, young padawan!
Alternatives & Substitutions
Feeling a little rebellious? Wanna mix things up? I gotchu. This recipe is super flexible:
- **Other Fruit Fillings:** Not feeling apples? Try cherry pie filling, peach, or even blueberry! The world is your fruit tart (or crisp, in this case). Just make sure it’s a standard 21 oz can.
- **Nutty Topping:** Want some extra crunch and flavor? Add a handful of chopped pecans or walnuts to your crumble mixture. Game changer!
- **Spice It Up:** A tiny pinch of nutmeg or allspice in the crumble can add another layer of cozy flavor. Don’t go overboard, though.
- **Gluten-Free Flour:** You can swap the all-purpose flour for a 1:1 gluten-free baking blend. Just make sure it contains xanthan gum.
- **Vegan Butter:** For our plant-based pals, use a good quality vegan butter alternative (like Miyoko’s Kitchen or Earth Balance sticks) in the crumble.
FAQ (Frequently Asked Questions)
Got questions? I’ve got (casual) answers!
- **Can I use margarine instead of butter?** Well, technically yes, but why hurt your soul (and your crisp’s flavor) like that? Butter just tastes better, IMO.
- **How do I store leftovers?** Pop it in an airtight container in the fridge for up to 3-4 days. It’s usually gone long before then, though.
- **Can I reheat it?** Absolutely! A quick zap in the microwave or a few minutes in a preheated oven (300°F/150°C) will warm it right up.
- **What if I don’t have rolled oats?** You can skip them and just use more flour (total 1.5 cups) or try quick oats, but the texture won’t be quite the same. Rolled oats give that *chef’s kiss* chewiness.
- **Can I double the recipe?** You bet! Just use a 9×13 inch baking dish and double all the ingredients. You might need to add a few more minutes to the baking time.
- **My topping didn’t get crispy! What happened?** Usually, this means your oven wasn’t hot enough, or you pulled it out too early. Next time, give it a few more minutes and ensure it’s truly golden.
Final Thoughts
See? I told you it was easy! You just whipped up a ridiculously delicious, comforting dessert with minimal fuss. Your kitchen smells like a dream, your tummy is about to be happy, and you barely broke a sweat. That’s a win-win-win in my book. Now go impress someone—or yourself—with your new culinary skills. You’ve earned it! Grab a spoon, kick back, and enjoy every single bite. You rock!


