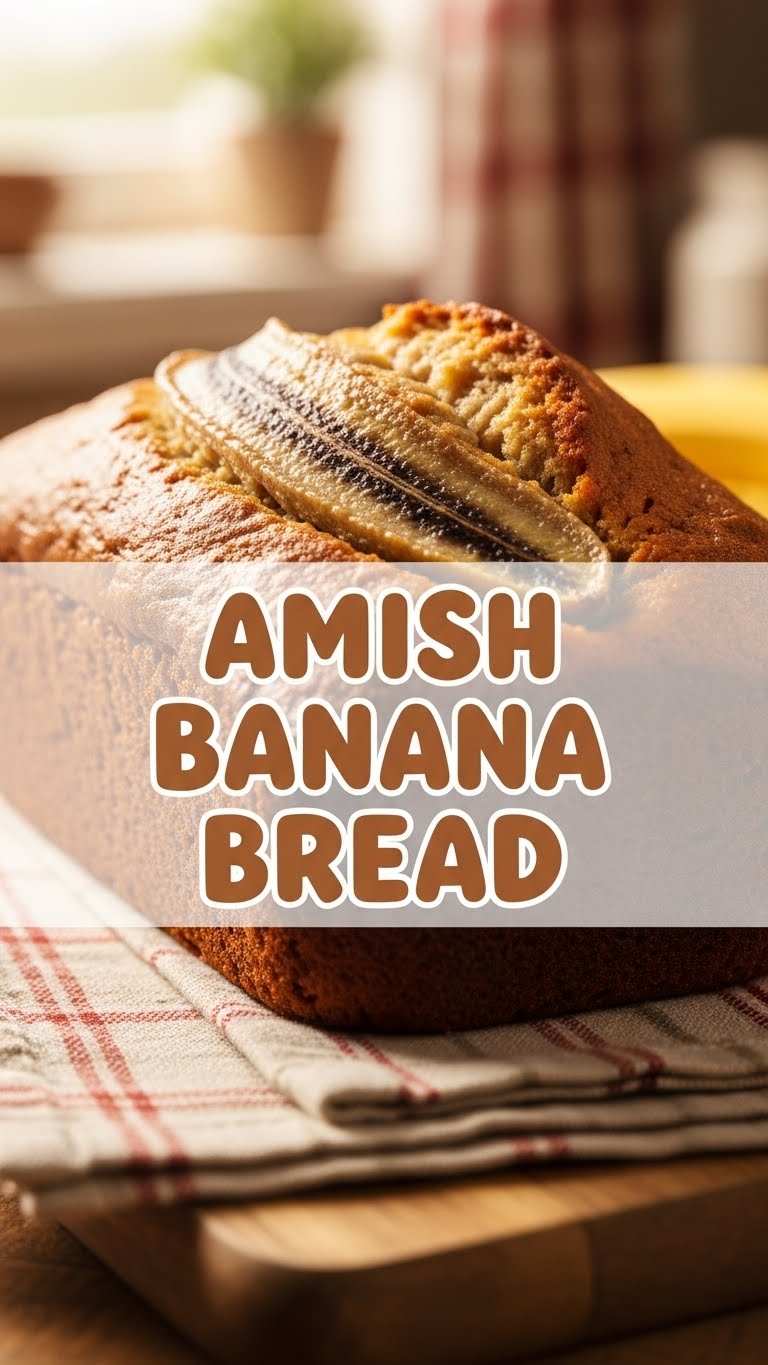
So, you’re staring at those sad, spotty bananas on your counter, aren’t you? And you’re probably thinking, “Another banana bread? *Yawn*.” But hold up, buttercup! This isn’t just *any* banana bread. This is the kind of banana bread that whispers sweet nothings to your soul, wraps you in a warm hug, and makes you wonder if maybe, just maybe, you’re secretly an Amish baking prodigy. (Spoiler: You might be after this!) It’s ridiculously easy, impossibly moist, and so comforting, it practically has its own theme song. Ready to turn those neglected bananas into pure gold? Let’s do this!
Why This Recipe is Awesome
This isn’t one of those fussy recipes that demands you pull out every single bowl in your kitchen and then meditate for three hours before daring to touch the dough. Nope. This Amish Banana Bread recipe is your chill, no-judgment zone. It’s practically **idiot-proof** – seriously, even I, the queen of kitchen catastrophes, nailed it on the first try. It’s super moist (yeah, I said it!), packed with banana goodness, and has that perfect golden-brown crust. Plus, it uses ingredients you probably already have lurking in your pantry, meaning fewer trips to the grocery store. Score! It’s the kind of recipe that makes you look like a baking wizard without actually having to *be* one. And honestly, who doesn’t want that?
Ingredients You’ll Need
Gather ’round, my fellow kitchen adventurers! Here’s your treasure map to deliciousness:
- 3-4 Ripe Bananas: The spottier, the better! Think “almost compost” level. Seriously, don’t be shy with the brown spots; that’s where the flavor party lives.
- 1/2 cup (1 stick) Unsalted Butter: Softened. Because butter makes everything better, obviously.
- 1 cup Granulated Sugar: Your sweet BFF.
- 2 Large Eggs: Room temperature, if you’re feeling fancy. If not, whatever, they’ll be fine.
- 1 teaspoon Vanilla Extract: The MVP of flavor. Don’t skip it!
- 1 1/2 cups All-Purpose Flour: The backbone of our bread.
- 1 teaspoon Baking Soda: Our little leavening hero.
- 1/2 teaspoon Salt: Just a pinch to make all the other flavors sing.
- Optional Add-ins (your choice!): 1/2 cup chocolate chips (because, chocolate), chopped walnuts or pecans (for a little crunch), or cinnamon (for extra coziness).
Step-by-Step Instructions
Alright, apron on, game face ready! Let’s bake some magic.
- Preheat & Prep: First things first, get your oven ready! Preheat it to 350°F (175°C). Then, grease and flour a 9×5 inch loaf pan. You can also line it with parchment paper for easy removal if you’re feeling extra.
- Mash ‘Em Up: In a medium bowl, mash those ripe bananas with a fork until they’re mostly smooth but still have a few glorious lumps. **Don’t overthink it!** A few chunks are totally fine. Set aside.
- Cream the Goods: In a large bowl (or your stand mixer if you’re fancy), cream together the softened butter and granulated sugar until it’s light and fluffy. This usually takes 2-3 minutes.
- Egg-cellent Addition: Beat in the eggs, one at a time, until they’re fully incorporated. Then stir in that glorious vanilla extract. It’ll smell heavenly already!
- Dry Mix Time: In a separate small bowl, whisk together the flour, baking soda, and salt. Give it a good whisk to make sure everything is evenly distributed.
- Combine Forces: Gradually add the dry ingredients to the wet ingredients, mixing on low speed (or by hand) **just until combined**. Stop as soon as you don’t see any streaks of flour. **Overmixing is the enemy of moist bread!**
- Fold in the Fun: Gently fold in your mashed bananas. This is also where you’d add any chocolate chips, nuts, or cinnamon if you’re using them.
- Into the Pan: Pour the batter into your prepared loaf pan. Give it a little wiggle to spread evenly.
- Bake It Up: Pop it in the preheated oven and bake for 55-65 minutes. How do you know it’s done? A wooden skewer or toothpick inserted into the center should come out clean (or with a few moist crumbs, but no wet batter).
- Cool Down: Once baked, let it cool in the pan for about 10 minutes before carefully transferring it to a wire rack to cool completely. Or, if you’re like me, cut a slice while it’s still warm and risk burning your mouth. Totally worth it.
Common Mistakes to Avoid
Look, we all make mistakes. It’s how we learn! But let’s try to avoid these rookie errors, shall we?
- Using Under-Ripe Bananas: Seriously, save your pretty yellow bananas for smoothies. We need the ugly, spotty ones for this. They’re sweeter and mushier, which is exactly what we want.
- Overmixing the Batter: This is a cardinal sin in baking. Overmixing develops the gluten too much, leading to tough, chewy bread. We want tender, moist goodness! Mix until *just* combined.
- Not Preheating Your Oven: Patience, young grasshopper! Your oven needs to be at the right temperature from the get-go for proper leavening and even baking. **Don’t skip preheating!**
- Opening the Oven Door Too Much: I know it’s tempting to peek, but resist! Every time you open the door, you drop the oven temperature, which can mess with your bread’s rise. Wait until at least the 45-minute mark.
Alternatives & Substitutions
Feeling adventurous or just missing an ingredient? No stress!
- Butter Swap: Ran out of butter? You can use an equal amount of vegetable oil or melted coconut oil. The texture might be slightly different, but it’ll still be delicious. But FYI, butter really is king here.
- Gluten-Free?: You can absolutely swap out the all-purpose flour for a 1:1 gluten-free baking blend. Just make sure it contains xanthan gum!
- Sugar Rush: Brown sugar can be used instead of granulated for a deeper, more caramel-y flavor. Totally recommend trying it sometime!
- Vegan Vibes: To make it vegan, replace the butter with vegan butter or oil, and use flax eggs (1 tbsp ground flaxseed + 3 tbsp water per egg, let sit for 5 minutes).
- Spice It Up: A dash of cinnamon, nutmeg, or even a pinch of ground cloves can add a lovely warmth.
- Add-in Extravaganza: Get wild with your add-ins! Dried cranberries, shredded coconut, or even a swirl of cream cheese frosting (after baking, of course) can take it to the next level.
FAQ (Frequently Asked Questions)
Got questions? I’ve got (casual) answers!
- Can I use margarine instead of butter? Well, technically yes, but why hurt your soul like that? Butter truly gives the best flavor and texture, IMO. If you must, it’ll work, but you’ll notice the difference.
- My bananas aren’t super ripe. Can I still use them? You *can*, but your bread won’t be as sweet or moist. To ripen them quickly, you can bake them unpeeled on a baking sheet at 300°F (150°C) for 15-30 minutes until they’re black and shiny. Cool before using!
- How do I store banana bread? Keep it tightly wrapped at room temperature for up to 3-4 days. For longer storage, slice it up and freeze individual pieces for up to 3 months. Perfect for a quick snack!
- Can I make muffins instead of a loaf? Absolutely! Pour the batter into a greased muffin tin. Bake for about 20-25 minutes, or until a toothpick comes out clean. Adjust baking time accordingly.
- Why is my banana bread dry? Likely culprits: overmixing the batter (developing too much gluten) or overbaking. Keep an eye on that baking time and mix gently!
- What if I don’t have baking soda? Baking soda reacts with acidic ingredients (like bananas) to help the bread rise. If you don’t have it, you’ll need a different recipe that uses baking powder or a combination. Don’t just omit it; your bread won’t rise properly.
Final Thoughts
And there you have it, folks! Your very own, incredibly delicious, ridiculously easy Amish Banana Bread. You’ve officially conquered those sad, spotty bananas and transformed them into a masterpiece. Go ahead, bask in the glory, take a well-deserved bite (or three), and maybe even share a slice with a loved one (if you can bear to part with it). You’re a baking rockstar! Now go impress someone—or yourself—with your new culinary skills. You’ve earned it!

