“`html
So you’re craving something tasty but too lazy to spend forever in the kitchen, huh? Same.
And you’ve got some sad, brown bananas staring at you from the fruit bowl, judging your life choices.
Don’t worry, we’ve all been there.
But guess what? We’re about to turn those spotted rejects into a slice of pure, unadulterated happiness.
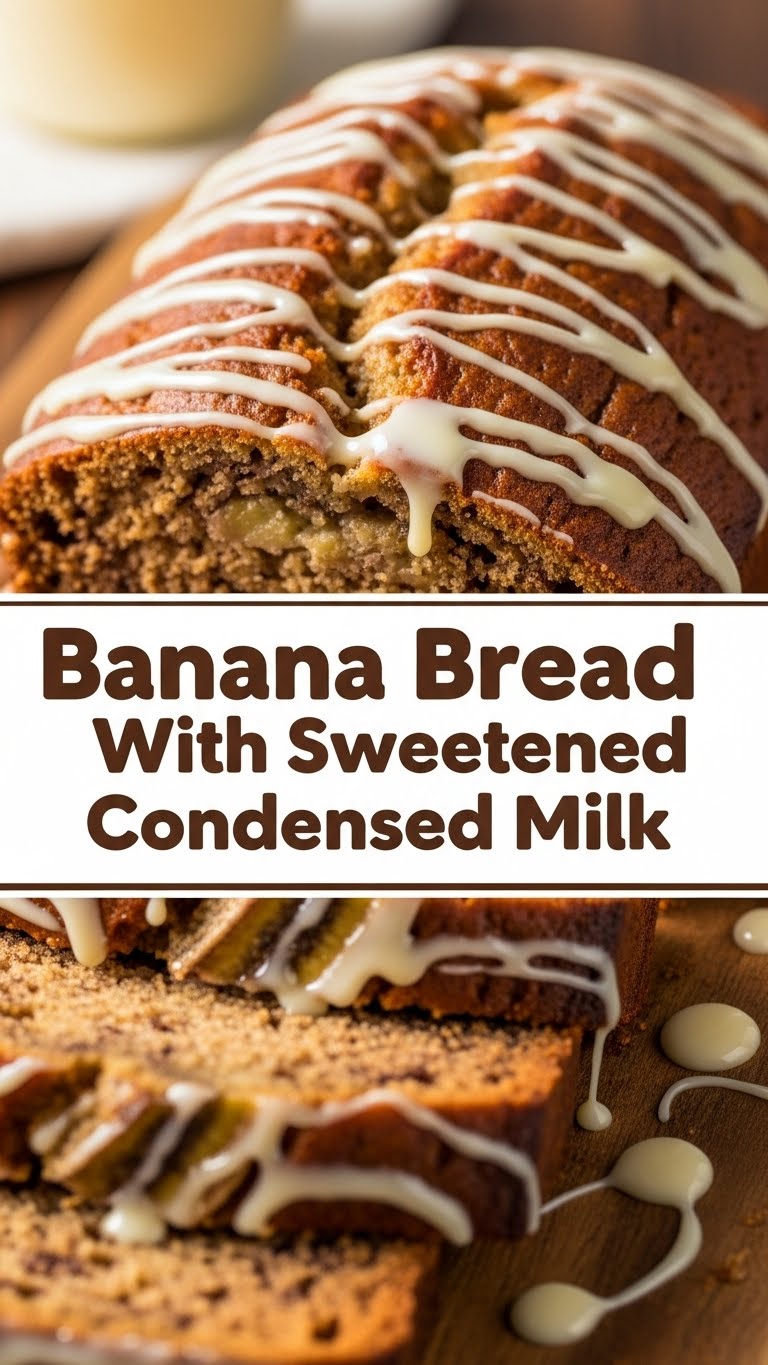
Get ready for the easiest, most ridiculously delicious banana bread you’ll ever whip up, thanks to a little secret weapon: sweetened condensed milk.
Why This Recipe is Awesome
Honestly, this recipe is a lifesaver. It’s practically idiot-proof, which is a HUGE win in my book.
It’s ridiculously moist, has a caramel-like sweetness from the condensed milk, and tastes like a warm hug on a chilly day.
Plus, it requires minimal effort for maximum deliciousness.
You’re basically a baking genius with zero stress. Boom.
Ingredients You’ll Need
- 3 ripe bananas (the browner, the better – no shame in their game)
- 1 can (14 oz) sweetened condensed milk (this is our magic ingredient, folks!)
- 1/2 cup (1 stick) unsalted butter, melted (don’t skimp on quality here!)
- 2 large eggs (room temperature is ideal, but who has time for that sometimes?)
- 1 teaspoon vanilla extract (the sweet perfume of baked goods)
- 1 1/2 cups all-purpose flour (the foundation of all baked goodness)
- 1 teaspoon baking soda (for that glorious rise)
- 1/2 teaspoon salt (balances out all that sweetness)
- Optional: 1/2 cup chopped nuts (walnuts or pecans are classic) or chocolate chips (because more is more, right?)
Step-by-Step Instructions
-
First things first, preheat your oven to 350°F (175°C). Grease and flour a 9×5 inch loaf pan.
This step is non-negotiable. Trust me. -
In a large bowl, mash those sad bananas until they’re mostly smooth. A few lumps are totally fine; they add character!
Then, pour in the entire can of sweetened condensed milk. Stir it all up like you mean it. -
Whisk in the melted butter, eggs, and vanilla extract until everything is nicely combined.
This is where the magic really starts to happen. -
In a separate medium bowl, whisk together the flour, baking soda, and salt.
This ensures everything is evenly distributed, so you don’t get weird pockets of baking soda. Yuck. -
Gradually add the dry ingredients to the wet ingredients, mixing until just combined.
**Do NOT overmix!** Seriously, just a few gentle stirs will do. Overmixing leads to tough bread, and nobody wants that. -
If you’re feeling fancy (or just really like chocolate), fold in your nuts or chocolate chips.
Again, gentle folding is key. -
Pour the batter into your prepared loaf pan and spread it evenly.
Pop it into the preheated oven and bake for 50-65 minutes, or until a toothpick inserted into the center comes out clean.
Keep an eye on it; ovens can be dramatic. -
Let the bread cool in the pan for about 10-15 minutes before carefully inverting it onto a wire rack to cool completely.
Patience is a virtue, especially when warm, sweet bread is involved.
Common Mistakes to Avoid
- Using underripe bananas: They won’t be sweet enough, and the flavor won’t be as intense. Go for those spotty guys!
- Overmixing the batter: I can’t stress this enough. Overmixing develops the gluten, making your bread tough and chewy instead of tender and moist.
- Not preheating the oven: This is a rookie mistake that leads to uneven baking. Give your oven time to get to temperature!
- Opening the oven door too early: Let the bread do its thing! Peeking too soon can cause it to deflate.
- Skipping the salt: Even though there’s a lot of sweetness, the salt is crucial for balancing flavors. Don’t leave it out!
Alternatives & Substitutions
So, what if you’re missing something?
- No unsalted butter? You can use salted butter, but you might want to reduce the added salt slightly. Or, if you’re feeling adventurous, use melted coconut oil for a slightly tropical twist.
- No eggs? This one’s a bit trickier for banana bread. You *could* try a flax egg (1 tbsp ground flaxseed + 3 tbsp water, let sit for 5 mins), but the texture might be a little different. It’s worth a shot if you’re desperate!
- Don’t have a loaf pan? Mini muffin tins work great! Just reduce the baking time considerably (around 20-25 minutes).
FYI, this recipe is pretty forgiving, so don’t stress too much!
FAQ (Frequently Asked Questions)
Can I make this bread dairy-free?
Unfortunately, the sweetened condensed milk is pretty key to the moisture and flavor here. It’s not easily swapped for a dairy-free alternative without significantly altering the recipe.
How long does this banana bread last?
Well, if it even makes it past day one, it should be good in an airtight container at room temperature for 2-3 days. For longer storage, pop it in the fridge.
Can I add more bananas?
Go for it! If you have extra super-ripe bananas, tossing in another one won’t hurt. Just be aware it might make the bread even moister, potentially requiring a slightly longer baking time.
My bread sunk in the middle! What happened?
This usually happens from overmixing, not preheating the oven properly, or opening the oven door too soon. Don’t beat yourself up; it happens to the best of us! It will still taste delicious, though.
Can I freeze this banana bread?
Absolutely! Once completely cooled, wrap it tightly in plastic wrap and then in foil. It should keep well in the freezer for up to 3 months. Thaw at room temperature.
Is sweetened condensed milk the same as evaporated milk?
Nope! Sweetened condensed milk is thick, creamy, and super sweet because the water has been removed AND sugar has been added. Evaporated milk is just milk with water removed, so it’s not sweet. Big difference!
Final Thoughts
There you have it! A ridiculously easy, ridiculously delicious banana bread that’s perfect for any occasion.
Whether it’s breakfast, a snack, or a late-night treat, this bread is guaranteed to make you smile.
Now go impress someone—or yourself—with your new culinary skills. You’ve earned it! Happy baking!
“`
