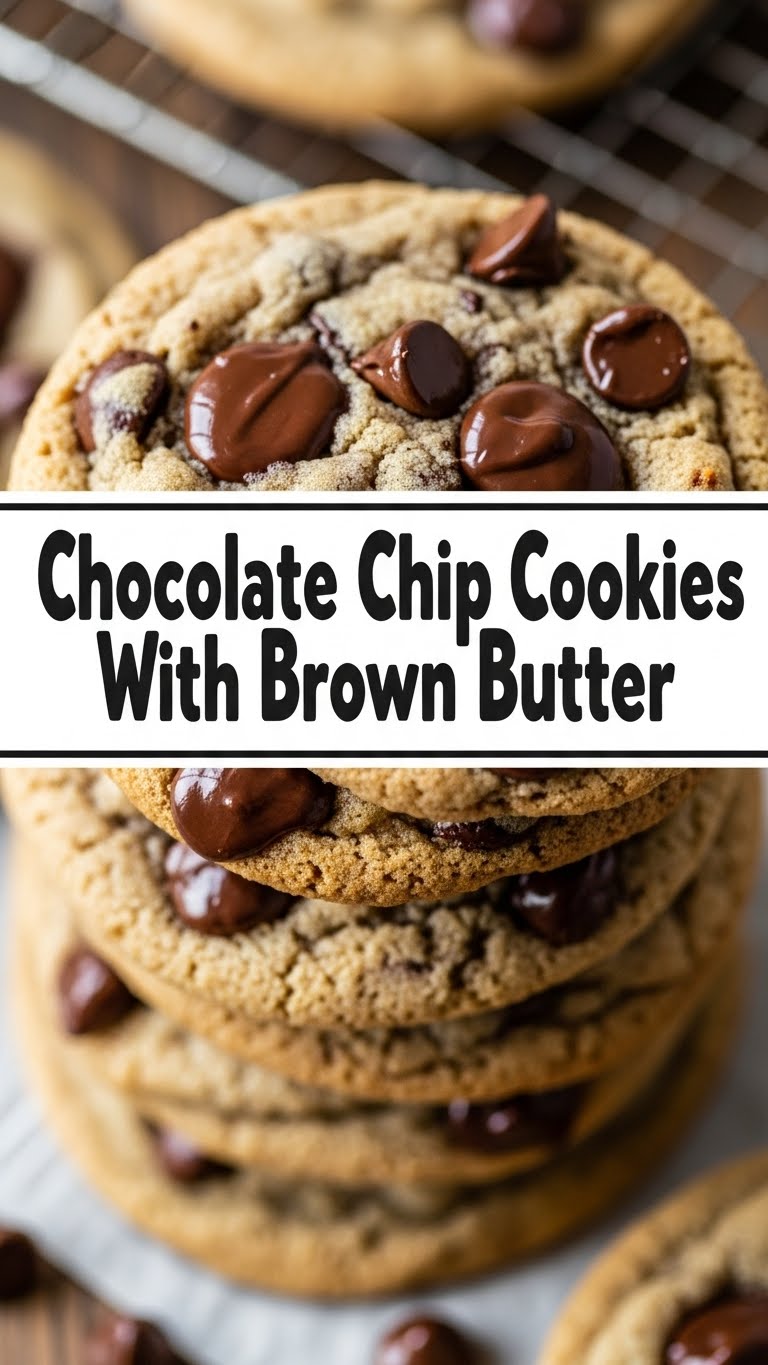
So, you’re craving something ridiculously delicious but don’t want to spend your entire afternoon wrestling with complicated culinary gymnastics, huh? Same. My kitchen philosophy is basically: deliciousness with minimal fuss. And when that fuss needs to be *just* enough to feel like I’m actually cooking, there’s one hero I always call: the brown butter chocolate chip cookie. Forget those bland, sad discs of dough. We’re talking next-level flavor town, population: YOU.
Why This Recipe is Awesome
Seriously, why is this recipe awesome? Because it takes a classic and gives it a much-needed glow-up. Brown butter isn’t some mystical fairy dust; it’s just butter that’s been coaxed into nutty, toasty perfection. It adds this insane depth of flavor that makes your regular chocolate chip cookies go from “meh” to “OMG, what IS that amazingness?!” Plus, it’s practically foolproof. Even if your butter-browning skills are currently on par with a burnt toast enthusiast (no judgment!), you’ve got this. It’s so good, it’s almost cheating.
Ingredients You’ll Need
- 1 cup (2 sticks) unsalted butter: The star of our show! Unsalted gives you more control, so don’t get fancy.
- 1 cup granulated sugar: For that classic cookie sweetness.
- 3/4 cup packed light brown sugar: This is where the magic happens. Don’t skimp!
- 2 large eggs: The binders. Make sure they’re room temp, if you can remember.
- 1 teaspoon vanilla extract: Essential for that cozy aroma.
- 2 1/2 cups all-purpose flour: The sturdy foundation of our cookie empire.
- 1 teaspoon baking soda: To get that lovely puff.
- 1/2 teaspoon salt: Balances out all that sweetness.
- 2 cups (about 12 oz) chocolate chips: Your favorite kind! Milk, dark, semi-sweet, chunks… go wild!
Step-by-Step Instructions
- Brown that butter! Melt your butter in a light-colored saucepan over medium heat. Swirl it occasionally. You’ll see it foam, then tiny brown bits will form at the bottom. It’ll smell AMAZING. Once it’s golden brown and smells nutty (watch it closely, it goes from perfection to burnt in seconds!), pour it immediately into a heatproof bowl to stop the cooking. Let it cool slightly.
- Cream ’em up. In a large bowl, beat together the slightly cooled brown butter with your granulated and brown sugars until it’s nice and fluffy. This is where your mixer (or your strong arm) gets to shine.
- Egg-cellent additions. Beat in the eggs one at a time, then stir in the vanilla extract. It might look a little separated at first, but don’t panic.
- Dry ingredients unite! In a separate bowl, whisk together the flour, baking soda, and salt.
- Combine forces. Gradually add the dry ingredients to the wet ingredients, mixing until just combined. Don’t overmix! We’re not making bricks here.
- Choc-tastic! Stir in your glorious chocolate chips. Give them a good, even distribution.
- Chill out. Cover the dough and **refrigerate for at least 30 minutes**. This is CRUCIAL for preventing sad, flat cookies. Trust me on this.
- Bake ’em till they’re beautiful. Preheat your oven to 375°F (190°C). Drop rounded spoonfuls of dough onto parchment-lined baking sheets. Bake for 9-12 minutes, or until the edges are golden brown and the centers look slightly underbaked. They’ll continue to cook on the sheet.
- Cool down. Let them cool on the baking sheet for a few minutes before transferring them to a wire rack to cool completely. Patience, grasshopper!
Common Mistakes to Avoid
- Skipping the brown butter part. Look, I know it’s an extra step, but it’s *the* step that elevates these cookies. Don’t be a hero, just brown the butter.
- Overmixing the dough. Seriously, just mix until you don’t see flour streaks. Overmixing = tough cookies. Nobody wants a tough cookie.
- Not chilling the dough. I know, I know, it’s tempting to bake them immediately. But the chill time is your secret weapon against cookie puddle disasters.
- Baking them for too long. A slightly underbaked center is the key to gooey, chewy perfection. They firm up as they cool.
- Using cold ingredients. Room temperature eggs emulsify better, leading to a more cohesive dough. It’s science, people!
Alternatives & Substitutions
- Chocolate chips: Feeling adventurous? Try a mix of dark and milk chocolate, or toss in some chopped nuts or toffee bits. I’m partial to a good sea salt sprinkle on top right after baking.
- Flour: You *could* try a gluten-free blend, but results might vary wildly. Stick to all-purpose for the best, most predictable outcome.
- Brown Sugar: If you only have granulated, you can technically make them, but you’ll miss out on that lovely chewiness and caramel notes. Just sayin’.
- Butter: Can I use margarine instead of butter? Well, technically yes, but why hurt your soul like that? Butter is non-negotiable for flavor and texture here.
FAQ
Can I make these ahead of time? Absolutely! The dough keeps well in the fridge for up to 3 days. You can even freeze dough balls for future cookie emergencies. Just bake from frozen, adding a couple of extra minutes.
My brown butter looks…weird. Is it supposed to be foamy? Yep! The foaming is part of the process. Just keep swirling and watching for those beautiful little brown bits to form.
Why are my cookies flat? Likely culprits: not chilling the dough long enough, overmixing the dough, or using too much butter. Oops!
How do I store these cookies? Once cooled, store them in an airtight container at room temperature for up to 3-4 days. They’re best eaten within the first couple of days, though!
Can I double or triple this recipe? You bet! Just multiply all ingredients accordingly. Just make sure you have a big enough bowl (and oven!).
My cookies are too cakey. What did I do wrong? You might have overmixed the flour, or perhaps didn’t use enough brown sugar. The brown sugar is key for chewiness!
Final Thoughts
And there you have it! Your ticket to cookie nirvana. These brown butter chocolate chip cookies are seriously game-changing. They’re perfect for sharing, for gifting, or, let’s be honest, for devouring all by yourself while binge-watching your favorite show. So go forth and bake! Your taste buds (and anyone lucky enough to snag one of these beauties) will thank you. Now go impress someone—or yourself—with your new culinary skills. You’ve earned it!

