So, you’ve stumbled upon the magical portal to brownie perfection, huh? You’re craving something decadent, something that whispers sweet nothings to your soul, but the thought of a complicated recipe makes you want to order pizza instead. I get it. Totally. We’ve all been there. But what if I told you that you can achieve brownie bliss with minimal fuss and maximum deliciousness? And what if, to level up this already epic creation, we add a gooey, dreamy cookie dough topping? Yeah, you read that right. Get ready to have your taste buds throw a parade.
Why This Recipe is Awesome (Seriously)
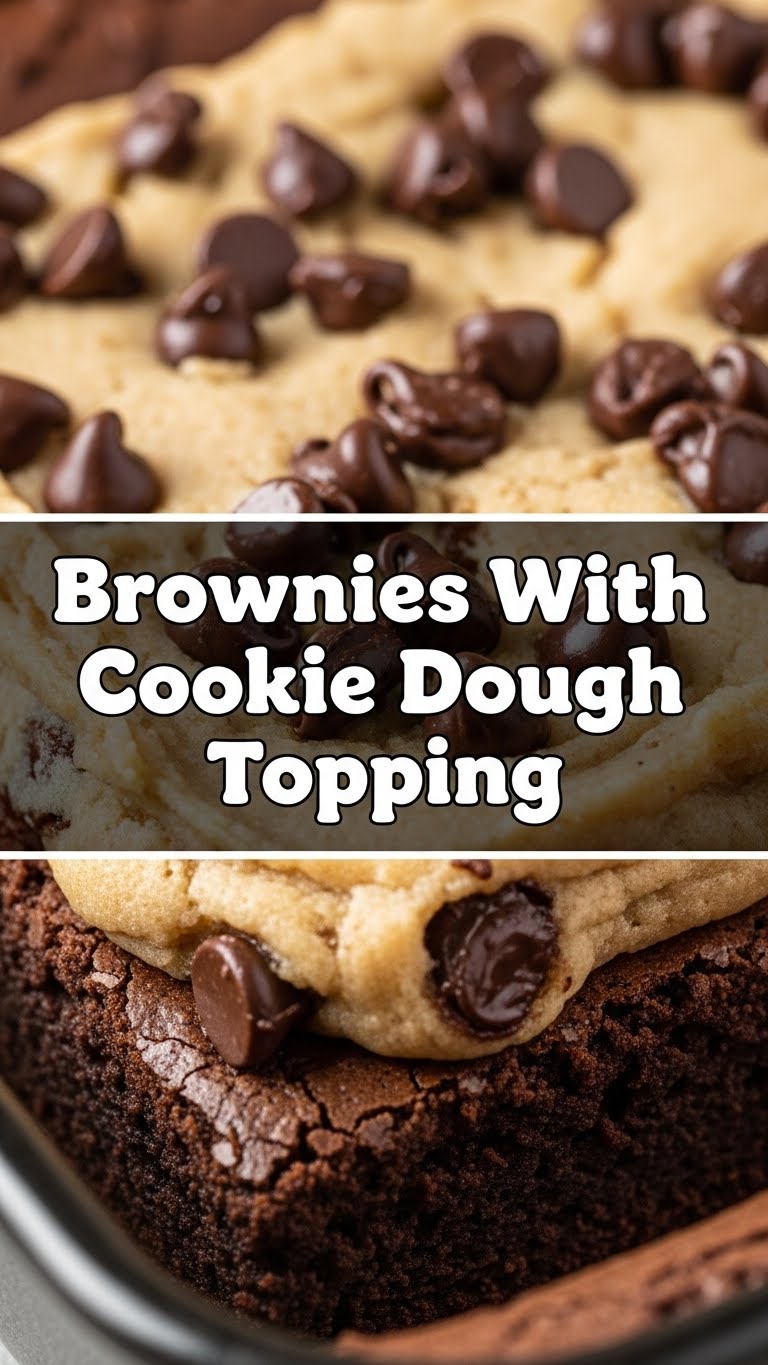
Let’s be real. Brownies are great. Cookie dough is great. Combining them? It’s like peanut butter and jelly, but for grown-ups with slightly more refined (or just lazier) tastes. This recipe is awesome because it’s ridiculously easy, and the payoff is HUGE. We’re talking fudgy brownies that are practically begging to be smothered in safe-to-eat cookie dough. It’s the ultimate crowd-pleaser, the “OMG, you made this?” moment creator, and honestly, a pretty great way to use up that tub of butter you’ve been hoarding. Plus, it’s pretty much idiot-proof. I’ve made it, so you definitely can too.
Ingredients You’ll Need
- For the Brownies:
- 1 cup (2 sticks) unsalted butter, melted (because no one has time for softened butter drama)
- 2 cups granulated sugar (sweetness level: maximum)
- 1 cup all-purpose flour (the fluffy stuff)
- ¾ cup unsweetened cocoa powder (the darker, the better, IMO)
- 1 teaspoon baking powder (just a little puff)
- ½ teaspoon salt (essential for balancing all that sweetness)
- 4 large eggs (room temperature is a nice thought, but let’s not stress)
- 1 teaspoon vanilla extract (the secret weapon)
- 1 cup chocolate chips (your favorite kind, duh)
- For the Cookie Dough Topping:
- ½ cup (1 stick) unsalted butter, softened (this one actually needs to be soft, sorry!)
- ¾ cup packed light brown sugar (for that classic cookie flavor)
- 1 tablespoon milk (or water, if you’re feeling rebellious)
- 1 teaspoon vanilla extract (more magic!)
- 1 cup all-purpose flour (yes, more flour, but it’s for a good cause)
- ½ teaspoon salt (to keep things interesting)
- ½ cup mini chocolate chips (or regular ones, your call)
Step-by-Step Instructions
- Preheat your oven to 350°F (175°C). Grease and flour a 9×13 inch baking pan. Or, you know, just line it with parchment paper and call it a day.
- In a big bowl, whisk together the melted butter and sugar until they’re best friends. Add the eggs one at a time, beating well after each addition. Stir in the vanilla extract.
- In a separate, slightly less big bowl, whisk together the flour, cocoa powder, baking powder, and salt.
- Gradually add the dry ingredients to the wet ingredients, mixing until just combined. Don’t overmix, or you’ll make your brownies tough. Nobody wants a tough brownie.
- Fold in the chocolate chips. Pour this glorious batter into your prepared pan and spread it evenly.
- Now, for the cookie dough! In another bowl, cream together the softened butter and brown sugar until light and fluffy. Add the milk and vanilla, mixing until smooth.
- Gradually mix in the flour and salt until just combined. Stir in the mini chocolate chips.
- Dollop spoonfuls of the cookie dough randomly over the brownie batter. Don’t stress about making it look perfect; rustic is in!
- Bake for 25-35 minutes, or until a toothpick inserted into the brownies (avoiding the cookie dough blobs!) comes out with moist crumbs. The cookie dough will look set but still soft.
- Let it cool completely before cutting. I know, the waiting is the hardest part. But trust me, it’s worth it.
Common Mistakes to Avoid
- Overmixing the brownie batter: This is a one-way ticket to tough brownies. Mix until just combined, and resist the urge to keep going.
- Underbaking: Nobody likes gooey, raw brownie batter. Make sure that toothpick test is reliable!
- Forgetting to cool: Seriously, trying to cut into hot brownies is a recipe for disaster (and sticky fingers). Patience, grasshopper!
- Thinking the cookie dough needs to be fully cooked: It’s meant to be soft and gooey, like actual cookie dough! Don’t overbake it into oblivion.
Alternatives & Substitutions
Not a fan of chocolate chips in your brownies? Throw in some chopped nuts or even some chopped candy bars. Feeling extra fancy? Swirl in some caramel sauce into the brownie batter before baking. For the cookie dough, if you’re not a fan of mini chips, regular ones work fine. And if you’re dairy-free, there are tons of great dairy-free butter substitutes and chocolate chips out there that work beautifully!
FAQ (Frequently Asked Questions)
- Can I make the cookie dough edible without baking it? Yep! This recipe is specifically designed so you don’t need to bake the cookie dough separately. It cooks perfectly on top of the brownies.
- My cookie dough looks a little dry. What should I do? Add a tiny bit more milk, like a teaspoon at a time, until it reaches a doughy consistency. Don’t go overboard, though!
- Can I use pre-made cookie dough? Technically, yes, but it won’t have the same delicious, fudgy texture as homemade brownies, and the cookie dough might not bake quite the same. Stick to the recipe for maximum deliciousness!
- How long will these last? In an airtight container at room temperature, they’re usually good for 2-3 days. But let’s be honest, they won’t last that long.
- Can I freeze these? You bet! Wrap them tightly and they’ll be good for about 2-3 months. Thaw at room temperature.
- I don’t have parchment paper. What’s my best bet? Grease and flour your pan really, really well. Or use aluminum foil, but be aware it might stick a bit more.
Final Thoughts
And there you have it! Brownies that are basically a hug in dessert form, topped with glorious cookie dough. It’s the perfect treat for yourself after a long day, a guaranteed hit at any gathering, or just a delicious excuse to spend some time in the kitchen (without too much stress). Now go forth and bake! You’ve got this, and your taste buds will thank you. Happy baking!


