So you’re craving something tasty but too lazy to spend forever in the kitchen, huh? Same. But what if I told you we could whip up some ridiculously good brownies with a pop of fruity goodness that’ll make your taste buds do a happy dance? Yep, we’re talking about raspberry brownies, and trust me, they’re easier than convincing yourself to go to the gym on a Monday. Let’s do this!
Why This Recipe is Awesome (Seriously)
Because it’s ridiculously easy and results in brownies that are fudgy, chocolatey, and have these delightful little bursts of tart raspberry. It’s like a party in your mouth, and everyone’s invited (especially you). Plus, it feels fancy without actually being fancy, which is basically my life motto. These aren’t your average dry, sad brownies; these are the kind that make people whisper your name in awe (or at least ask for the recipe).
Ingredients You’ll Need (Don’t Panic, It’s Mostly Stuff You Already Have)
- Butter: Unsalted, because we’re controlling the salt game here. About 1/2 cup, softened (leave it out on the counter for an hour, or nuke it for 15 seconds if you’re impatient like me).
- Sugar: 1 cup. Granulated is fine, brown sugar can add extra chewiness if you’re feeling adventurous.
- Eggs: 2 large ones. The glue that holds our chocolate dreams together.
- Vanilla Extract: 1 teaspoon. Don’t skimp on this! It’s the secret agent of flavor.
- All-Purpose Flour: 1/2 cup. Just enough to bind, we want fudgy, not cakey.
- Unsweetened Cocoa Powder: 1/3 cup. The darker, the better, IMO.
- Salt: 1/4 teaspoon. Enhances all that glorious chocolatey goodness.
- Chocolate Chips: 1/2 cup. Semi-sweet is classic, but milk or dark chocolate chips work too!
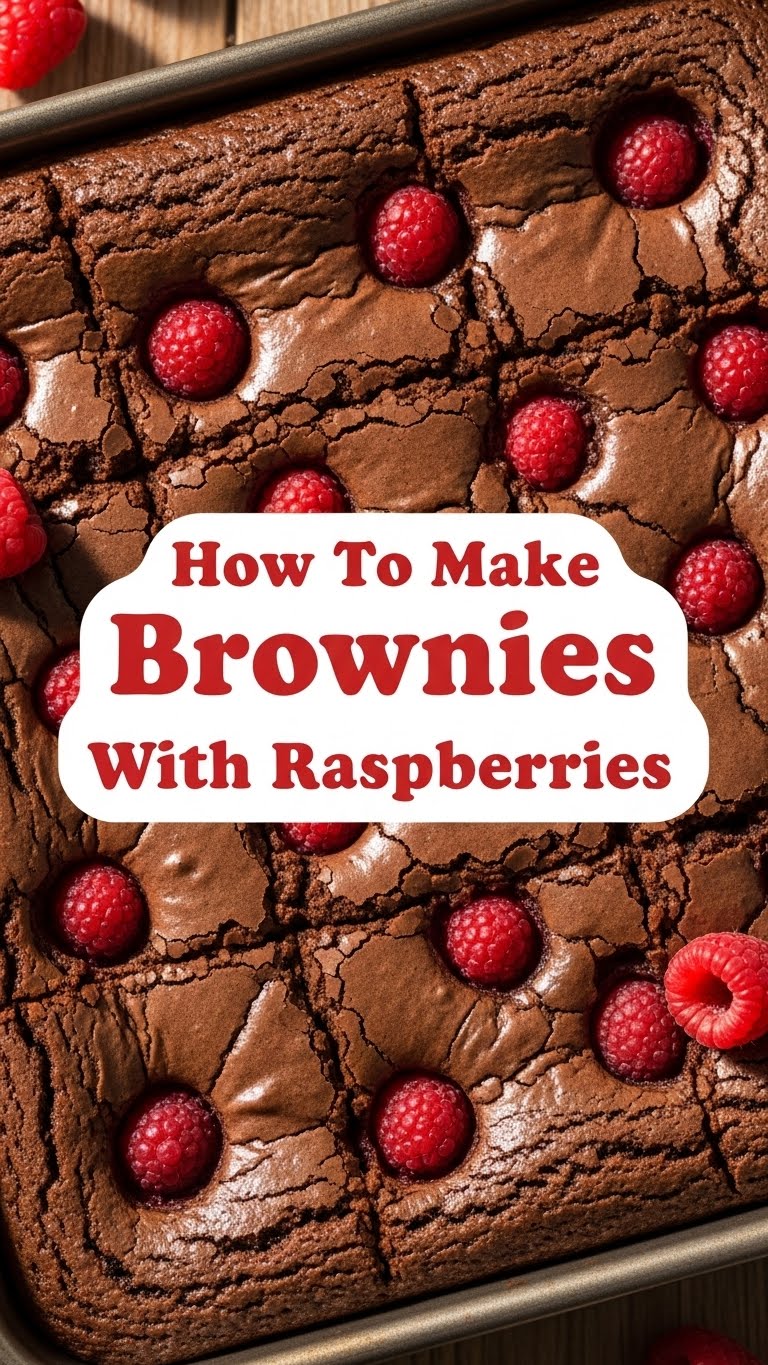
- Fresh Raspberries: 1 cup. Or frozen if you can’t find fresh. They’ll add that beautiful tartness.
Step-by-Step Instructions (Keep it Simple, Keep it Fun!)
- Preheat your oven to 350°F (175°C). Grease and flour an 8×8 inch baking pan. You can also line it with parchment paper if you want those super clean edges and easy removal.
- In a medium bowl, melt your butter (microwave or stovetop, your choice). Whisk in the sugar until it’s all happy and combined.
- Beat in the eggs one at a time, then stir in the vanilla. It might look a little…weird…at first, but trust the process.
- In a separate, even smaller bowl (or just directly into the wet ingredients if you’re feeling sassy), whisk together the flour, cocoa powder, and salt.
- Now, gently fold the dry ingredients into the wet. Don’t overmix! Just until you don’t see any more dry flour streaks. Seriously, **don’t overmix**, or your brownies will be tough.
- Fold in the chocolate chips. Then, gently fold in about 3/4 of your raspberries. Try not to mash them into oblivion.
- Pour the batter into your prepared pan and spread it out evenly. Dot the top with the remaining raspberries.
- Bake for 25-30 minutes, or until a toothpick inserted into the center comes out with moist crumbs (not wet batter). We’re aiming for fudgy, not dry!
- Let them cool completely in the pan before cutting. This is the hardest part, I know, but it’s crucial for fudgy brownies. Patience, grasshopper!
Common Mistakes to Avoid (Or Embrace, Whatever Floats Your Boat)
- Overmixing the batter: This is the brownie killer. It develops the gluten too much, turning your fudgy delight into a tough chew toy.
- Underbaking: We want that gooey center! A few moist crumbs on the toothpick are your friend. If it comes out clean, you’ve gone too far.
- Forgetting to let them cool: Seriously, I know it’s tempting, but cutting into hot brownies is a recipe for a crumbly mess. Let them chill!
- Using old cocoa powder: Your brownies will taste like sad, dusty cardboard. Invest in some good quality cocoa!
Alternatives & Substitutions (Because Life is Messy and So Are Recipes)
- No Raspberries? Other berries work too! Blueberries, blackberries, or even chopped strawberries can add a delightful twist. If you’re feeling brave and don’t have fruit, just omit them and you’ll have delicious plain chocolate brownies.
- Want it richer? Add a tablespoon of instant espresso powder to the dry ingredients. It’ll deepen the chocolate flavor without making it taste like coffee, promise!
- Dairy-free? Use vegan butter and a flax egg (1 tbsp flaxseed meal + 3 tbsp water, let sit for 5 minutes) instead of regular eggs. And, of course, use dairy-free chocolate chips!
- Nutty for nuts? Toss in some chopped walnuts or pecans with the chocolate chips. Extra crunch, extra yum.
FAQ (The Burning Questions You Didn’t Know You Had)
Can I use margarine instead of butter? Well, technically yes, but why hurt your soul like that? Butter adds flavor and richness that margarine just can’t replicate. Stick with butter if you can!
My raspberries sank to the bottom! What did I do wrong? Sometimes this happens! A good trick is to toss your raspberries in a little bit of flour before adding them to the batter. This helps them float. Or, just embrace the surprise berry treasure at the bottom!
Can I make these ahead of time? Absolutely! They’re often even better the next day after the flavors have melded. Store them in an airtight container at room temperature.
How do I know when they’re done? The edges will look set, and a toothpick inserted into the center should come out with moist crumbs clinging to it. If it’s completely clean, they’re overbaked. If it’s wet batter, they need more time.
Can I freeze these? Yep! Once cooled and cut, you can wrap them individually in plastic wrap and then place them in a freezer bag. They’ll last for a couple of months.
Are these brownies super fudgy or cakey? This recipe is designed to be fudgy! That’s why we don’t use too much flour and don’t overmix.
Final Thoughts
There you have it! Brownies that are as fun to make as they are to devour. They’re perfect for movie nights, impromptu get-togethers, or just a Tuesday when you need a little chocolatey pick-me-up. Now go impress someone—or yourself—with your new culinary skills. You’ve earned it! Happy baking (and eating)!


