“`html
So you’re craving something crispy, golden, and ridiculously delicious but too lazy to spend forever in the kitchen, huh? Same. My friends, prepare yourselves, because we’re about to embark on a journey of fried chicken cutlet glory that’s so easy, it practically makes itself. No, seriously.
Why This Recipe is Awesome
Let’s be honest, who has the time (or the patience) for complicated chicken recipes? This bad boy is your weeknight savior. It’s ridiculously quick, uses stuff you probably already have lurking in your pantry, and the results are seriously impressive. Think restaurant-quality crunch without the fancy chef skills. It’s practically idiot-proof, and you know, *I* didn’t even mess it up the first time. That’s saying something! Plus, cleanup is a breeze. What more could you ask for?
Ingredients You’ll Need
- Boneless, skinless chicken breasts or thighs: Whatever floats your boat! Cut ’em into cutlet-sized pieces. About 1-1.5 lbs should do it.
- All-purpose flour: Your trusty coating. About 1 cup.
- Eggs: The glue that holds the magic together. Two should be plenty.
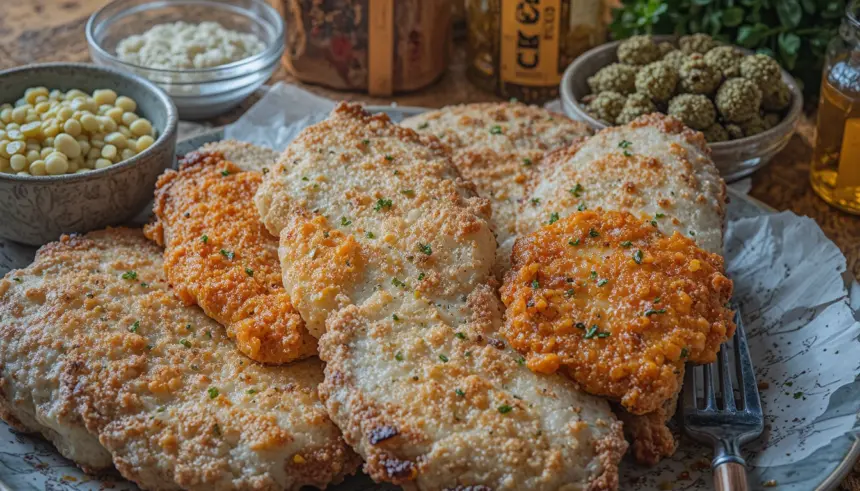
- Breadcrumbs: Panko is king here for ultimate crunch, but regular breadcrumbs work too. About 1.5 cups.
- Seasonings: This is where you get creative! Think salt, pepper, garlic powder, onion powder, paprika. Maybe a pinch of cayenne if you’re feeling brave. About 1-2 teaspoons of each, adjust to your taste!
- Vegetable oil or canola oil: For frying. You’ll need enough to fill your pan about 1/2 inch deep.
Step-by-Step Instructions
- First things first, get yourself three shallow dishes. In the first, whisk your eggs like you’re trying to start a tiny chicken revolution. In the second, pile your flour and all your chosen seasonings. In the third, dump those glorious breadcrumbs.
- Now, take your chicken pieces and give them a good dredge in the flour mixture. Make sure they’re coated evenly – no naked chicken allowed!
- Next, dip those floured pieces into the egg. Let any excess drip off. This is the crucial step for getting that crispy coating to stick.
- Finally, roll them in the breadcrumbs. Press down gently to ensure maximum adhesion. You want a thick, even coating. Set them aside on a plate.
- Heat your oil in a large skillet over medium-high heat. You’ll know it’s ready when a tiny breadcrumb dropped in sizzles like a summer party.
- Carefully place a few chicken cutlets into the hot oil, **don’t overcrowd the pan**. They need space to get crispy! Fry for about 3-4 minutes per side, until golden brown and cooked through.
- Remove the fried chicken from the pan and place it on a wire rack set over a baking sheet. This helps keep them super crispy and not soggy. Repeat with the remaining chicken.
Common Mistakes to Avoid
- Thinking you don’t need to preheat the oil: Rookie mistake! Cold oil = soggy chicken. Sad, sad chicken.
- Overcrowding the pan: Seriously, give your little chicken cutlets some breathing room. They’re shy and need space to get their crisp on.
- Not seasoning enough: Bland chicken is a culinary tragedy. Don’t be afraid to get liberal with your salt, pepper, and other spices!
- Flipping too early: Patience, grasshopper! Let one side get nice and golden before you even think about flipping.
Alternatives & Substitutions
Feeling adventurous?
- Gluten-free? Swap the all-purpose flour for a gluten-free blend and use gluten-free breadcrumbs. Easy peasy!
- No Panko? Regular breadcrumbs will do the trick, but they might not get *quite* as shatteringly crisp. Still delicious, though.
- Spice it up! Add a dash of cayenne pepper or some red pepper flakes to your flour or breadcrumbs for a little kick. Or try a sprinkle of smoked paprika for that smoky goodness.
- Herbs, anyone? Toss in some dried Italian herbs or finely chopped fresh parsley into your breadcrumb mix for extra flavor.
FAQ (Frequently Asked Questions)
Q: Can I bake this instead of frying?
A: You *can*, but it won’t have that glorious, addictive fried crunch. For baking, I’d suggest a higher temp and maybe spraying them with a little oil. But IMO, frying is the way to go for true cutlet perfection!
Q: How do I know when the chicken is cooked through?
A: The best way is to use a meat thermometer. It should read 165°F (74°C). If you don’t have one, cut into the thickest part of a piece – it should be white all the way through, with no pink.
Q: Can I make these ahead of time?
A: Fried chicken is best enjoyed fresh and hot. If you have leftovers, you can reheat them in an oven or air fryer to try and regain some crispiness, but they’ll never be quite as good as the first time.
Q: What kind of oil is best?
A: Neutral oils with a high smoke point are your friends here. Vegetable, canola, or even peanut oil are excellent choices. Avoid olive oil for deep frying, as it can smoke and burn.
Q: My coating is falling off! What did I do wrong?
A: You probably didn’t press the breadcrumbs firmly enough onto the chicken after dipping it in the egg. Give it a good press to make sure it adheres! Also, ensure your chicken is dry before flouring.
Q: Can I use margarine instead of butter?
A: Well, technically yes, but why hurt your soul like that? Butter isn’t typically used for frying cutlets like this. Stick to vegetable or canola oil for the best results.
Final Thoughts
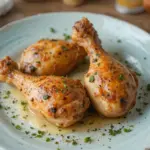
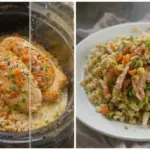
There you have it! Your ticket to crispy, golden fried chicken cutlet heaven, without all the fuss. Serve these bad boys with your favorite sides – mashed potatoes, a killer salad, or just straight out of the pan if no one’s looking. Now go impress someone—or yourself—with your new culinary skills. You’ve earned it! Happy cooking!
“`
