Gravy So Easy, Your Crockpot Does All the Work!
So, you’re craving something ridiculously tasty, comforting, and slathered in glorious gravy, but the thought of standing over a hot stove is making you want to order pizza? Been there, my friend. Been there. But what if I told you that you could achieve gravy nirvana with minimal effort, maximum flavor, and your trusty slow cooker? Yep, we’re talking Crockpot chicken gravy, and it’s about to be your new best friend. Forget those dusty old cookbooks; this is the real deal.
Why This Recipe is Pure Genius (and Also Lazy)
Let’s be real. Life’s too short to spend hours babysitting a saucepan, constantly whisking to avoid lumps the size of golf balls. This Crockpot chicken gravy recipe is so darn easy, it’s practically foolproof. I’m talking “set it and forget it” levels of deliciousness. It’s perfect for those nights you *want* to cook but also want to spend that time binge-watching your favorite show or, you know, napping. Plus, the slow cooker coaxes out all those amazing chicken flavors. It’s practically magic, but with way less chanting and way more savory goodness.
Ingredients You’ll Need (Don’t Panic, It’s Easy!)
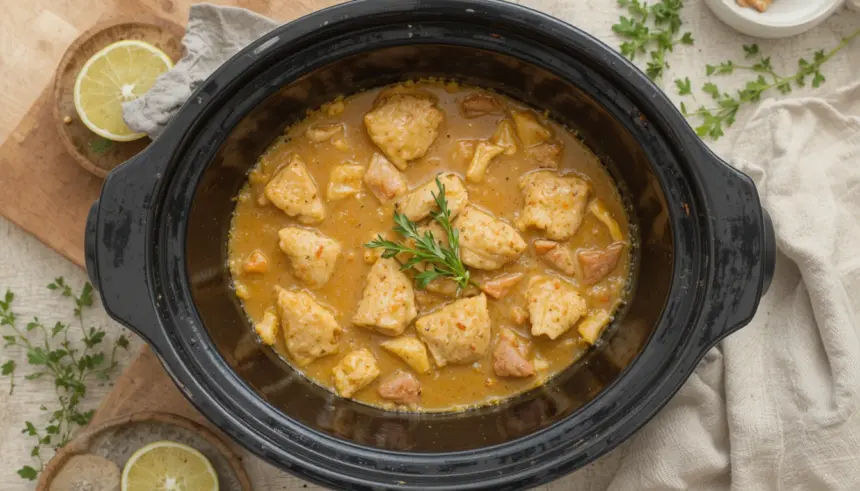
* **Chicken Bits:** About 1-2 pounds of chicken pieces. Thighs are your friend here – they stay juicy! Bones are totally fine; they add flavor. Think of them as little flavor factories.
* **Onion:** One medium onion, roughly chopped. No need for fancy knife skills; it’s all going in the pot.
* **Garlic:** A few cloves of garlic, smashed. Again, precision isn’t key. Think “enthusiastic crushing.”
* **Broth:** 4 cups of chicken broth. Use low-sodium if you’re watching your salt intake, or regular if you like a little more zing.
* **Seasoning:** Salt and pepper to taste. This is where you get to be the boss.
* **Thickener (The Magic Part):**
* 1/4 cup Cornstarch (the classic, reliable choice) OR
* 3 tablespoons All-Purpose Flour (if you’re feeling fancy)
* **Water:** About 1/2 cup, mixed with your thickener. This is for slurry-making purposes.
Step-by-Step Instructions (Seriously, This Is It!)
1. **Toss it In:** Throw your chicken, chopped onion, and smashed garlic into your Crockpot. Don’t overthink it. Just get it in there.
2. **Broth Bath:** Pour the chicken broth over everything. Make sure the chicken is mostly submerged.
3. **Season Up:** Sprinkle in your salt and pepper. Give it a little stir.
4. **Cook Time!** Cover your Crockpot and cook on LOW for 6-8 hours or on HIGH for 3-4 hours. The chicken should be super tender and falling off the bone.
5. **Chicken Out:** Carefully remove the cooked chicken from the Crockpot. You can shred it for chicken salad, serve it as is, or just, you know, eat some of it straight from the pot (no judgment here).
6. **Strain the Goodness:** Strain the liquid from the Crockpot into a saucepan, leaving behind the onion bits and garlic. Discard the solids; their job is done.
7. **Slurry Power:** In a small bowl, whisk together your cornstarch (or flour) with the 1/2 cup of water until it’s smooth and lump-free. This is your gravy thickener, aka the “slurry.”
8. **Thicken Up:** Pour your strained liquid back into the Crockpot (or into a clean saucepan if you prefer). Turn the Crockpot to HIGH if it’s not already. Bring the liquid to a simmer. Slowly whisk in your slurry, a little at a time, until the gravy reaches your desired thickness. **Keep whisking!** You want smooth, luscious gravy, not a lumpy disaster.
9. **Taste and Adjust:** Give your glorious gravy a taste. Need more salt? More pepper? You’re the chef now!
Common Mistakes to Avoid (Don’t Be That Person)
* **Forgetting to Strain:** Leaving the onion bits and garlic in your final gravy is like getting a surprise onion in your mac and cheese. Not ideal.
* **Not Whisking Enough:** Gloopy, lumpy gravy is a sad, sad thing. **Whisk, whisk, whisk** when you’re adding the slurry.
* **Adding Slurry All at Once:** Pour it in slowly, my friends. You can always add more, but you can’t take it away.
* **Using Cold Liquid for Slurry:** Warm or room temperature liquid is best for dissolving your cornstarch or flour to avoid lumps.
Alternatives & Substitutions (Because Life Isn’t One-Size-Fits-All)
* **No Chicken Broth?** Vegetable broth works in a pinch! It’ll give your gravy a slightly different, but still delicious, flavor profile. Or, if you’re really desperate, use water and a good chicken bouillon cube.
* **Want Richer Flavor?** Add a splash of white wine or even a dollop of sour cream at the end for extra creaminess and tang. My grandma swore by a tiny bit of Worcestershire sauce for an umami boost.
* **Herbs, Anyone?** Toss in a sprig of rosemary or thyme with the chicken for a subtle aromatic infusion. Just remember to remove them before straining!
FAQ (Your Burning Gravy Questions, Answered Casually)
* **”Do I *really* need chicken bones?”** Honestly, no. Boneless chicken thighs will totally work. The bones just add that extra layer of “mmmm.”
* **”Can I make this ahead of time?”** Absolutely! Let it cool, then store it in an airtight container in the fridge for up to 3 days. Reheat gently on the stovetop, adding a splash of broth or water if it’s too thick.
* **”What if my gravy is too thin?”** Slurry, my friend! Make a little more slurry (cornstarch + water) and whisk it in slowly until it’s just right.
* **”What if my gravy is too thick?”** Just add a splash more chicken broth or water until you achieve that perfect, pourable consistency. Easy peasy.
* **”Can I use turkey broth instead of chicken broth?”** Yep, that’ll work great, especially if you have leftover turkey from Thanksgiving (or a random Tuesday).
* **”Is this gluten-free?”** If you use cornstarch, yes! Flour will make it not gluten-free, obviously.
Final Thoughts
And there you have it! Crockpot chicken gravy that’s so easy, it almost feels like cheating. You’ve got the deliciousness, you’ve got the comfort, and you’ve got your evening back. Now go forth and smother everything you can think of in this liquid gold. Mashed potatoes, biscuits, roasted chicken – you name it, this gravy will make it sing. Your taste buds will thank you, and your lazy bones will thank you even more. Now go impress someone—or yourself—with your new culinary skills. You’ve earned it!


