“`html
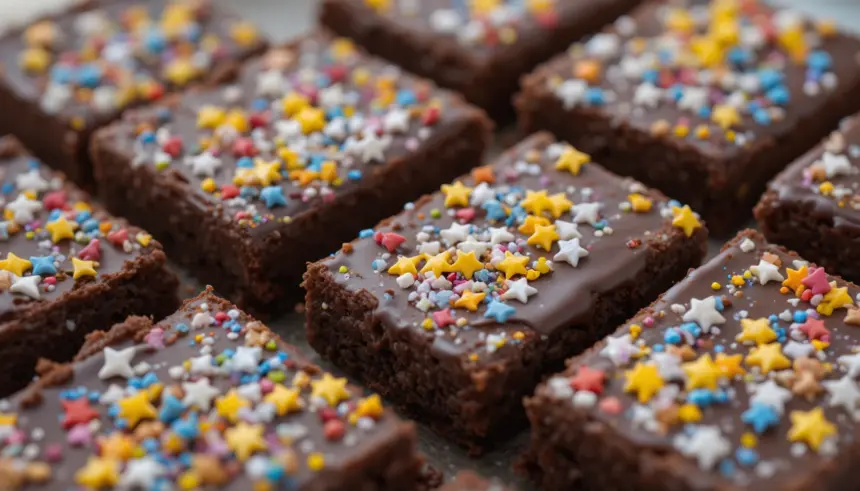
So, you’re craving something decadent, something chocolatey, and something that screams “I’m an adult who can still have fun,” but the thought of a multi-step, soul-crushing baking project is making you want to nap instead? I hear ya. But what if I told you there’s a way to get all the brownie goodness, a dreamy chocolate coating, and a sprinkle of pure joy, all without needing a culinary degree or a week’s vacation? Get ready to meet your new best friend in the kitchen: Chocolate-Covered Brownies with Star Sprinkles!
Why This Recipe is Awesome
Honestly, this recipe is genius. It’s like taking your favorite childhood treat and giving it a grown-up, but still ridiculously fun, makeover. The brownie base is fudgy, the chocolate coating is smooth and luxurious (or as smooth as you can get it without breaking a sweat!), and those little star sprinkles? They’re basically edible confetti that says, “Hooray, I made something delicious!” Plus, it’s pretty darn forgiving. Even if your brownies are a *little* wonky on the edges, the chocolate dip hides a multitude of sins. And let’s be real, who can resist a brownie that looks like it came straight out of a party?
Ingredients You’ll Need
- Your favorite boxed brownie mix (No judgment here, we’re going for delicious, not dissertation-level baking.) Plus, the stuff it asks for (eggs, oil, water).
- Semi-sweet chocolate chips (About 1.5 cups. More if you’re feeling *extra* generous.)
- A tablespoon or two of vegetable oil or coconut oil (This makes the chocolate super smooth and melty, like a warm hug for your brownies.)
- Star sprinkles (As many as your heart desires. This is non-negotiable for maximum sparkle.)
- Optional: A pinch of sea salt (Just a tiny bit to make the chocolate pop. Trust me on this.)
Step-by-Step Instructions
- Bake those brownies! Follow the instructions on your brownie box. Make sure they bake all the way through. You want them firm enough to handle, not a gooey mess.
- Cool ’em down. This is crucial! Let the brownies cool *completely* in the pan. Seriously, be patient. A warm brownie will just fall apart when you try to dip it. We’re aiming for sturdy chocolate-covered soldiers, not chocolate-lava-disasters.
- Cut into brownie bites. Once cooled, cut your brownies into bite-sized squares or rectangles. Think manageable, dippable pieces.
- Melt that chocolate. Pop your chocolate chips and oil into a microwave-safe bowl. Microwave in 30-second intervals, stirring well after each, until the chocolate is smooth and melty. Be careful not to scorch it! Alternatively, you can use a double boiler if you’re feeling fancy.
- Dip ’em! Grab a brownie piece with a fork or a toothpick and dip it into the melted chocolate, coating it as much as you like. Let any excess chocolate drip off.
- Sprinkle away! Immediately place the dipped brownie onto a piece of parchment paper or a silicone mat. While the chocolate is still wet, shower it with those adorable star sprinkles. Go wild!
- Let them set. Let the chocolate-covered brownies sit at room temperature until the chocolate hardens, or pop them in the fridge for about 10-15 minutes for a quicker set.
Common Mistakes to Avoid
- Not letting the brownies cool completely. I cannot stress this enough. Patience, grasshopper!
- Overheating your chocolate. Burnt chocolate tastes… well, like disappointment. Microwave in short bursts and stir.
- Skipping the oil in the chocolate. It’s the secret to that smooth, glossy finish. Don’t be a hero and try without it.
- Using sad, non-star sprinkles. Look, plain sprinkles are fine, but stars? Stars are where the magic happens. Invest in joy.
- Thinking you can get away with thin brownies. Thicker brownies mean more surface area for chocolate and sprinkles. It’s science.
Alternatives & Substitutions
Feeling adventurous? Or just out of something? No worries!
- Different Chocolate: Milk chocolate or dark chocolate chips work just as well. White chocolate is also an option if you’re feeling particularly festive, though it’s a bit trickier to get super smooth.
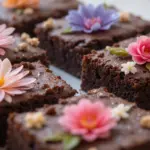
- Other Toppings: No stars? Try rainbow sprinkles, crushed cookies, or even a drizzle of contrasting chocolate. Get creative!
- Homemade Brownies: If you *are* feeling ambitious and have a killer brownie recipe, go for it! Just make sure they’re baked until firm.
- No Oil? You can use butter, but it might make the chocolate a tad less smooth. A little bit of shortening can also work in a pinch.
FAQ (Frequently Asked Questions)
Can I make these ahead of time?
Of course! They’ll keep in an airtight container at room temperature for a few days, or in the fridge if you want them extra firm. Just don’t blame me if they disappear faster than a free sample at Costco.
My chocolate is clumpy after melting. What happened?
Ah, the dreaded clumpy chocolate. This usually happens when water gets into the chocolate or if it overheats. Try adding a tiny bit more oil and stirring vigorously. If it’s still a mess, it might be time for a fresh batch of chocolate. Don’t cry, just melt more!
Can I use margarine instead of butter for the brownies?
Well, technically yes, but why hurt your soul like that? For the best fudgy texture, butter is usually the way to go. Margarine can sometimes result in a cakier brownie.
Do I *really* need the star sprinkles?
IMO, yes. They elevate this from “good brownie” to “OMG, look at these festive little guys!” But if you absolutely can’t find them, any fun sprinkles will do. Just promise me you’ll add some sparkle.
How do I store them?
In a single layer in an airtight container. If you stack them, the chocolate might smoosh together, and nobody wants smooshed chocolate.
Can I freeze these?
You *can*, but the chocolate coating might get a little dull and the texture of the brownie could change slightly. It’s probably best to enjoy them fresh!
Final Thoughts
And there you have it! Chocolate-covered brownies that are as fun to make as they are to eat. They’re perfect for parties, potlucks, a Tuesday afternoon treat, or just because you deserve something sparkly and delicious. Seriously, this is your new go-to for instant happiness. Now go impress someone—or yourself—with your new culinary skills. You’ve earned it!
“`
