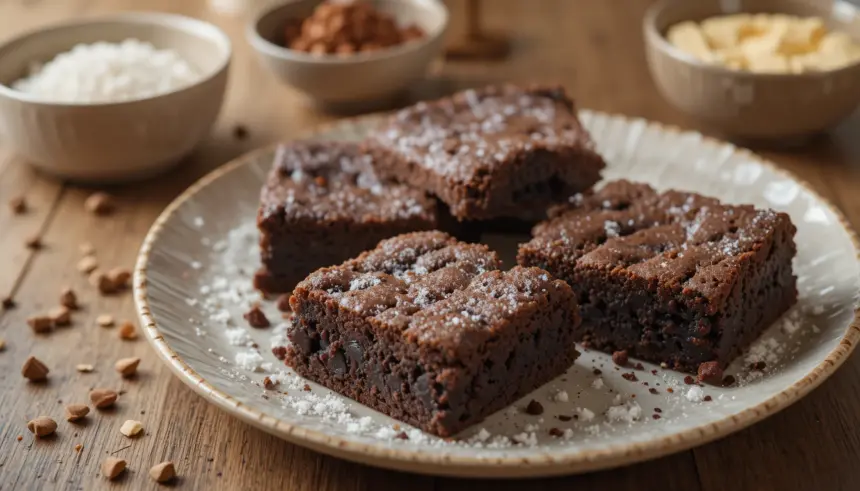
So, you’re standing there, stomach rumbling, and the siren song of chocolate is calling your name. But the thought of a multi-step, complicated brownie recipe makes you want to just… stare blankly at the pantry. Fear not, my friend! Because today, we’re ditching the drama and diving headfirst into the glorious world of brownies that are so easy, they practically make themselves. And the best part? We’re serving them up right on a plate, ready to be devoured. No fancy pan-shuffling required!
Why This Recipe is Pure Genius (aka Awesome)
Look, I’m not going to lie. Life’s too short for burnt edges and undercooked centers. This recipe is like the fairy godmother of dessert – it swoops in, makes everything magical, and leaves you with a plate full of fudgy goodness. It’s ridiculously simple, requires minimal brain power (perfect for those “too lazy to even,” kind of days), and the results are consistently, outrageously delicious. Seriously, it’s almost criminal how easy this is. Even your perpetually distracted Uncle Barry could probably pull this off.
Ingredients You’ll Need (The Good Stuff!)
- 1/2 cup (1 stick) unsalted butter: Melted, because we’re not barbarians.
- 1 cup granulated sugar: The sweet nectar of the gods.
- 2 large eggs: Because no brownie is complete without a little egg-cellent binding.
- 1 teaspoon vanilla extract: For that extra je ne sais quoi. Don’t skip it.
- 1/3 cup unsweetened cocoa powder: The darker, the better. Embrace the decadence.
- 1/2 cup all-purpose flour: Just enough to hold it all together.
- 1/4 teaspoon salt: Balances all that sweetness. Crucial!
- Optional, but highly recommended: 1/2 cup chocolate chips: Because MORE chocolate is always the answer.
Step-by-Step Brownie Bliss
- Preheat your oven to 350°F (175°C) and grab an 8×8 inch baking pan. Grease it up or line it with parchment paper – make your life easier later!
- In a medium bowl, **whisk together the melted butter and sugar**. Get it nice and smooth, like a silky whisper.
- Beat in the eggs one at a time, followed by the vanilla extract. Whisk until everything is well combined and looks like a happy, glossy mixture.
- Now, here’s where the magic happens. **Sprinkle in the cocoa powder, flour, and salt**. Stir gently until *just* combined. Don’t go overboard here; overmixing is the enemy of tender brownies.
- If you’re feeling extra wild, **fold in those glorious chocolate chips**. Get them evenly distributed for maximum chocolatey surprise.
- Pour the batter into your prepared pan and spread it out evenly. Aim for a smooth, uniform surface.
- Bake for 20-25 minutes. You want the edges to be set and a toothpick inserted into the center to come out with *moist crumbs attached*, not wet batter. This is key to fudgy perfection!
- Let the brownies cool COMPLETELY in the pan before cutting. I know, I know, the temptation is real. But trust the process! A warm brownie is sticky, a cooled brownie is life.
- Once cooled, lift the brownies out (if you used parchment) or carefully cut them directly in the pan. **Serve on a plate with a flourish!**
Common Mistakes to Avoid (Don’t Be That Guy)
- Overmixing the batter: Seriously, this is how you get tough, cakey brownies. Stir until *just* combined, and then stop.
- Not preheating the oven: Your brownies will be sad and unevenly baked. Think of the oven as your brownie’s spa – it needs to be warm and inviting.
- Pulling them out too early: Gooey is good, but raw is not. Watch for those moist crumbs on the toothpick!
- Not letting them cool: Patience, grasshopper. Trying to cut warm brownies is like trying to hug a cactus – messy and a little painful.
Alternatives & Substitutions (Because We’re All About Options)
Feeling adventurous? Or maybe you just ran out of something. No drama!
- No chocolate chips? Toss in some chopped nuts (walnuts or pecans are divine!), dried cranberries, or even some M&Ms for a fun pop of color.
- Out of granulated sugar? Brown sugar works too, though it might make them a tad chewier and give them a deeper flavor. Just use an equal amount.
- Want it richer? Add a tablespoon or two of instant espresso powder to the dry ingredients. It intensifies the chocolate flavor without making it taste like coffee. Trust me on this one.
FAQ (The Burning Questions You Might Have)
Q: Can I make these in a different-sized pan?
A: If you use a larger pan, they’ll be thinner and bake faster. A smaller pan means thicker brownies and longer baking time. So, yeah, but adjust your timing accordingly.
Q: My brownies came out a little cakey. What did I do wrong?
A: Likely overmixing! Or maybe you baked them a tad too long. Next time, be gentle with the batter and watch that toothpick test like a hawk.
Q: Can I use margarine instead of butter?
A: Well, technically yes, but why hurt your soul like that? Butter brings a richness and flavor that margarine just can’t replicate. IMO, stick with the butter for the best results.
Q: Do I *really* need to let them cool completely?
A: Yes. And then maybe a little longer. The cooling process firms them up and makes them way easier to cut. It’s like letting a good wine breathe, but for brownies.
Q: Can I add frosting?
A: Oh, honey, you absolutely can! A simple chocolate ganache or a classic buttercream would be divine. But honestly, they’re perfect on their own.
Final Thoughts
There you have it! Brownies on a plate, ready to be your new go-to dessert. They’re ridiculously easy, incredibly forgiving, and undeniably delicious. Whether you’re baking for a crowd, a significant other, or just for your own magnificent self (you deserve it!), these brownies are guaranteed to bring smiles. Now go forth and bake! You’ve totally got this. Enjoy every last fudgy bite!
