“`html
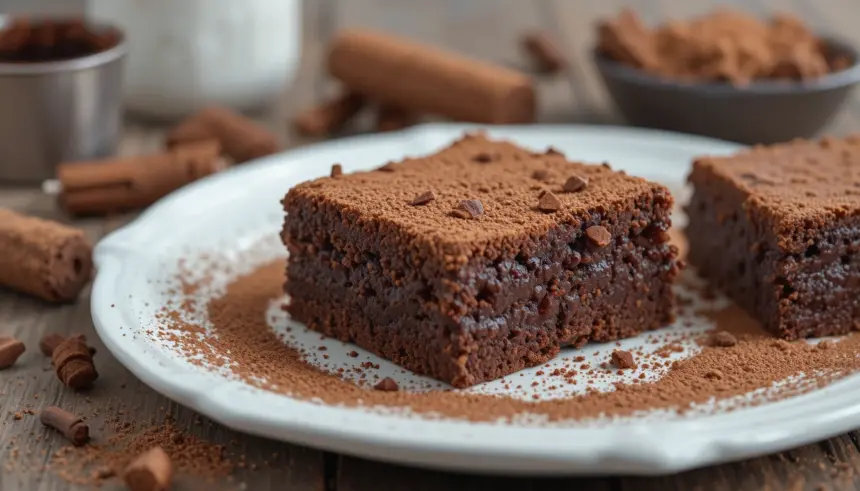
So, you’re scrolling through life, and suddenly, a primal urge strikes: CHOCOLATE. Not just any chocolate, but that fudgy, intensely chocolatey brownie situation that makes you want to hug your taste buds. And you’re thinking, “Can I actually pull this off without setting off the smoke alarm or crying into a bowl of melted chocolate chips?” The answer, my friend, is a resounding YES!
Why This Recipe is Awesome
Honestly, this recipe is a lifesaver. It’s the kind of brownie that’s rich and decadent without requiring you to attend culinary school. It’s got that perfect balance of chewy edges and a gooey center, and the cocoa powder is the secret weapon that makes it taste like it came from a fancy bakery, not your slightly chaotic kitchen. Plus, it’s ridiculously forgiving. Even if you accidentally added a *smidge* too much flour (oops!), it’ll probably still turn out amazing. That’s the magic of cocoa, people!
Ingredients You’ll Need
- Butter: Unsalted, obviously. Because who needs extra salt messing with their chocolate dreams? About 1 cup (2 sticks), softened.
- Granulated Sugar: To sweeten the deal. 1.5 cups.
- Eggs: Two large ones. The glue that holds your happiness together.
- Vanilla Extract: A splash of pure magic. 1 teaspoon.
- All-Purpose Flour: Just enough to give it some structure. 1 cup.
- Unsweetened Cocoa Powder: This is your star. Don’t skimp! We’re talking 3/4 cup of the good stuff.
- Salt: A pinch to make the chocolate pop. 1/2 teaspoon.
- Optional, but highly encouraged: Chocolate Chips! Because more chocolate is *always* the answer. 1 cup.
Step-by-Step Instructions
- Preheat your oven to 350°F (175°C). Grease and flour an 8×8 inch baking pan. Or line it with parchment paper if you’re feeling fancy and want easy cleanup.
- In a large bowl, cream together the softened butter and sugar until it looks light and fluffy, like a cloud of pure joy. This usually takes about 2-3 minutes with an electric mixer, or a bit longer if you’re channeling your inner warrior with a whisk.
- Beat in the eggs one at a time, then stir in the vanilla extract. Make sure everything is well combined. It should look smooth and delicious – resist the urge to lick the spoon just yet!
- In a separate, smaller bowl, whisk together the flour, cocoa powder, and salt. This is where we get serious about that intense chocolate flavor.
- Gradually add the dry ingredients to the wet ingredients, mixing until just combined. **Don’t overmix!** Overmixing leads to tough brownies, and nobody wants a tough brownie.
- If you’re using chocolate chips, fold them in now. Gently, you don’t want to agitate them too much.
- Pour the batter into your prepared pan and spread it evenly. It’s going to look thick, and that’s a good thing!
- Bake for 25-30 minutes. A toothpick inserted into the center should come out with moist crumbs attached, not wet batter. This is the sweet spot between cakey and fudgy.
- Let them cool completely in the pan before cutting. I know, I know, the anticipation is torture! But trust me, cutting them warm will result in a chocolatey mess, not neat squares of happiness.
Common Mistakes to Avoid
- Overbaking: This is the brownie’s arch-nemesis. Seriously, pull them out when they’re still a little moist in the center. They’ll finish cooking as they cool.
- Using low-quality cocoa powder: You can taste the difference, my friend. Invest in good cocoa; your brownies will thank you.
- Not softening the butter: Cold butter just won’t cream properly, and you’ll end up with a lumpy batter. Sadness.
- Skipping the cooling step: Impatience leads to crumbly, sad brownies. Just… don’t.
Alternatives & Substitutions
Feeling adventurous? You can totally switch things up!
- For extra chocolatey goodness: Add a tablespoon or two of instant espresso powder with the dry ingredients. It enhances the chocolate flavor without making them taste like coffee (unless you add a lot, then well, you get coffee brownies!).
- Nutty Delight: Fold in some chopped walnuts or pecans with the chocolate chips. They add a lovely crunch.
- Gluten-Free? You can try substituting a gluten-free all-purpose flour blend. Results may vary slightly, but it’s worth a shot!
- Vegan? This is a bit trickier with this specific recipe, as it relies heavily on eggs and butter. But there are tons of awesome vegan brownie recipes out there if you’re looking to go plant-based!
FAQ (Frequently Asked Questions)
Can I make these in a different pan size?
Yes, but you’ll need to adjust the baking time. A larger, shallower pan will bake faster, and a smaller, deeper pan will take longer. Keep an eye on them!
My brownies are cakey, not fudgy! What went wrong?
Likely overbaked them, or you might have added a bit too much flour. Next time, aim for those moist crumbs on the toothpick!
Do I *really* need to let them cool completely?
Yes. Imagine trying to cut a hot block of cheese – it’s messy and unappealing. Brownies are no different. Patience is a virtue (and leads to better brownies).
Can I use oil instead of butter?
You *could*, but butter really adds to the richness and flavor profile of these brownies. IMO, butter is the way to go for classic brownies.
How do I store these amazing creations?
Once completely cooled, store them in an airtight container at room temperature for up to 3-4 days. They might even get better with age (if they last that long!).
Can I freeze leftover brownies?
Absolutely! Wrap them well in plastic wrap and then foil, and they’ll last in the freezer for a couple of months. Thaw them on the counter.
Final Thoughts
There you have it! A ridiculously simple, incredibly delicious chocolate brownie recipe that’s practically foolproof. So go forth, bake with joy, and embrace the glorious mess that is homemade brownies. Now go impress someone—or yourself—with your new culinary skills. You’ve earned it! Happy baking!
“`
