“`html
So, You’re Ready for Brownie Nirvana?
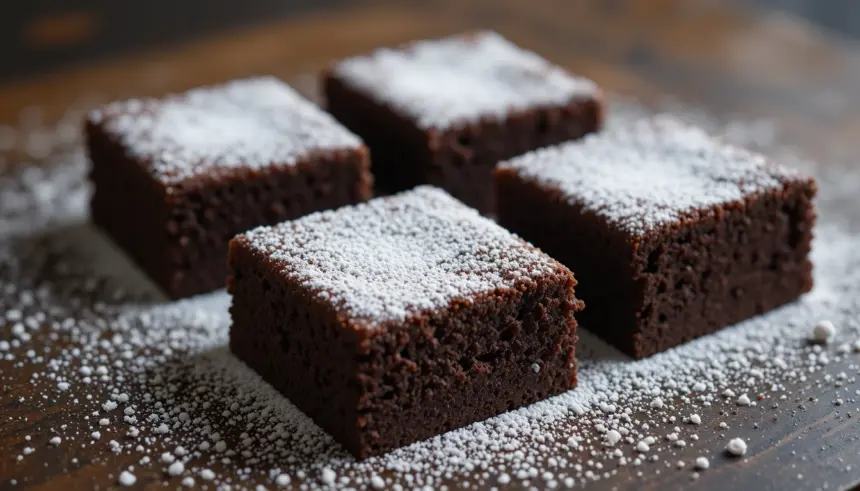
Let’s be real. Sometimes, the universe calls for chocolate. And not just any chocolate, but that fudgy, intensely chocolatey, melt-in-your-mouth kind of chocolate that screams “I’m fabulous and I know it.” If you’re nodding along with a glazed-over, chocolate-starved expression, then welcome, my friend, because you’ve landed in the right spot. We’re diving headfirst into the glorious world of powdered sugar-dusted chocolate brownies. Forget those sad, cakey imposters. We’re talking serious brownie business here.
Why This Recipe is Your New Bestie
Look, I’m not going to lie to you. I’m not exactly a Michelin-star chef. I’m more of a “can I make this delicious and not burn the house down?” kind of cook. And guess what? This recipe? It’s practically idiot-proof. Seriously. Even my cat, Bartholomew (who is surprisingly judgmental about baked goods), gave these a tentative sniff of approval. They’re rich, they’re decadent, and they require minimal brain power. Plus, the powdered sugar dusting? It’s like tiny, sweet clouds of pure happiness. It’s the *chef’s kiss* of brownie finishing.
Ingredients You’ll Need (No Fancy Stuff Required!)
- Unsalted Butter: About a stick and a half. Because butter is life.
- Granulated Sugar: A cup. Sweetness is key, folks.
- Eggs: Two large ones. The binder of all baked dreams.
- Vanilla Extract: A teaspoon. For that little *je ne sais quoi*.
- All-Purpose Flour: Half a cup. We don’t need a ton, we want fudgy, not cakey!
- Unsweetened Cocoa Powder: Half a cup. Use the good stuff if you can.
- Salt: A pinch. Balances out all that sweetness.
- Chocolate Chips (Optional, but HIGHLY recommended): A cup or so of your favorite. Dark, milk, white – you do you!
- Powdered Sugar: For that ethereal dusting of joy.
Let’s Get Baking (It’s Easier Than You Think!)
- Preheat and Prep: Crank your oven to 350°F (175°C). Grease and flour an 8×8 inch baking pan, or line it with parchment paper. This is crucial for easy removal. Nobody wants a brownie stuck to the pan. Ugh.
- Melt the Magic: In a microwave-safe bowl, melt your butter. Then, whisk in the granulated sugar until it’s all combined. Don’t overthink it; just make it happen.
- Egg-cellent Addition: Beat in the eggs one at a time, followed by the vanilla extract. Your mixture should look smooth and glossy.
- Dry Goods Unite: In a separate bowl, whisk together the flour, cocoa powder, and salt. This ensures even distribution. We’re aiming for brownie perfection, not a lumpy chocolate disaster.
- Combine and Conquer: Gradually add the dry ingredients to the wet ingredients. Stir until *just* combined. Overmixing is the enemy of fudgy brownies. Seriously, stop when you don’t see streaks of flour. If you’re adding chocolate chips, fold them in now.
- Bake to Bliss: Pour the batter into your prepared pan and spread it evenly. Bake for 20-25 minutes. The edges should look set, but the center should still be a little gooey. A toothpick inserted near the center should come out with moist crumbs, not clean.
- Cool Down is Crucial: This is probably the hardest part: Let the brownies cool completely in the pan. I know, I know, the temptation is real. But trust me, they’ll be so much better (and easier to cut) if they cool down.
- Dust with Delight: Once cooled, liberally dust the top with powdered sugar. Use a sieve for an even, snowy effect. Now, slice and prepare for brownie bliss.
Common Brownie Blunders to Dodge
- Skipping the Parchment Paper: You’ll regret it when you’re scraping burnt bits off your pan. Just don’t.
- Overbaking: This is how you end up with dry, sad brownies. Aim for that slightly underbaked center – it’s the secret to fudginess.
- Overmixing the Batter: Seriously, just stir until combined. You’re not trying to develop gluten here; you’re trying to make brownies.
- Not Letting Them Cool: Impatience is a virtue you can’t afford when it comes to brownies. Let them cool!
Swaps, Subs, and Other Shenanigans
- Vegan? No problem! You can try replacing the butter with vegan butter or coconut oil. For eggs, a flax egg (1 tbsp flaxseed meal + 3 tbsp water, let sit for 5 mins) or a commercial egg replacer should work.
- Gluten-Free? Swap the all-purpose flour for a good quality gluten-free all-purpose blend. You might need to add a little more liquid if the batter seems too stiff.
- No Cocoa Powder? You *could* use melted unsweetened baking chocolate instead, but it’s a different ballgame and will likely change the texture and ratios. Stick to cocoa for this recipe.
Brownie Brainstorm (aka FAQ)
- Can I make these ahead of time?
- Absolutely! In fact, they’re often even better the next day. Store them in an airtight container at room temperature.
- My brownies are too cakey! What went wrong?
- Likely overmixing or overbaking. Go easy on the mixing and pull them out when the center still looks a bit soft.
- Can I use margarine instead of butter?
- Well, technically yes, but why hurt your soul like that? Butter brings flavor and richness that margarine just can’t replicate. IMO, it’s worth it.
- Do I *really* need to preheat the oven?
- Yes! Unless you enjoy the suspense of uneven baking and potentially raw batter in the middle. Preheat. It’s non-negotiable.
- What kind of chocolate chips are best?
- Honestly? Whatever you love! Dark chocolate gives a more intense flavor, milk chocolate adds sweetness. A mix is also fantastic!
- How do I get that perfectly smooth powdered sugar dusting?
- Use a fine-mesh sieve and tap it gently as you move it over the brownies. Be generous!
Final Thoughts (Go Forth and Bake!)
There you have it – a recipe for pure, unadulterated brownie joy. These aren’t just brownies; they’re edible hugs, mood boosters, and potential conversation starters. So go forth, mix, bake, and devour. Whether you’re sharing them (or not, no judgment here) or just treating yourself, remember that you’ve just created something wonderful. Now go impress someone—or yourself—with your new culinary skills. You’ve earned it!
“`
